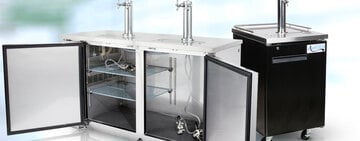


One of the key factors to running a successful bar is keeping your kegerator lines clean. The quality and flavor of your signature beer can be significantly impacted by the cleanliness of the lines they flow through. We’ve created a step-by-step beer line cleaning guide to show you how to clean keg lines and provide your customers with the best possible experience at your bar.
Shop All Beer Tap Brushes and Cleaning Accessories
How to Clean Lines on Kegerator
Yeast, minerals, and bacteria can build up in your keg lines over time, creating undesirable flavors and appearances in your beer. If you’re opening a bar, it is important to learn how to clean beer lines thoroughly and teach your staff the process so they can serve a great-tasting beer every time. Follow these keg line cleaning instructions to perform this task quickly and efficiently.
What you’ll need:
- Beer Line Cleaner
- Keg Line Cleaning Bottle (Hand Pump or Cleaning Keg)
- Fresh Water
- Bucket
- Faucet Wrench
- Faucet Brush
- Hand and Eye Protection
- pH Test Strips
Cleaning Keg Lines Video
Follow along with this video to keep your kegerator lines clean:
Cleaning Draft Beer Lines with Hand Pump Bottle
Use these instructions if you’ll be cleaning draft beer lines with a hand-powered cleaning bottle. These bottles are perfect for cleaning single-tap systems.
1. Turn off the CO2
The first step to cleaning keg lines with a hand pump is to make sure that your CO2 tank and regulator are completely turned off before you disconnect the draft lines from the keg. This will keep the pressure from pushing the cleaning solution or remaining beer through the lines before you’re ready.
2. Disconnect the Keg Lines
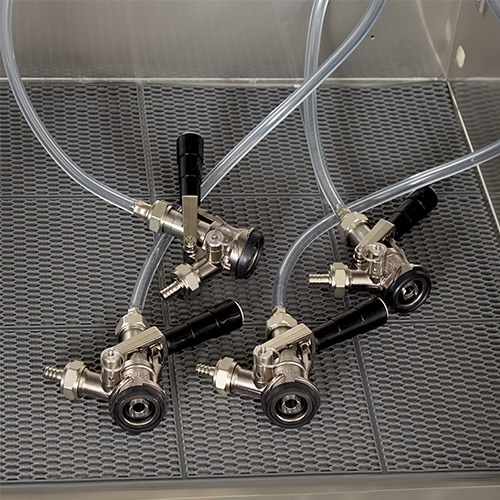
Untap the beer lines from your keg by releasing the coupler, unscrewing the beer hose fitting, and removing the CO2 pressure hose. You can also unscrew the faucet at this time. Be sure to keep all of the disconnected parts, like the washers and check valves, in a safe place to avoid losing any draft beer tap components.
3. Prepare the Cleaning Solution
Follow the instructions on the cleaning solution you have chosen to prepare the mixture for your keg lines. Most bar line cleaners will have you pour a measured amount of solution with warm fresh water into the cleaning bottle.
4. Clean the Draft Lines
- Connect the hand-pumped bar line cleaning bottle with the solution to your faucet coupling nut.
- Place the end of the beer line into a bucket to catch the cleaning solution as it passes through.
- Drop your faucet, coupling, and other parts into the bucket with a little water and cleaning solution to begin soaking.
- Use the hand pump to flush the cleaning solution through the keg lines and into the bucket. You’ll need to pump approximately 2 liters through the lines or the specified amount on your cleaning solution instructions.
- Allow the solution to soak through the hose according to the manufacturing instructions of the cleaner.
5. Rinse the Keg Lines
- Disconnect the cleaning bottle and rinse it.
- Dispose of the cleaning solution according to the instructions on the cleaner. Be sure to also check local regulations on proper chemical cleaner disposal.
- Once clean, fill it with fresh cold water and reattach it to the faucet.
- Pump approximately 2 liters of fresh water through the lines to make sure all of the cleaning solution is out of the system.
- Use pH test strips to check the water for any remaining cleaning chemicals.
- Disconnect the bottle and dispose of the remaining solution in the bucket.
6. Clean the Faucets
Use a faucet brush to scrub the insides of the faucet and keg coupler. Rinse the parts thoroughly before reattaching them to your kegerator.
7. Reconnect Your Beer Lines
Once your keg lines are thoroughly cleaned, you can reassemble your kegerator system. Return the couplers to their proper place and connect the line to your keg. Turn the CO2 tank back on and reopen the regulator. You’re now ready to serve more of your customers’ favorite types of beer.
Cleaning Draft Beer Lines with a Cleaning Keg
Follow these instructions if you’ll be cleaning draft lines with a cleaning keg instead of a hand pump bottle. Cleaning kegs are large bottles that use your CO2 tank to push the solution through the keg lines. They are better suited for multi-tap systems.
1. Prepare the Solution
To get started with a cleaning keg, you’ll want to unscrew the cap and fill the keg bottle with the appropriate amount of water and cleaning solution according to the manufacturer's instructions. Once filled, secure the cap back onto the bottle.
2. Attach the Coupler to the Cleaning Keg
Unlatch the coupler from your beer keg and attach it to the top of the cleaning keg. The pressure from the CO2 will force the cleaning solution through your draft lines.
3. Run Cleaning Solution through the Faucet
- Place a storage container or bucket under the opening of your kegerator faucet before opening the faucet.
- Allow for approximately 2 liters of cleaner solution to run through the faucet before shutting off. Repeat with each faucet.
- Let the cleaning solution soak in the lines for as long as the instruction indicates. This is usually around 5 to 10 minutes.
4. Flush Solution Out of System
- After the lines soak, remove the coupler from the cleaning keg and release the pressure.
- Unscrew the cap and appropriately dispose of the cleaning solution following local regulations.
- Rinse out the bottle thoroughly and fill it with cold fresh water.
- Screw the cap back onto the cleaning keg.
5. Rinse the Keg Line
- Attach the keg coupler back onto the top of the cleaning keg.
- Place a bucket under your kegerator faucet and open it to flush out the cleaning solution.
- Allow about 2 liters to pass through the faucets, clearing out the lines.
- Test the water for cleaning chemicals with pH test strips.
6. Clean the Faucet
- Soak your faucet and coupler in a mixture of cleaning solution and water for the time indicated in the solution instructions.
- Using a faucet brush, thoroughly scrub all parts of the faucet and coupler.
- Rinse the faucet and coupler with cold fresh water.
7. Reconnect the Beer Lines
With your faucets, couplers, and draft lines cleaned, attach the coupler to your beer keg and return the faucets to their place. Your system is now clean and ready for your beer service.
How Often to Clean Beer Lines

Your keg lines should be cleaned approximately every two to three weeks with an alkaline cleaning solution to keep proteins and yeast from building up in your lines. It is also recommended to clean out our beer lines between each new flavor to prevent one beer from altering the flavor of the other and ruining the experience for your customer. Most bars will run a cleaning cycle of the lines each time a keg kicks. After 4-5 alkaline cleanings, run an acid beer line cleaner through your system to break down beer stones (calcium buildup) and other harmful organic soils.
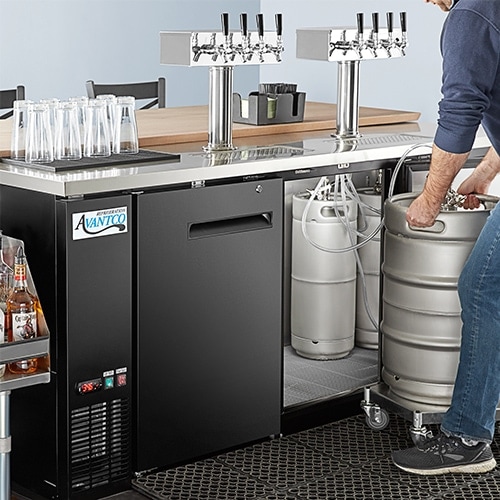
Importance of Beer Line Cleaning
When you take the time and effort to choose the best kegerator for your bar, you’ll want to make sure those beer lines stay clean in order to serve the best drinks as well. Beer contains yeast, proteins, and minerals that can cause buildup, like hop resins, beer stones, mold, biofilms, and bacteria, in your draft lines. This can impact the flavor, aroma, and appearance of your draft beers. Ensure that you’re serving the best quality beer to your customers by cleaning your keg lines regularly.
Help your specialty brews to shine by performing regular cleaning and maintenance on your beer tap system. Cleaning your draft lines will keep your kegerator operating efficiently and allow you to serve the best quality beers that have your customers coming back for more.