- Topics 1584
- Industrial 59
- Troubleshooting Guides 32
- Restaurant Management 144
- Bar Management 70
- Catering Tips 46
- Bakery Management 46
- Food Trucks & Concessions 43
- Advertising & Marketing 41
- Eco-Friendly Tips 13
- Facility Layout & Design 47
- Coffee Shop Tips 32
- Installation & Maintenance 63
- Janitorial & Pest Control 34
- Safety & Sanitation 122
- Startup Tips 111
- Menu Design 11
- Kitchen & Cooking Tips 106
- Hospitality Management 26
- Pizza & Sandwich Shop Tips 26
- Smallwares 42
- Food Prep 104
- Tabletop Items 21
- Disposables 28
- Calculators & Tools 7
- Consumables 76
- Warewashing & Laundry 22
- Cooking Equipment 105
- Food Storage & Refrigeration 58
- Beverage Equipment 43
- Office Supplies 6
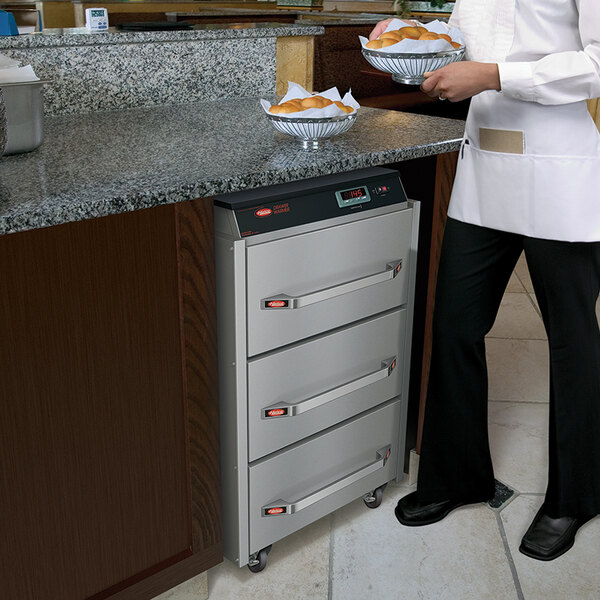
Commercial drawer warmers function as a buffer between cooking and service, allowing kitchens to stage items, manage fluctuating ticket times, and maintain product quality during peak periods. From quick-service lines to full-service kitchens, these units support everything from holding proteins and sides to proofing dough. Understanding how drawer warmers work and how to select and use them effectively directly impacts food safety compliance, operational efficiency, and guest satisfaction. Below, we break down the practical considerations operators need to evaluate before integrating a drawer warmer into their workflow.
Shop All Warming Drawers
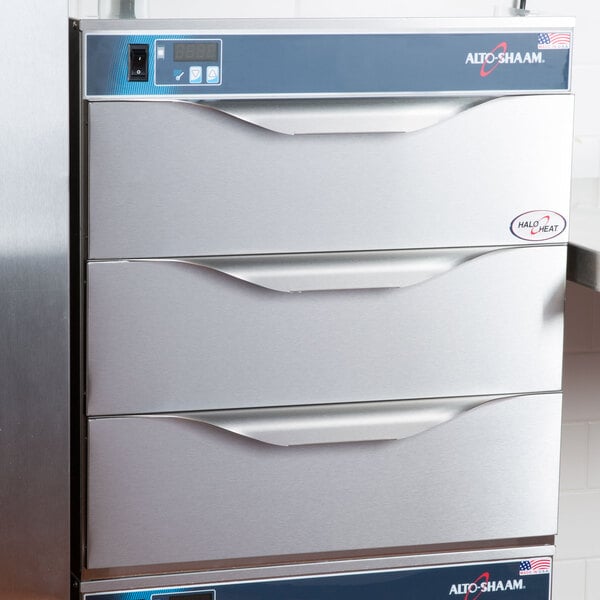
A drawer warmer typically consists of a stainless steel cabinet with one or more drawers that are designed to hold food pans. The drawers are equipped with heating elements that evenly distribute heat throughout the cabinet, ensuring that food stays warm without drying out or becoming overcooked. Most drawer warmers have adjustable temperature controls, allowing operators to set the desired temperature based on the type of food being held.
Drawer warmers are also available in various sizes and configurations to accommodate different kitchen layouts and volume needs. Some models feature multiple drawers, while others have a single large drawer for holding larger quantities of food. Additionally, some drawer warmers come with options such as moisture controls or humidity settings to help preserve the texture and quality of delicate foods like baked goods or fried items.
What Are Drawer Warmers Used For?
Commercial drawer warmers are used to hold hot food, ingredients, and service items at safe, ready-to-serve temperatures until they're needed. They help smooth out timing gaps between cooking and plating. However, they are not designed for cooking or reheating food and should never be used with plastic wrap or non-oven-safe dinnerware. When used correctly, they preserve texture, prevent temperature loss, and support consistent service during rush periods.
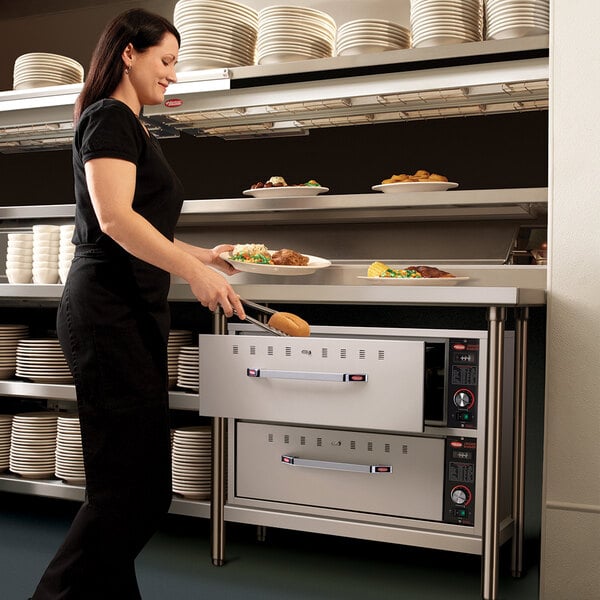
- Order Holding: Finished dishes or components can be staged in a drawer warmer while the rest of the ticket is completed. This keeps entrees and sides within food-safe temperature ranges without continuing to cook, reducing remake rates and improving ticket consistency.
- Ingredient Holding: Proteins, vegetables, and batch-cooked items stay hot and ready for assembly, which is especially useful in high-throughput environments like QSRs or cafeterias. By maintaining stable temperatures, kitchens can avoid repeated reheating cycles that degrade quality.
- Warming Plates, Bowls, and Serving Vessels: Preheating dinnerware helps maintain food temperature after plating, particularly for dishes that cool quickly. Warm plates also improve the guest experience by preventing heat loss during the trip from kitchen to table.
- Proofing Dough: Certain drawer warmers can double as low-temperature proofing cabinets for bread and pizza dough. Gentle, consistent heat encourages yeast activity without forming a dry skin on the dough surface.
- Short-Term Holding for Banquet or Catering Service: During events or large-volume service, drawer warmers act as a staging point for plated or portioned items before dispatch. This allows teams to coordinate timing across multiple courses or service areas without sacrificing quality.
- Moisture-Controlled Holding: Units with humidity controls can prevent foods like rice, poultry, or steamed vegetables from drying out. Adjusting moisture levels helps retain texture and appearance over longer holding periods.
Commercial drawer warmers are available in several configurations designed to match different kitchen layouts, capacities, and service styles. The right type depends on how much product you need to hold, where the unit will be installed, and whether mobility or built-in integration is a priority.
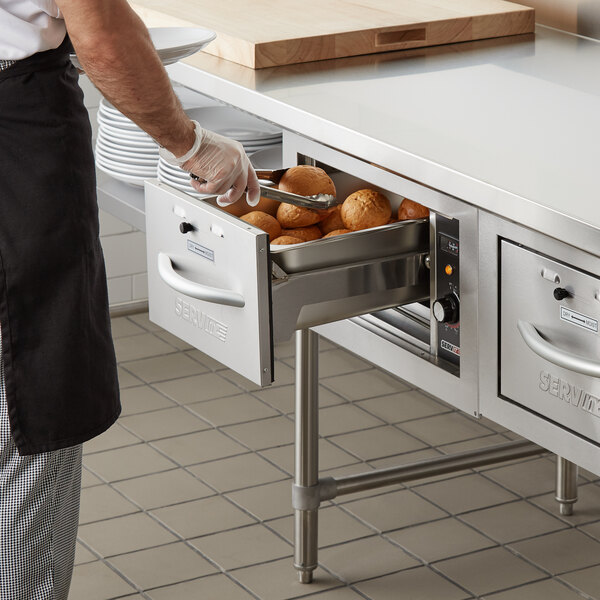
- Narrow Drawer: Built with a slimmer footprint, these units fit into tight line spaces where every inch matters. They're commonly used for holding smaller quantities or specific components without sacrificing valuable prep or cookline real estate.
- Standard Drawer: The most common format, offering a balance between capacity and footprint with one or multiple full-size drawers. Suitable for a wide range of applications, from holding plated meals to bulk ingredients during peak service.
- Freestanding Warmers: Designed as standalone units, freestanding warmers can be placed wherever they're needed without integration into cabinetry. They're a practical choice for kitchens that need flexibility or are working within existing layouts.
- Built-In Warmers: Installed directly into counters or chef bases, built-in models create a seamless, space-efficient workstation. They're often used in permanent kitchen designs where consistent workflow and clean line organization are priorities.
- Mobile Warmers: Equipped with casters, these units can be repositioned to support different service areas or events. They're particularly useful in catering, banquet operations, or kitchens that frequently reconfigure their setup.
Thermostatic vs Digital Drawer Warmers
Thermostatic drawer warmers use a dial-based control system to regulate heat output, making them straightforward to operate and reliable in fast-paced kitchens. They're typically more durable and cost-effective, but temperature adjustments are less precise, which can lead to wider fluctuations during long holding periods. For operations prioritizing simplicity and speed over fine control, thermostatic models remain a practical choice.
Digital drawer warmers rely on electronic controls and displays to set and maintain exact temperatures, often with programmable settings or alarms. This added precision supports tighter food safety compliance and more consistent product quality, especially when holding sensitive items. While they tend to come at a higher upfront cost and require more careful handling, digital units offer a level of control that benefits kitchens with strict holding standards.
Drawer warmers offer a range of benefits that contribute to efficient food service operations. Understanding the advantages of these appliances can help businesses make informed decisions when outfitting their kitchen spaces and can improve the efficiency of a kitchen's operation.
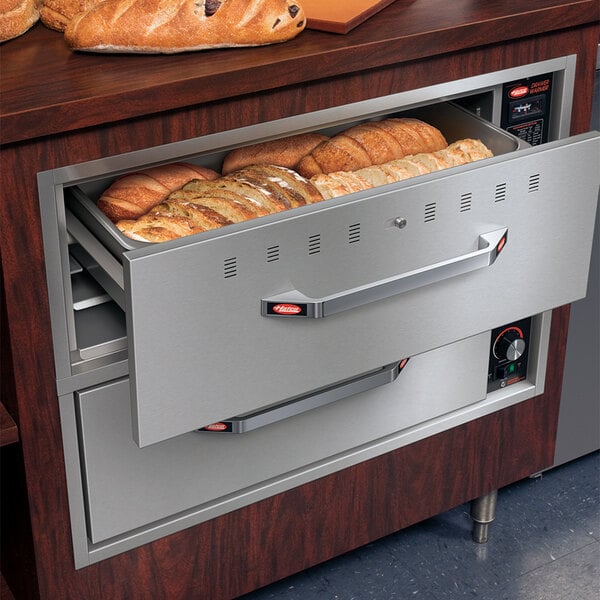
- Keeps Food Fresh: Drawer warmers help keep food fresh and at the optimal serving temperature. This is crucial for maintaining the quality and integrity of dishes, ensuring that customers receive delicious and satisfying meals every time.
- Energy Efficient: These units are designed to provide consistent heat to keep food items warm without the need for constant monitoring or reheating. By maintaining the desired temperature within the drawers, businesses can save on energy costs and reduce waste associated with food spoilage.
- Meal Prep: Drawer warmers also play a vital role in meal preparation workflows in commercial kitchens. With designated compartments for hot food storage, chefs and foodservice professionals can organize and store different menu items before plating and serving. This allows for better time management and smoother operations during peak service hours, enhancing overall kitchen efficiency.
- Organization: Drawer warmers provide a designated space for hot food items, keeping them separate from cold or room-temperature ingredients. This segregation helps prevent cross-contamination and allows for better organization within your commercial kitchen.
Should I Invest in a Drawer Warmer?
If your operation produces high quantities of menu items or relies on preparing food ahead of service, a warmer can help you keep up with demand while maintaining quality. For catering or high-volume service, drawer warmers make it easier to hold food at a consistent standard without sacrificing appearance or texture. When demand is steady, they become a reliable support tool that helps kitchens stay organized and service-ready.
Drawer warmers come in various types, each designed to cater to specific commercial needs. Depending on your kitchen's needs and requirements, different drawer warmers will be best suited for the job.
- Capacity Needs: Start by estimating how much product you'll need to hold during peak service, not just average volume. Undersized units lead to overcrowding and uneven holding, while oversized ones waste energy and space.
- Intended Use: Consider whether the unit will primarily hold plated meals, bulk ingredients, proof dough, or warm dinnerware. Different applications may require specific features like humidity control or independent drawer temperature settings.
- Available Space: Measure your cookline, counters, or prep areas to determine whether a built-in, undercounter, or freestanding unit makes the most sense. Clearance, ventilation, and workflow access all play a role in proper placement.
- Electrical Requirements: Verify voltage and amperage compatibility with your facility's existing infrastructure before purchasing. Some higher-capacity units may require dedicated circuits, which can impact installation cost and timeline.
- Drawer Configuration and Accessibility: Units with multiple drawers or dividers allow for better organization and separation of menu items. Think about how staff will access the warmer during service and whether independent controls are necessary.
- Build Quality and Cleaning Considerations: Stainless steel construction, removable pans, and smooth drawer tracks make routine cleaning faster and more effective. Equipment that's difficult to maintain often leads to inconsistent sanitation practices over time.
With proper training, using a warming drawer is simple for your most experienced cook and your newest server alike. Though control options may vary across models, the same basic functions apply to all units. After you've selected the right warmer for your business needs, ensure that it is securely resting or installed in an ideal location away from water sources. Use the following tips and instructions for optimal results.
How to Optimize Warmer Controls
- Voltage: Before using the drawer warmer, ensure that it is properly connected to a power source that matches its voltage requirements. Most drawer warmers operate on standard voltages such as 120V or 240V, so make sure to check the specifications of your unit and have it connected by a qualified electrician if needed.
- Temperature: Adjust the temperature setting on the drawer warmer to the desired level based on the type of food you are storing. Most drawer warmers feature easy-to-use temperature controls that allow you to set the unit to the precise temperature needed to keep your food warm and ready for serving.
- Airflow Control: Some drawer warmers come equipped with airflow control features that allow you to regulate the amount of airflow within the unit. This feature is particularly useful for maintaining the quality of delicate foods that require gentle warming without drying out. Adjust the airflow control settings according to the specific requirements of the food you are storing in the drawer warmer.
- Moisture: Excessive moisture can affect the texture and quality of the food items being stored. To prevent moisture buildup, ensure that the food items are properly covered or wrapped before placing them in the warmer. Additionally, regularly check and clean the interior of the drawer warmer to prevent any excess moisture accumulation.
How to Use a Drawer Warmer for Proofing Dough
Though less conventional, it is possible for a warming drawer to be used as a proofing drawer. This is discouraged by some, as cold proofing via refrigeration is said to allow for a longer, more stable rise, resulting in improved taste and structure. Some warmer units have a proof mode that will fall between 80 degrees Fahrenheit (or lower) up to 110 degrees Fahrenheit, though at normal ambient room temperature of around 75 degrees Fahrenheit, it is recommended to proof dough between 80 and 90 degrees Fahrenheit.
Typical proofing cabinets have relative humidity levels of around 80%, meaning you should aim to restrict airflow to the drawer, keeping the vents closed and placing a separate pan of water into the drawer alongside the dough for optimal humidity. Proof dough in a separate container, and do not rest it directly on the bottom of the drawer. Allow dough to rest in the drawer for around 40 minutes, or until it has doubled in size and an impression remains in the surface after pressing it with a finger.
How to Use a Drawer Warmer for Warming Dinnerware
Keeping dinnerware warm before plating and serving is another less conventional use for drawer warmers. Some operators prefer to do this based on the notion that some hot dishes maintain better flavor and consistency and stay warm longer when using preheated plates, bowls, or other dinnerware.
- Place Dinnerware Items - Arrange the dinnerware items inside the drawer warmer, ensuring that they are evenly spaced to allow for proper heat distribution.
- Set Temperature - Adjust the temperature settings on the drawer warmer according to the manufacturer's instructions and check periodically to ensure that the items are reaching the desired temperature without overheating.
- Remove Items - Once the dinnerware has reached the desired temperature, carefully remove it from the drawer warmer using heat-resistant gloves or tongs.
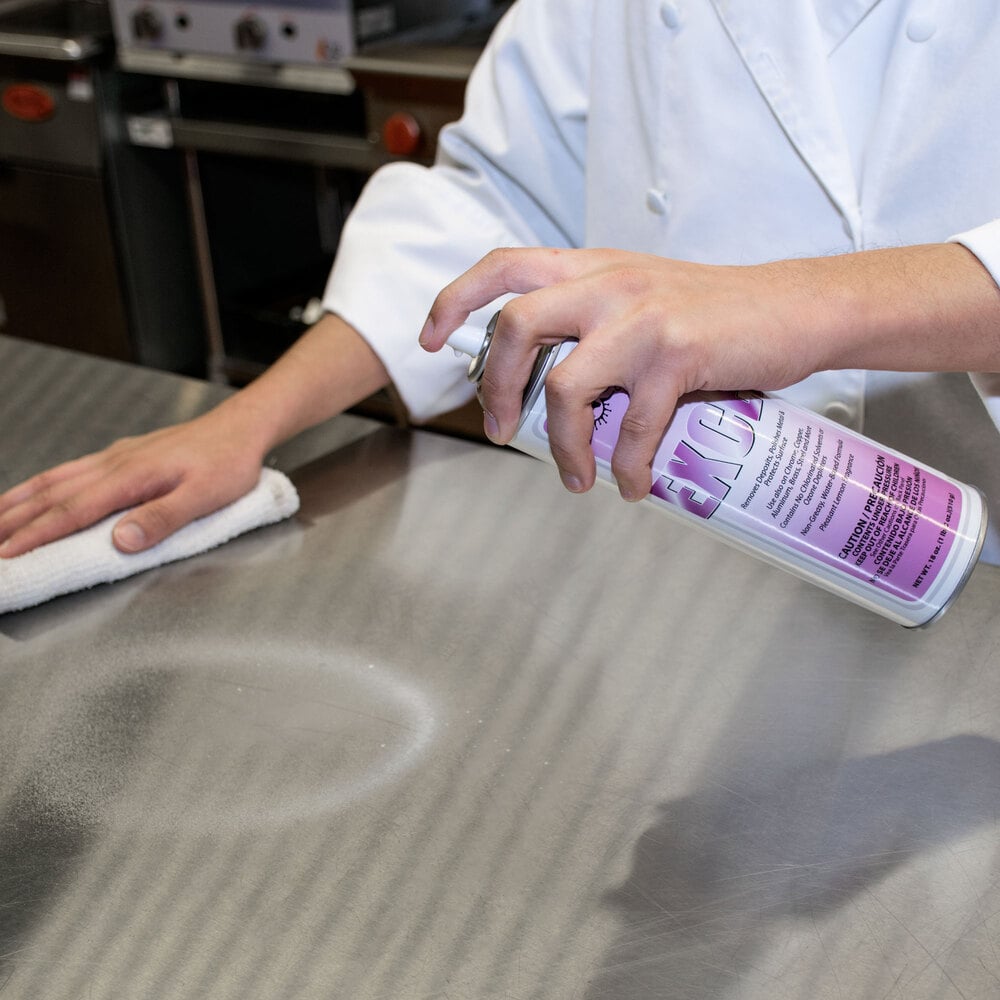
Proper cleaning and routine maintenance keep commercial drawer warmers operating safely, efficiently, and in compliance with health codes. Grease buildup, food debris, and neglected components can affect temperature consistency and shorten the unit's lifespan. Establishing a consistent cleaning schedule helps prevent performance issues and reduces the risk of contamination.
- Power Down and Disconnect the Unit: Always turn off the warmer and unplug it before cleaning to eliminate electrical hazards. Allow the unit to cool fully so surfaces can be cleaned safely without causing burns or damaging components.
- Take Out Pans and Drawers: Remove all inserts, pans, and drawers to access hidden debris and residue. This also allows for more thorough cleaning of individual components in a sink or dish area.
- Clean the Interior Surfaces: Wipe down the inside of the cabinet using a mild detergent and non-abrasive cloth. Pay close attention to corners and seams where grease and food particles tend to accumulate.
- Wipe Down the Exterior: Use a damp cloth and food-safe cleaner to remove grease, fingerprints, and spills from outer surfaces. Keeping the exterior clean not only maintains appearance but also prevents grime from migrating into the unit.
- Inspect Drawer Tracks and Seals: Check that drawers slide smoothly and that seals are intact and free of buildup. Damaged gaskets or obstructed tracks can lead to heat loss and inconsistent holding temperatures.
- Avoid Harsh Chemicals and Abrasives: Stick to manufacturer-approved cleaning agents to prevent corrosion or surface damage. Abrasive pads can scratch stainless steel, creating areas where bacteria can collect.
- Schedule Routine Deep Cleaning: Beyond daily wipe-downs, perform a more thorough cleaning at regular intervals based on usage. This includes detailing hard-to-reach areas and verifying that all components are functioning as intended.
Selecting the right commercial drawer warmer is less about the unit itself and more about how well it supports the pace and structure of a kitchen's operation. When matched correctly to menu, volume, and workflow, a drawer warmer becomes a stabilizing piece of equipment. Operators who prioritize proper sizing, control type, and maintenance will see more consistent results on the line and fewer disruptions during peak periods. That level of reliability translates directly into better execution and a smoother back-of-house environment.
Related Resources

April 2026 WebstaurantStore Coupon Code
Spring is here, and great deals are blooming in the warm weather here at WebstaurantStore! Stock up on much-needed supplies and equipment for important upcoming events like Earth Day and Mother's Day! Take a look at our selection of sale items below and don't forget to enter the code BLOOM26 at checkout to enjoy 15% off your purchases! Looking to save even more? Check out the new Webstaurant Rewards® Visa Business Card ! Sign up for a new card today and start earning rewards on every WebstaurantStore purchase, and save on a WebstaurantPlus subscription. Have a look at some incredible deals on disposable items with April's monthly coupon code! Whether you're looking for disposable dessert cups for spring sweet treats or compostable hot cup o

Minimum Internal Cooking Temperatures
To ensure the safety and quality of food, chefs must know the minimum internal cooking temperatures of different dishes. Cooking food to the right temperature enhances its taste and texture and eliminates harmful pathogens that can cause foodborne illnesses. Whether you're a professional chef or a culinary student, learning the recommended cooking temperatures is essential for maintaining food safety standards and avoiding the temperature danger zone . Safe Cooking Temperatures Fortunately, there's no guesswork for determining safe cooking temperatures. Food safety organizations, such as the United States Department of Agriculture (USDA) and the Food and Drug Administration (FDA), set the minimum internal cooking temperatures to ensure cons
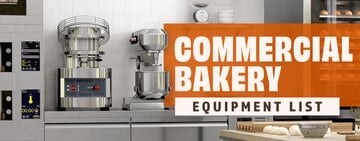
Commercial Bakery Equipment List
Finding the best bakery equipment can be daunting, whether you've owned a bakery for years or are just starting in the industry . It represents a significant investment, and you'll want to get the most for your money. Before purchasing, consider your menu, expected output, and preferred baking styles. To help guide you through the purchasing process, we've provided a list of essential bakery equipment and a downloadable checklist below: Download Checklist PDF Click any of the tips below to skip to the bakery equipment that interests you: Dough Prep Equipment Baking Equipment Display Equipment Dough Prep Equipment Dough preparation is the cornerstone of creating delicious baked goods, and having the right equipment is a key factor for achiev
Join Our Mailing List
Receive coupon codes and more right to your inbox.

