
If you process large quantities of tomatoes in your foodservice kitchen, a tomato slicer can be a game-changer for your daily kitchen prep. With this easy-to-use tool, you get consistent slices in a fraction of the time it takes to cut tomatoes by hand. These convenient food choppers will provide years of service as long as you care for them properly. If you find that your blades are dull or that it takes too much effort to operate your tomato slicer, we recommend brushing up on some simple tomato slicer maintenance requirements.
1. Proper Training

Tomato slicers are designed with simple operation in mind, but they can become damaged if they aren't used the right way. Always train your staff to use tomato slicers the way they are intended. This protects the user from injury and extends the life of the machine.
Keep an eye out for common mistakes by inexperienced users:
- Using the tomato slicer for the wrong items: Food slicers are amazing tools, but they are rated for specific items only. Most tomato slicers should only be used for tomatoes or other soft types of produce like mushrooms and strawberries. If you try to cut lemons or limes, you could dull and damage the blades. Thankfully, there are many types of food cutters and choppers, so just choose a different model if you need to cut other types of produce.
- Forcing the pusher head through bent blades (or blades of the wrong size): If the blades have become bent or damaged and you continue to force the pusher through them, this will cause even more damage and could even result in an injury. When the pusher cannot be moved, set the machine aside and discontinue use until it can be repaired.
- Operating the machine with missing parts: Tomato slicers have components that help to make the machine more safe. Suction feet keep the unit in place while you slice, and a bumper or guard prevents the blades from going too far. If you see that any of these components are missing, do not use the machine.
- Playing with the machine: This may seem obvious, but playing around with a tomato slicer is a bad idea. Make it clear that tampering with a tomato slicer is completely off-limits and could lead to a safety issue.
Expert Tip: Before operating the slicer, take a moment to gently pull or push the lever to make sure everything is functioning normally and installed correctly. Stop if you feel any resistance. If you feel resistance before the block comes to rest on the blades, recheck the machine to make sure everything is set up correctly.
2. Lubrication
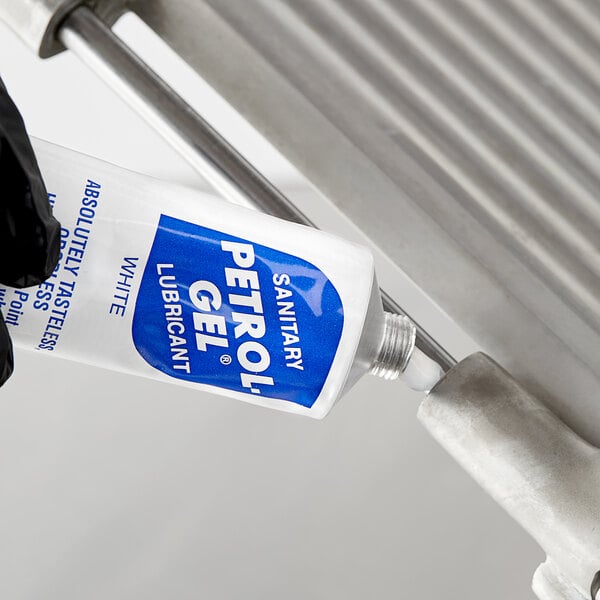
Blades in a tomato slicer are constantly in motion, which can lead to friction and wear over time. Lubricating the guide bars, preventing premature dulling and extending the lifespan of your slicer. Lubrication can also improve the slicing performance, ensuring clean and precise cuts every time.
As for the frequency of lubrication, it is recommended to lubricate your guide track after every cleaning. This ensures that the guide bars remain properly lubricated and protected from excessive wear. Regular lubrication also helps prevent rust and corrosion, especially in high-moisture environments.
When it comes to choosing the right lubricant for your tomato slicer blades, it is essential to use a lubricant that is safe for contact with food. Food-grade lubricants are specifically formulated to meet the stringent requirements of the food industry, ensuring that they do not contaminate food products. Silicone-based lubricants are a popular choice for tomato slicers due to their high heat resistance and non-toxic properties.
Please note: Do not lubricate your slicer with cooking oil or release sprays. This will cause a gummy residue to build up on your blades and it will affect operation. If you aren't cleaning your machine regularly, this residue will also cause a food safety issue.3. Tomato Slicer Blade Assembly
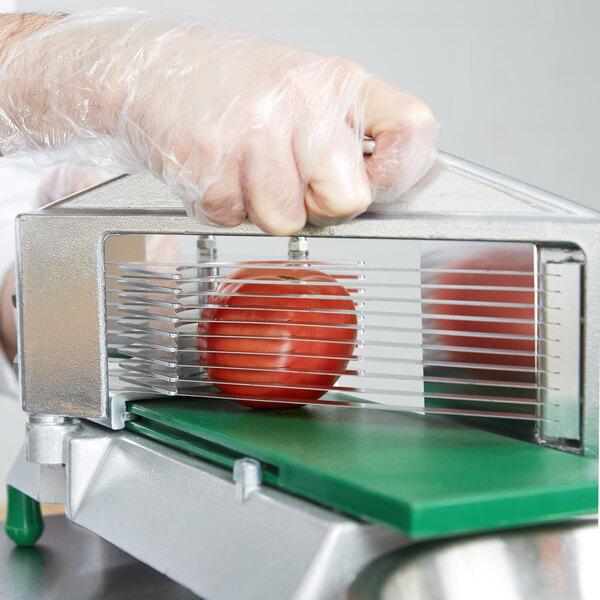
Your tomato slicer comes fully assembled, but you have the option of switching out the blades and pusher head to create slices of different sizes. Just remember that every blade assembly needs to be paired with the correct pusher head. These will be labeled with the slice size they create. Pair a 1/4" blade with a 1/4" pusher, pair a 3/8" blade with a 3/8" pusher, and so on. If you pair up mismatched blades and pushers, you could damage the unit.
You can also replace the blades if they are getting dull. This is more cost-effective than purchasing a new unit. We recommend purchasing extra blades to keep on hand so you have them when you need them. Here are some general guidelines for changing the blade assembly on most tomato slicers (specific instructions may vary by model):
- Be extremely cautious: Always practice extra care when handling the blade assembly because it's very sharp.
- Remove the thumb screws: Locate the thumb screws connected to the slide plate. You'll find these on the same side as the handle. Remove the screws and the small panel they hold in place.
- Remove the pusher assembly: Pull the pusher away from the blades and slide it off the plate. It should easily come free.
- Locate the hex screws: Find the six-sided screws that connect the blades to the housing. Carefully unscrew these, making sure to keep your hands away from the blades as they come loose.
- Replace the blades: Place your new blades in the same location and make sure they're aligned correctly. The sharp edge of the blades should be facing away from you. Tighten the screws on the right side, alternating a quarter turn for each screw until they are tight. Follow the same procedure with the hex screws on the left side.
- Reattach the pusher head: Slice the pusher head back onto the slide plate and replace the panel and thumb screws.
- Test the tomato slicer: Slowly move the pusher head through the blades to make sure everything is balanced and secure.
4. Tomato Slicer Cleaning
Regular cleaning is essential to keep your tomato slicer in good working order. Tomato juice is acidic and can cause corrosion on the blades and metal parts of the slicer. If left uncleaned, this can lead to rusting and deterioration of the slicer's components, affecting its performance and lifespan. Tomatoes can carry bacteria and other contaminants that can transfer to the slicer during use. Proper cleaning helps in removing these harmful substances, reducing the risk of cross-contamination and ensuring food safety compliance in your kitchen.
Clean the tomato slicer thoroughly at least once a day, but also remember to clean the blades between cutting sessions to avoid sticky tomato residue. Carefully handwash the parts in a three-compartment sink and never send them through the dishwasher. Follow these steps to clean your tomato slicer:
- Disassemble the slicer: Remove the blades and any detachable parts according to the manufacturer's instructions.
- Soak in warm, soapy water: Submerge the components in warm, soapy water to loosen any dried-on residue.
- Scrub and rinse: Use a brush or sponge to scrub the parts clean, paying special attention to the blades and crevices. Rinse thoroughly with clean water.
- Sanitize: To ensure food safety, sanitize the slicer parts using a commercial sanitizer or a mixture of water and bleach.
- Dry and reassemble: Thoroughly dry the components before reassembling the slicer, ensuring that all parts are securely in place.
Check out our video for step-by-step instructions that show you how to disassemble and clean a tomato slicer:
Back to Top
5. How to Adjust Blade Tension
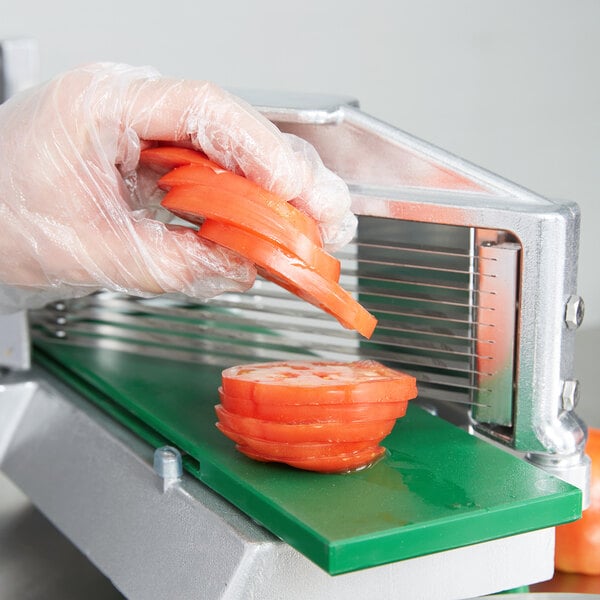
Blade tension plays a crucial role in the performance of a tomato slicer. It refers to the pressure applied to the blades to ensure they are properly aligned and cutting efficiently. When the blade tension is off, it can lead to issues such as uneven slicing, jagged cuts, or difficulty in slicing through the tomatoes.
Refer to the manual for your specific model to learn how to properly tension the blades. Here are some general guidelines that can be used on many tomato slicers:
- Make sure the blade assembly is properly installed: Check that the blade holder assembly is firmly mounted on the frame with the sharp side of the blades toward the pusher assembly.
- Locate the hex screws on the right side of the machine: Be sure the hex head screws on the right side of the blade holder are tight. If they are loose, tighten them up.
- Locate the hex screws on the left side of the machine: Tighten the hex head screws on the left end of the blade holder until the blades “hum” when strummed or plucked.
- Test the slicer: After adjusting the blade tension, test the slicer by slicing a tomato. Ensure that the cuts are clean and uniform.
- Fine-tune if necessary: If the blade tension is still not optimal, repeat the adjustment process until you achieve the desired results.
6. Missing Tomato Slicer Parts
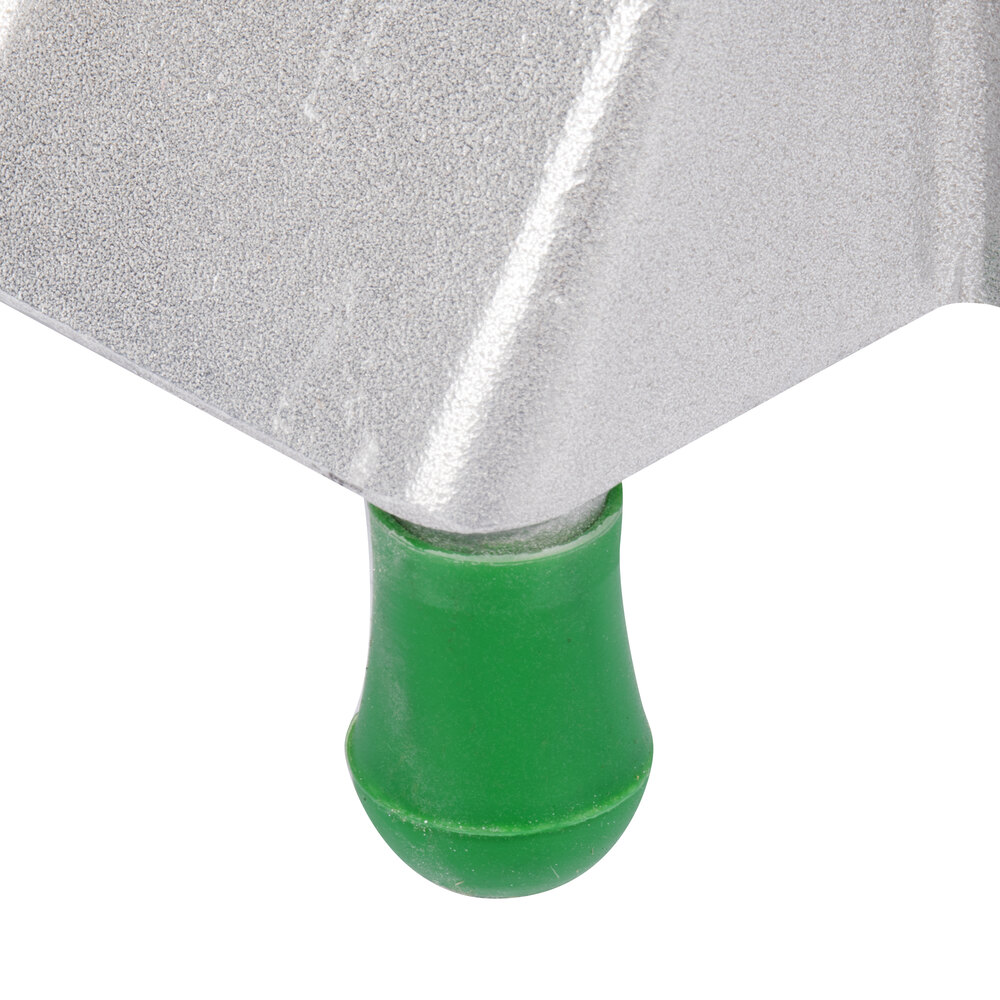
After a tomato slicer is disassembled for cleaning or replacing the blade assembly, it's a common mistake for some parts to get forgotten or lost. Operating the machine without all components in place is one reason why the unit may fail to work as it should. Make sure that all parts of the slicer are put back in place correctly.
For example, the feet of the tomato slicer are small and can be easily misplaced during cleaning. Operating the slicer without all feet in place causes the machine to become unbalanced, which can cause unwanted friction on the blades.
Many machines have bumpers that keep the pusher head on track. Operating without a bumper in place will cause the pusher block to slide into the blades too far or unevenly, damaging both the blades and the pusher block. Regularly inspect your tomato slicer to make sure all parts are in place and in good condition. If you notice that parts are becoming worn out, swap them out immediately with compatible vegetable cutter parts.
Tomato Slicer FAQ
We have a few more tips to help you care for your tomato slicer:
Why Are My Blades Wearing Out so Quickly?
Your blades will naturally dull over time with continuous use of your machine. If you find that your tomato slicer blades are becoming dull prematurely, address these common maintenance issues:
- Are you washing the blades correctly? Your blades can become dull and corroded if you fail to clean them after every use, run them through the dishwasher, or use an alkaline cleaning solution.
- Do you apply lubrication to the machine after every cleaning? Lubricant is required to reduce friction on the blades and keep them sharp.
- Is the tomato slicer being used to cut other items? Using the tomato slicer for other types of produce can dull the blades over time.
- Is the machine properly assembled with tight blade tension? If the blade assembly is out of position, this can cause more friction and dulling of the blades. Likewise, you also need to make sure the blade tension is adjusted every time you reassemble the blades after cleaning or replacements.
How Can I Get Clean Cuts from My Tomato Slicer?
Use a socket wrench to make sure the hex screws on your unit are properly tightened to adjust the blade tension and produce consistent slices. Also, make sure your blades are properly positioned with the sharp sides of the blades facing the pusher assembly.
Why Do I Feel Resistance When I Push the Tomato Slicer?
You could be getting resistance if you aren't applying food-grade lubrication to the pusher head regularly.
Back to TopIf you're unhappy with the performance of your tomato slicer, make sure your staff is properly trained on simple care and maintenance. Improper use of the machine and failing to clean and sanitize the slicer can lead to corrosion, dulling of the blades, and damage. By investing time in caring for your tomato slicer, you can significantly extend its lifespan, ensure optimal performance, and reduce the risk of injuries or accidents in the kitchen.


