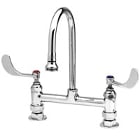
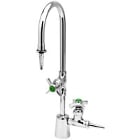
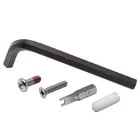
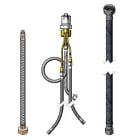
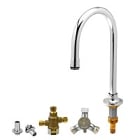
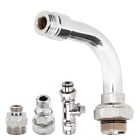
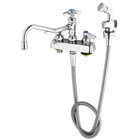
Hi, I'm Jeff. I'd like to talk to you a little bit about the differences between a wall-mounted faucet and a backsplash faucet. This information would apply to faucets and pre-rinse units. Wall mount faucets have eccentrics. Eccentrics are the hardware package where it is adjustable from 8 1/2" to 7 1/2", because the plumber when he's stubbing out into a wall, can never get those pipes exactly 8" on center, so there has to be some adjustability. In a backsplash-mounted faucet, the hardware looks similar to this, where it's not an eccentric; it's not adjustable. They come out exactly 8" on center, because the holes in the backsplash of the stainless steel sink are always computerized; they're always exactly 8" on center, so you don't need the adjustability. But when you talk about Fisher backsplash faucets, you get the male nipple where the lock nut and the washer go on so you can attach the faucet to the stainless steel backsplash. It's the correct hardware package for mounting a faucet to a stainless steel backsplash. Whether you have a wall-mounted or a backsplash faucet, the actual back of the faucets look identical. The only thing different is the hardware package that comes with either a wall mount or a backsplash. Okay, so let's take a look at a wall mount faucet and how you actually install a wall mount faucet onto a wall. The trim ring, the flange - what we call the flange - screws onto one half of the eccentric. You put that on both. And screw them all the way down. And then, you go to your wall and simply screw the eccentric onto the nipple assembly or the pipe sticking out of the wall. Screw both of them on. And you always want to use plumbing tape or plumbing putty to seal the threads. So with these eccentrics on, you can see that if you turn them one way or the other, they will actually go from about 7 1/2" all the way out to 8 1/2". So, with the eccentrics installed, the next thing we want to do is to install the two washers that come with it. No plumbing tape, no pipe sealant is required. You simply install the washers into the recessed area of the concentric, and then grab the body out of the faucet box. Screw it on. Now you noticed that I've got this one, this side screwed on. But this one doesn't line up. So all I really have to do is bring this around until it lines up to be exactly 8" on center. If it screws all the way onto the eccentrics, you know you've done it right. Now, what you want to do is you want to make sure that it is level. And then, the last thing we do, is bring the flange back all the way up against the wall. Tighten it up, and we use a wrench. Tighten up these nuts. And we've just installed the faucet on the wall. So what we want to do now, is installing a swing-spout faucet... what you do is each faucet contains a little tube of lubrication, and what you do... you put the lubrication all over the o-rings. And this helps not only just slide the spout into the faucet body, but it also lubricates the o-rings and makes the swing spout swing very easily. Line it up, straight up and down; it pops right in. And then you tighten down the spout nut. Check to make sure the valves work smoothly - and they do. A perfect wall-mounted application. Okay, now we're going to install the backsplash hardware package to the Fisher faucet. It's always easier to install the faucet if you have the swing-spout off, so we'll put that on later. So what we're going to do is install the washers into the concentrics. Install those onto the faucet body; just screw them in, nice and snug... wanting to make sure that these washers stay on the concentric and don't drop out. And you can see that because they thread all the way in, so we know they're secure. Then what we're going to do is put the flange onto the concentric, and we're going to want to screw those all the way down for installation. Later, what we're going to do is back them off and tighten them against the front of the stainless steel backsplash, but for right now we're going to screw them all the way down. Now what we'll do is take this faucet over and see if it fits in the holes. And it fits! Okay, so now from the rear of the sink, installing the washer and the lock nut onto the backsplash hardware... naturally, in the real world, if we were really installing this, we'd be using a wrench and really tightening this nut down tight. Now, using the optional elbow, you'd put plumbing tape - Teflon tape - around the threads, and then screwing the elbow onto the nipple and tightening it up until it's very tight. And then now, this is where the water supply line goes in. Now, you could run in copper or it could be a supply line. And you'll notice by using the Fisher elbow, that when the sink is up against the wall, using this ruler to illustrate the wall, what you've got is the elbow not interfering with the wall, so now the sink can fit up flush against the wall with no problem whatsoever. Okay, now that we're done behind the sink, the next thing we want to do is tighten down these flanges. They just tighten down against the stainless steel. Use a wrench and tighten them down very tight. And this secures the faucet to the backsplash. Next step is installing the swing-spout. Inside the faucet packaging you'll find a little thing of lubrication. You put the lubrication all over the o-rings; you get a lot of it on there, because the lubrication is going to help you install the spout, and it's also going to ensure that the spout can swing freely. When installing the spout, don't try to put it in on an angle; come in vertical into it, and you can feel it go all the way to the bottom. Tighten up the spout nut; ensure that the swing-spout swings free. Check your stem to make sure they're off. Turn the water on underneath the sink. And we've just installed a Fisher backsplash faucet. And that's the difference between a Fisher backsplash and a Fisher wall mount faucet or pre-rinse.
Copy and paste the embed code above.
Installing a new faucet doesn't have to be difficult, and this video shows you why. Watch as a Fisher wall mount faucet and a Fisher backsplash faucet are installed, and learn what makes them different and what makes them reliable. Perfect for any operation, these Fisher faucets secure to existing water lines with ease and deliver long-lasting quality.