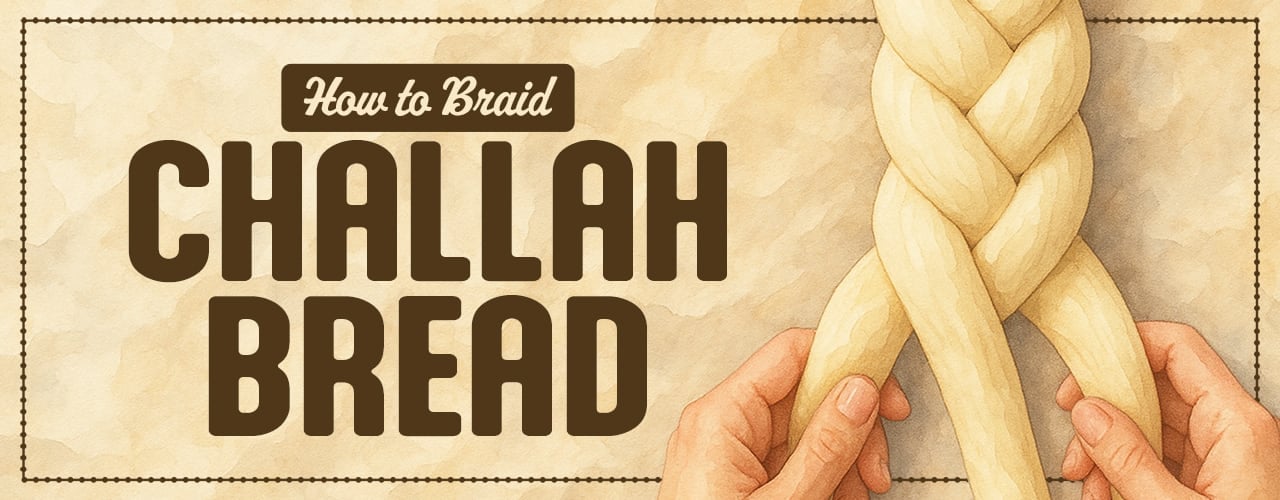
Challah is more than just a loaf of bread. It’s a weekly tradition, a holiday essential, and a versatile menu item that brings beauty to any table. For bakeries and caterers, offering fresh, beautifully braided challah can be a profitable way to serve your local community, especially customers who observe Shabbat or celebrate Jewish holidays like Rosh Hashanah and Sukkot. Once you’ve perfected your dough, mastering different braiding styles is the next step to creating standout loaves that look as good as they taste. In this guide, we’ll cover four popular ways to braid challah, along with tips to help you nail the technique and creative menu ideas to make the most of any extra loaves.
What Is Challah Bread?
Challah (pronounced hah-luh) is a traditional Jewish bread typically eaten on Shabbat (Friday evening) and during holidays. It’s made with enriched dough - usually flour, water, eggs, sugar, yeast, and oil - giving it a tender, fluffy interior and a slightly sweet flavor.
Braiding is a signature element of challah’s appearance. Classic loaves use a 3-strand braid while holidays like Rosh Hashanah call for round versions, and the braiding itself symbolizes unity, continuity, and tradition. Challah is not eaten during Passover, but it's a central part of most other Jewish celebrations. Beyond its ceremonial role, its soft texture and rich flavor also make it ideal for various culinary uses, from french toast to bread pudding and sandwiches.
How to Braid 3-Strand Challah Bread
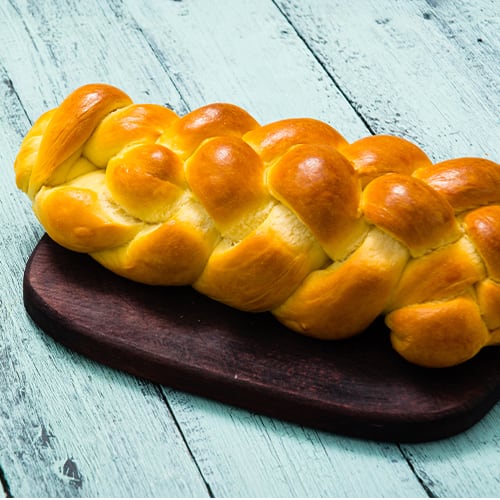
The 3-strand braid is the most classic and beginner-friendly challah style, perfect for weekly Shabbat loaves and everyday offerings. This braid produces a simple, elegant loaf with a clean shape that’s easy to scale for different sizes.
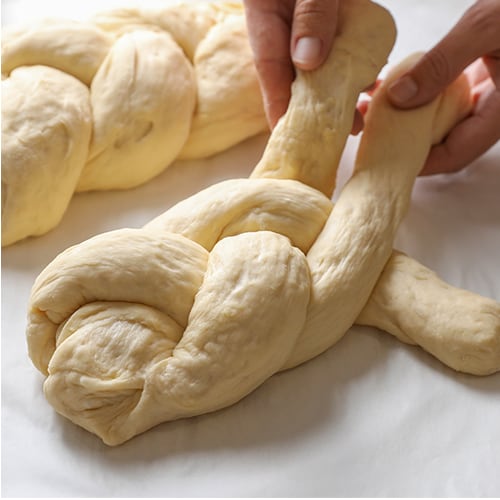
- Roll three even strands of dough, each approximately the same length and thickness. Line them up side by side and pinch them together at the top to secure.
- Cross the right strand over the center, then the left over the new center. Repeat until you reach the end.
- Once braided, gently roll the tapered ends to even them out and tuck them under for a clean finish.
How to Braid 4-Strand Challah Bread
The 4-strand braid offers a more intricate look and a slightly tighter crumb structure, which adds visual interest to your display or packaging.
- Roll four even strands of dough, each approximately the same length and thickness. Line them up side by side and pinch them together at the top to secure.
- Take the rightmost strand and cross it over to become the leftmost strand.
- Take the original leftmost strand and cross it over to become the rightmost strand. To make it easy to follow, keep your two outer strands straight out (like two wings) and your two middle strands pointed down (like two legs).
- Take the leftmost strand and cross it between the two middle strands. Take the second strand in from the right and cross it over to the leftmost position. Take the rightmost strand and cross it between the two middle strands. Take the second strand in from the left and cross it over to the rightmost position. Repeat until you reach the end.
- Once braided, gently roll the tapered ends to even them out and tuck them under for a clean finish.
How to Braid 6-Strand Challah Bread
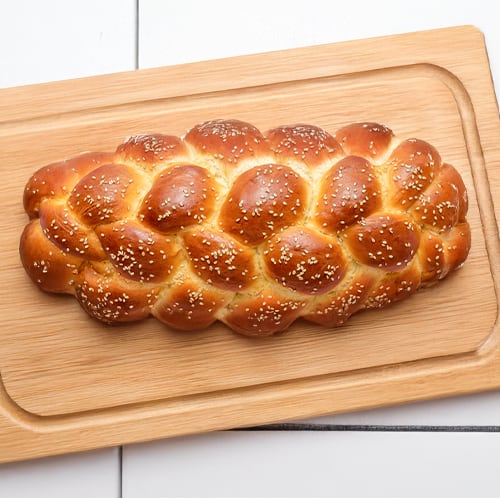
The 6-strand braid is an eye-catching showstopper, ideal for holidays, premium offerings, or special orders. The technique is very similar to the 4-strand braid, but with the addition of two more strands. Though it may require a few practice runs, this braid holds its shape well and offers great oven spring and presentation value.
- Roll six even strands of dough, each approximately the same length and thickness. Line them up side by side and pinch them together at the top to secure.
- Take the rightmost strand and cross it over all the others to become the new leftmost strand. Then take the original leftmost strand and cross it over to become the new rightmost strand.
- Take the new leftmost strand and cross it between the two middle strands, placing it in the center.
- To replace the strand you just moved, take the second strand from the right and move it into the leftmost position. Then take the rightmost strand and bring it into the center, again crossing it between the two middle strands.
- Repeat this process of crossing the outermost strand into the center and replacing it by bringing the second strand from the opposite side to the outer position until you reach the end.
- Once braided, gently roll the tapered ends to even them out and tuck them under for a clean finish.
How to Braid 4-Strand Round Challah Bread

Braided round challah is traditionally served on Rosh Hashanah, the Jewish New Year, symbolizing the cycle of life and renewal. The round shape gives the loaf a stunning centerpiece quality, perfect for holiday displays, gifts, or catering spreads.
- Lay out two strands of dough horizontally, from left to right, on your work surface. Then place the remaining two strands vertically, from top to bottom, directly over the horizontal ones so that they intersect in the center. You should now have a shape resembling a hashtag or plus sign, with the strands forming a woven cross.
- Adjust the positioning so that one of the horizontal strands crosses over the vertical strand it intersects, and the other horizontal strand crosses under. This creates a clean, over-under basketweave pattern at the center, which will serve as the foundation for the braid.
- To begin braiding, choose one of the strands that is currently positioned underneath another. Cross it over the strand immediately to its right. Continue this motion in a clockwise direction, always taking the strand that is underneath and moving it over the next one. This begins to form the round, woven pattern.
- Once you’ve completed a full circle in the clockwise direction, switch to a counterclockwise weave. Repeat the same under-over pattern, this time moving in the opposite direction. Continue alternating between clockwise and counterclockwise weaves with each full rotation.
- As the strands become shorter and more difficult to braid, bring the ends together, gently pinch them to seal, and tuck them underneath the loaf. This will give the challah a clean, round shape that's ready for proofing and baking.
Challah Braiding Tips
Braiding challah all begins with how you handle the dough. These simple yet essential tips will help ensure your braids are even, your dough is well-proofed, and your final loaf is both beautiful and delicious.
- Weigh your dough: Use a dough scale to weigh each portion of dough before rolling. This ensures your strands are uniform in size, making for a more balanced and professional-looking braid.
- Use the poke test: Gently press a floured finger into the surface of the dough. If the indentation springs back slowly and partially, it’s ready to shape. If it springs back too quickly, it’s under-proofed; if it doesn’t spring back at all, it may be over-proofed.
- Flour your hands, not the dough: To keep braiding smooth and seamless, dust your hands lightly with flour instead of the dough. Adding too much flour directly to the dough can make the strands slip and resist sticking together, leading to an uneven braid.
- Roll even strands with tapered edges: Roll each piece of dough into evenly sized strands with gently tapered ends. This helps create a neater, more cohesive braid and prevents bulky knots where the strands are tucked under.
- Braid loosely, not tightly: Keep your strands relaxed rather than braiding too tightly. This provides space for the dough to rise properly, leading to an even bake and that signature soft, pillowy interior.
How to Use Challah Bread
Though deeply rooted in Jewish tradition, challah’s rich, slightly sweet flavor and soft, tender crumb can be used in sweet and savory dishes, transitioning seamlessly across all menu segments.
- Jewish holidays: Challah is a staple on Shabbat and festive occasions like Rosh Hashanah and Sukkot. On Shabbat, it’s typically braided; for Rosh Hashanah, it’s often shaped into a round loaf to symbolize the year's cycle.
- French toast: Challah’s soft, egg-enriched texture absorbs custard beautifully, making it ideal for classic french toast or indulgent french toast casseroles. It’s the perfect way to elevate your brunch menu with a decadent twist on a familiar favorite.
- Bread pudding: Challah’s structure and subtle sweetness upgrade sweet and savory bread puddings, offering a rich and custardy result without becoming soggy.
- Grilled cheese: Use thick-cut challah to make artisanal grilled cheeses. Its golden crust and airy crumb toast beautifully while holding up to fillings like melty cheeses, caramelized onions, and deli meats.
- Breakfast sandwiches: A slice (or roll) of challah makes the perfect base for gourmet breakfast sandwiches. Think scrambled eggs, sauteed greens, sharp cheese, and a swipe of aioli or labneh.
Braiding challah may appear complex at first, but with practice, the process becomes intuitive. Once the technique is in your hands, it’s a rewarding bread to produce, offering both visual impact and menu versatility. From traditional celebrations to inventive brunch offerings, challah is a product that earns its place in any baker’s repertoire.