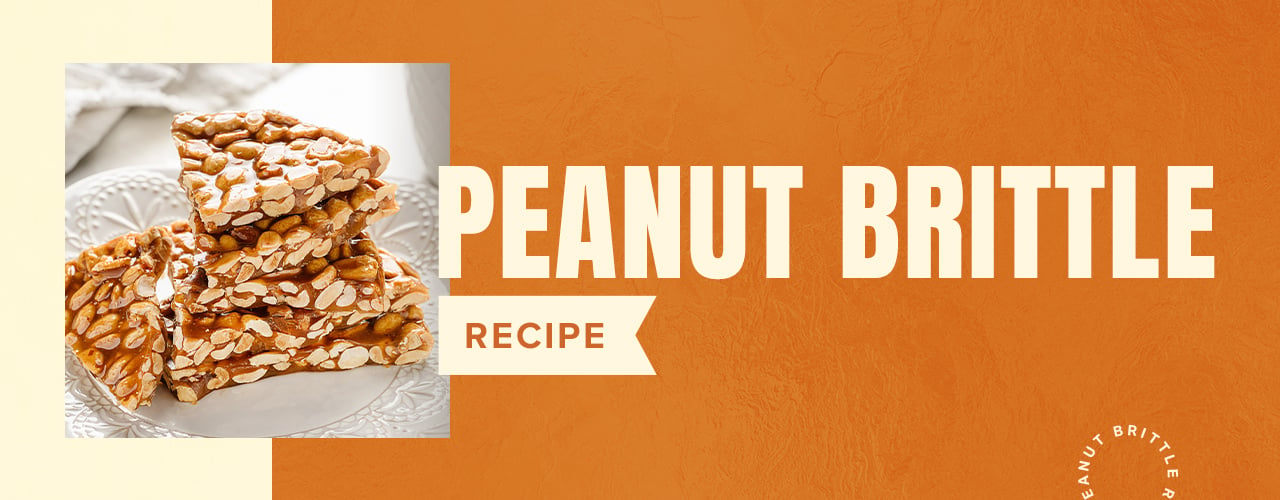
How to Make Peanut Brittle
Last updated on Nov 5, 2026Jason KurtzPeanut brittle is a popular treat made from roasted peanuts. Commonly found in candy stores, confectionary shops, and bakeries, it is traditionally served during the fall and winter. With a classic look and nostalgic flavor, it has appealed to generations. Peanut brittle traces its roots to the American South, where peanut farms are abundant, but its simple recipe is easy to follow and enjoyed worldwide. We'll outline what peanut brittle is, how to make it, and answer frequently asked questions about it so you can decide whether it belongs on your menu.
What Is Peanut Brittle?
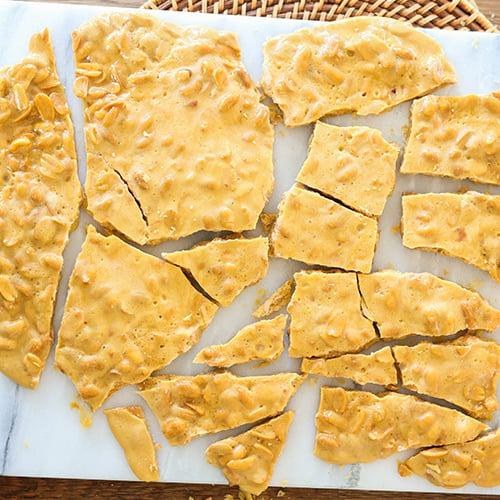
Peanut brittle is a classic candy made by cooking sugar and corn syrup until they caramelize, then mixing in peanuts. As it cools, it becomes crisp and crunchy, giving it a signature brittle texture. The combination of sweet caramelized sugar and salty roasted peanuts complements each other, creating a rich, satisfying flavor. People often enjoy it as a snack, dessert, or homemade holiday treat, and it has been a popular confection in the United States for generations.
Peanut Brittle Recipe
Peanut brittle comes together quickly, using just a handful of ingredients and basic kitchen tools. Because it keeps well, you can make a large batch ahead of time and have it ready for your bakery case or dessert menu. Our easy recipe below works great as written, but feel free to resize it to suit your own tastes and needs.
Yield: 16-24 servings
Total time: 50 minutes
Peanut Brittle Ingredients
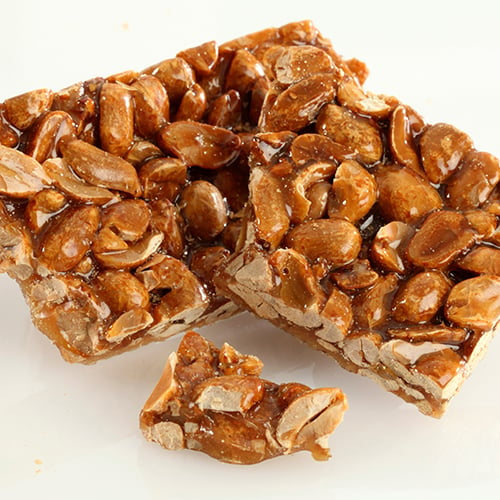
- 2 cups sugar
- 2 cups peanuts
- 1/2 cup corn syrup
- 1/4 cup water
- 4 Tablespoons. butter
- 2 teaspoons baking soda
Equipment Needed
- Large saucepan
- Candy thermometer
- Baking sheet
Instructions
- Combine sugar, corn syrup, and water in the saucepan over medium heat. Stir gently until the sugar dissolves.
- Add peanuts and cook until the contents reach 300 degrees Fahrenheit.
- Remove the pan from heat and mix in the butter and baking soda.
- Pour the mixture over the baking sheet. Use a spatula or spoon to spread it into a thin, consistent layer.
- Allow the mixture to cool until solid. Use your hands to break the brittle into pieces.
Peanut Brittle FAQ
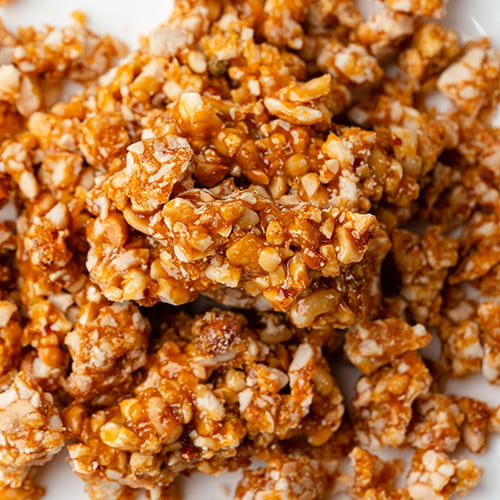
Though the recipe is simple, there are still plenty of questions to answer about peanut brittle. Whether you're making it at home or featuring it on your menu, understanding the basics can help you enjoy it even more. We'll answer some of the most common questions about peanut brittle to help you learn everything you need to know.
How to Store Peanut Brittle in the Freezer
Peanut brittle can be frozen once it has been cooked, and it keeps for up to 4 months when stored correctly. A few careful steps will protect its crisp texture while it’s in the freezer.
- Cool completely: Make sure the brittle is fully cooled before freezing it.
- Use a freezer-safe bag: Place the brittle in a bag designed for freezer storage.
- Layer with parchment paper: Put parchment between layers so the pieces don’t stick together.
- Remove excess air: Press out as much air as possible before sealing the bag.
- Freeze for up to 4 months: Stored this way, the brittle stays good for about 4 months.
Is Peanut Brittle Gluten-Free?
Yes, traditionally prepared peanut brittle is gluten-free. However, some recipes might include ingredients that contain wheat, barley, or rye, which can add gluten. Check the specific ingredients you use to make sure your peanut brittle is safe for customers with gluten-free diets, and make sure to take care during the cooking process to avoid cross-contamination with ingredients that contain gluten.
How to Store Peanut Brittle at Room Temperature
Homemade peanut brittle stays crisp for two to three weeks when stored properly, but it’s very sensitive to moisture. A few simple steps will keep it fresh and prevent it from turning sticky.
- Cool completely first: Let the brittle reach room temperature before packing it, so no trapped warmth creates condensation.
- Break into pieces: Snap it into manageable shards, which makes it easier to layer and store.
- Separate with paper: Layer the pieces between sheets of wax or parchment paper so they don’t fuse.
- Use an airtight container: A tight seal keeps out humidity, since brittle pieces readily absorb moisture from the air.
- Choose a cool, dry spot: Store it away from heat, sunlight, and humidity, such as a pantry shelf.
Whether you’re stocking a bakery case or sharing a homemade batch with friends, its satisfying crunch and sweet-salty balance make it an easy crowd-pleaser. Once you’ve made it on your own, you’ll likely find yourself experimenting to put your own unique spin on it. However you choose to enjoy it, this timeless confection is sure to bring a little nostalgia to any occasion.

Over his 5+ years with WebstaurantStore, Jason has spent countless hours learning, researching, and writing about the foodservice industry. With expertise in technical topics, he takes pride in helping customers and readers understand everything from troubleshooting their equipment to the fundamentals of starting a business.
Learn more about this author and WebstaurantStore's Content Writing Team here!
Related Resources

Types of Nuts
Nuts are a versatile and popular ingredient in commercial kitchens, adding flavor, texture, and nutritional value to everything from salads to baked goods. Selecting the right nut for your recipe can elevate the flavor and presentation of your dishes. From their shape to their best uses, reference this guide to elevate the taste and texture of cookies, trail mix, and charcuterie boards. Shop All Wholesale Nuts Skip to a specific type of nut: Pistachio Walnut Peanut Chestnut Pecan Hazelnut Cashew Almond Macadamia Pine Nut What Is a Nut? In botanical terms, a nut is strictly categorized as a dry fruit with a single seed, a hard shell, and a protective husk. Chestnuts, hazelnuts, pecans, and walnuts, fit this precise botanical definition. Interestingly, common items we often refer to as nuts, such as peanuts and almonds, do not meet the botanical definition of a nut. Despite this, they are still commonly grouped with true nuts in culinary contexts due to their similar characteristics and uses. Seeds vs Nuts Seeds are the small reproductive units of a plant that contain the genetic material necessary for the growth and development of a new plant. Nuts are a type of seed enclosed in a hard, inedible shell that typically grows on trees. This means that while all nuts are seeds, not all seeds are considered nuts. List of Nuts We provide a list of the most popular types of nuts with pictures so you can easily identify and differentiate them. 1. Pistachio Pistachios, scientifically known as Pistacia vera, are a culinary nut ranging in color from yellowish to bright green, with the more vibrantly hued specimens being more prized. Pistachios are described as meaty yet sweet, with a distinctive combination of flavors that includes notes of fruity avocado, olive, and earthy mushrooms. They are also prized for their crunchy texture, which adds a satisfying element to various recipes. On the tree, pistachios are reddish, wrinkled fruits that grow in heavy clusters reminiscent of a bunch of grapes. The husked fruit contains a thin, ivory-colored, bony shell that splits longitudinally along its sutures when mature. Inside the shell is the kernel, what we commonly refer to as the nut, which is about one inch in length and a half-inch in diameter. Native to semi-arid climates in Central Asia, pistachios are harvested anywhere from late August to early October. What Do Pistachios Look Like? Pistachios are small, oval-shaped nuts with a hard, beige shell that splits open when ripe, revealing a yellow to vibrant green kernel inside. The shell of a pistachio is naturally beige with a slightly purplish hue and is often dyed red to enhance its appearance. What Do Pistachios Taste Like? Buttery and mildly sweet Best Uses for Pistachios: Turkish delight, baklava, salads, charcuterie boards, pasta, trail mix, ice cream How to Open a Pistachio: Hold the pistachio between your thumb and index finger and gently squeeze until the shell cracks. Be careful not to apply too much force, as this can crush the nut inside. How to Store Pistachios: To store pistachios, place them in an airtight container and keep them in a cool, dry place like the refrigerator for the best freshness; for longer-term storage, you can freeze them in an airtight container as well. 2. Walnut Walnuts, scientifically named Juglans regia, are a type of tree nut that belongs to the walnut family. They are round, single-seeded stone fruits with a brown, wrinkly shell. The shell is enclosed in a husk that becomes brittle during ripening, making it easy to crack open to access the kernel. The kernel is typically found in two halves, which are commonly known as the walnut "meat." In the Northern Hemisphere, walnuts ripen between September and November. Walnuts originated in the Mediterranean region and Central Asia and have been a part of the human diet for thousands of years. They are now widely cultivated and enjoyed. Popular varieties of walnuts include English walnuts, Persian walnuts, and Eastern black walnuts. They have an earthy, slightly bitter flavor that completes savory dishes or serves as a contrasting element in confectionaries like fudge. What Do Walnuts Look Like? A walnut shell is typically round- or oval-shaped and varies in color from light brown to dark brown. Inside, the seed is light-colored, ridged, and shaped similarly to a human brain. What Do Walnuts Taste Like? Earthy, creamy, and slightly bitter Best Uses for Walnuts: Walnut oil, pastries, bread, ground into a paste to create savory sauces and dips How to Open a Walnut: Using a nutcracker, gently apply pressure to the center of the shell until it cracks open. Remove the shell to reveal the delicious walnut meat inside. How to Store Walnuts: Store walnuts in an airtight container or resealable bag in the refrigerator or freezer. Walnuts can absorb odors from other foods, so it is best to store them away from strong-smelling items. Black Walnut vs Walnut Black walnuts are a type of walnut known for its bold, earthy flavor and rich, oily texture. They have a stronger taste compared to traditional English walnuts, but they also come at a higher price point. English walnuts, also known as Persian walnuts, have a milder taste and a softer texture than black walnuts. 3. Peanut Despite their name, peanuts are technically legumes, belonging to the same family as beans and lentil varieties. They are also commonly referred to as groundnuts because they grow underground, with the peanut plant producing yellow flowers that eventually wilt and bend toward the ground, where the peanuts develop. The peanuts are encased in a thin, papery shell that splits open when they mature. Peanuts are typically planted in the spring and harvested in the fall. They thrive in warm climates and are a staple crop in many regions worldwide. Scientifically known as Arachis hypogaea, peanuts reveal their legume origins with their beany, earthy flavor. This savory taste is undercut by a slightly sweet undertone that becomes more pronounced when roasted. They can be enjoyed roasted and salted as a snack, ground into peanut butter, or used in various recipes such as stir-fries, sauces, and baked goods. Whether you're making a classic kid's menu item like a peanut butter and jelly sandwich or Thai peanut sauce for spring rolls, peanuts are a beloved ingredient worldwide. Operators must take into account that peanuts are a common allergen in the United States and can elicit severe allergic responses in certain individuals. What Do Peanuts Look Like? Peanuts are encased in light tan, hard, wrinkled pods. The pods are between 1 and 3 inches long and contain one to four seeds each. The seeds are white with pale brown skins. What Do Peanuts Taste Like? Beany, rich, earthy, and slightly sweet Best Uses for Peanuts: Peanut butter, trail mix, boiled peanuts, cookies, brownies How to Open Peanuts: Start by grasping the shell between your thumb and forefinger, then apply pressure to crack it open. Carefully separate the cracked shell to remove the peanut inside. How to Store Peanuts: Peanuts should be stored in airtight containers to prevent moisture and pests from affecting the product. It is recommended to store peanuts away from strong odors and direct sunlight to preserve their flavor. 4. Chestnut Chestnuts, scientifically known as Castanea, are typically in season during the fall and winter months, making them a staple ingredient in holiday dishes and desserts. Their spiky outer shell that encases their smooth, shiny brown nuts inside makes chestnuts visually distinct. Unlike most nuts, chestnuts are high in carbohydrates and low in fat, making them a popular choice for those seeking a nutritious snack. Chestnuts are mild and slightly sweet, with a creamy texture that sets them apart from other nuts like almonds or walnuts. One of the key features of chestnuts is their versatility in culinary applications. Chefs can roast chestnuts in the oven or over an open fire and serve them as a seasonal appetizer or snack. They can also be boiled and pureed to create a variety of dishes, from savory fillings to sweet desserts. Additionally, chestnuts can be candied, dried, or ground into a paste. What Do Chesnuts Look Like? Chesnuts are characterized by their round shape and hard, spiky, dark brown outer shell. Once the shell is cracked open, the nut inside is light brown, smooth, and shiny. Their shapes range from flattened, to triangular, to rounded and are pointed at one end. What Do Chestnuts Taste Like? Sweet and creamy Best Uses for Chestnuts: Roasted and served as a snack, tarts, cakes, quick breads How to Open Chestnuts: To open a chestnut, start by scoring an "X" on the flat side of the nut to prevent it from exploding during cooking. Then, roast or boil the chestnuts until the skin peels back. Remove the peeling skin and reveal the tender, creamy nut inside. How to Store Chestnuts: Chestnuts should be stored at temperatures between 33 to 34 degrees Fahrenheit with humidity levels around 90%. To maintain their freshness and flavor, use chestnuts within two weeks of storage for the best quality. Horse Chestnuts vs Edible Chestnuts Horse chestnuts and edible chestnuts are often confused due to their similar names, but they are quite different in terms of consumption and usage. Horse chestnuts, also known as conkers, are not edible for humans and are toxic if consumed raw. They are commonly used in crafts and as decorative items. Edible chestnuts are safe for human consumption and are a beloved winter flavor, especially when roasted over an open fire and served at Christmas markets. 5. Pecan Pecans, scientifically known as Carya illinoinensis, are prized for their rich, creamy taste with a slightly sweet undertone. What sets pecans apart visually is their elongated shape, smooth reddish-brown shell, and the characteristic grooves on the nut's surface. Pecans are harvested in the fall, typically from September to November, making them a seasonal delight for many chefs and bakers. Pecans are used in various culinary applications, including baked goods such as pecan pies, cookies, and muffins. They are also a popular addition to salads, granolas, and trail mixes. Pecans can be ground into a fine powder to create pecan flour, which is used in gluten-free baking. Additionally, pecans are commonly used in savory dishes as a coating for proteins or as a topping for salads and vegetables. What Do Pecans Look Like? Pecan shells are smooth, hard, thin, and oval-shaped. The outer shell is dark brown, while the nutmeat is oblong with deep ridges. What Do Pecans Taste Like? Buttery, sweet, and rich Best Uses for Pecans: Pecan pie, cookies, muffins, salads, yogurt toppings, oatmeal toppings How to Open Pecans: Place a pecan in a nutcracker and gently squeeze until the shell breaks, revealing the delicious pecan meat. How to Store Pecans: Pecans should be stored in an airtight container in a cool, dry place away from sunlight and heat sources. Refrigeration or freezing can extend their shelf life. Pecan Pronunciation How people pronounce the word pecan varies based on regional dialects. In the Southern United States, the word pecan is typically pronounced as "pee-can," emphasizing the first syllable. People in the Northern United States tend to say "puh-kahn," emphasizing the second syllable. Neither pronunciation is expressly right or wrong. Pecans vs Walnuts Walnuts are known for their round, wrinkled shells and brain-like shape, while pecans have more oval-shaped shells and a smooth surface. Pecans boast a luxurious, buttery taste and satisfying crunch, making them a favored ingredient in recipes. With a milder flavor profile and a hint of bitterness, walnuts are commonly used in baked goods, salads, granola, and as a topping for yogurt or oatmeal. Pecans tend to be pricier than walnuts due to their intricate harvesting and shelling process, as well as their limited cultivation areas. Back to Top 6. Hazelnut Hazelnuts, scientifically known as Corylus avellana, are typically harvested in the fall, making hazelnut-flavored items a fun fall flavor. These nuts are easily recognizable by their round shape and hard shell that encases a small, cream-colored kernel. Hazelnuts are distinctive for their rich, buttery, slightly sweet flavor with a chocolate undertone. Also known as filberts, hazelnuts can be eaten raw or roasted to enhance their caramelized notes and sweetness. Hazelnuts are commonly used in baking, adding a delightful crunch and nutty flavor to cookies, cakes, and pastries. One of the most beloved uses for hazelnuts is making NUTELLA®. Operators can also use hazelnuts to make plain hazelnut butter. What Do Hazelnuts Look Like? The outer shell of a hazelnut is rough and textured, providing a protective layer for the nut inside. Once the shell is cracked open, the edible part of the hazelnut is cream-colored with a smooth surface and a small, rounded oval shape. What Do Hazelnuts Taste Like? Buttery, rich, slightly sweet, and chocolate essences Best Uses for Hazelnuts: Making NUTELLA®, hazelnut butter, cookies, quick breads, cakes How to Open Hazelnuts: Use a nutcracker to crack the shells open and access the nut inside. How to Store Hazelnuts: Store hazelnuts in an airtight container or resealable bag to prevent moisture and air exposure. Keep them in a cool, dry place like your storeroom, refrigerator, or freezer. Chestnuts vs Hazelnuts Chestnuts offer a sweet and starchy flavor, while hazelnuts have a rich, chocolatey taste. Chestnuts have a tough outer shell, whereas hazelnuts are encased in a thin, papery skin. Hazelnuts have rounded oval shapes and are much smaller than chestnuts which can be flattened, rounded, or triangular. When it comes to applications, chestnuts are often roasted or boiled and used in both savory and sweet dishes, while hazelnuts are commonly used in baking, confectionery, and as a garnish for salads and desserts. With a slightly lower price point, hazelnuts are a comparatively cost-effective option. 7. Cashew Scientifically named Anacardium occidentale, cashews grow on the cashew tree, which produces cashew apples in addition to the nuts. The cashew nut is found at the bottom of the cashew apple. The growing season for cashews varies depending on the region, with some areas producing cashews year-round. However, the peak season for cashew harvesting typically falls between February and May. Cashew nuts are encased by a shell that contains a toxic resin called urushiol, which can cause skin irritation if not properly removed. This is why cashews are typically sold shelled and roasted to ensure they are safe for consumption. Cashews are distinguished by their kidney-shaped appearance with a smooth texture and a distinct curve at one end. They have a mild, creamy flavor that makes them a versatile ingredient in both savory and sweet dishes. They are commonly used in cooking to add a creamy texture to dishes or as a topping for salads and stir-fries. Cashews are also used to make dairy-free alternatives like cashew milk, cashew yogurt, or cashew cheese. What Do Cashews Look Like? Cashews are light beige, kidney-shaped, smooth, and have a slightly curved bottom with a pointed end. Each cashew seed is encased by a hard, gray, and curved shell. What Do Cashews Taste Like? Creamy, subtly sweet, and delicate Best Uses for Cashews: Cashew butter, curries, cashew dairy alternatives (milk, cheese, yogurt), cashew-crusted proteins, trail mix, yogurt toppings, oatmeal toppings, baked goods How to Open Cashews: Sold with shells removed How to Store Cashews Cashews should be stored in an airtight container in a cool, dry place away from direct sunlight and heat sources. Refrigeration can help extend the shelf life of cashews, but bring them to room temperature before using them to maintain their optimal taste and texture. Cashews vs Peanuts Cashews are kidney-shaped with a smooth texture, while peanuts are round and have a rough outer shell. In terms of taste, cashews are known for their mild, creamy flavor, whereas peanuts have a more earthy and savory taste. However, peanuts are typically more affordable than cashews, making them a cost-effective option for commercial kitchens. It's important to note that peanuts are a common allergen, while cashews are less likely to cause allergic reactions. Pistachios vs Cashews Pistachios are prized for their green color and slightly sweet taste that is a great addition to making sweet treats and savory items. Cashews are known for their creamy texture, subtle flavor, and kidney-shape. Cashews are used in a variety of dishes, from stir-fries to curries to nut butter spreads. Regarding pricing, cashews can be cheaper in the U.S. but less so in other parts of the world. 8. Almond Almonds are the seeds of the Prunus dulcis tree, native to the Middle East and South Asia. They are scientifically named after their tree of origin. Almonds have a distinctive oval shape with a pointed tip and a smooth, light brown outer shell. They are typically harvested in late summer, with the growing season spanning from mid-February to mid-April. Due to their nutritional value and perceived health benefits, almonds are a popular choice for snacks and as an ingredient in health-conscious recipes. Almonds have a mild, slightly sweet flavor profile paired with a crunchy, chewy texture. They are enjoyed in various forms, including raw, roasted, sliced, and ground into flour. They are commonly used in baking, confectionery, and as a topping for salads, yogurt, and oatmeal. Almonds are converted into almond flour by finely grinding blanched almonds. Almond flour is one of the most popular gluten free flours for Celiac friendly baking. What Do Almonds Look Like? Almonds are oval-shaped nuts with a pointed tip and a flat side. In their shell, almonds have a hard, woody exterior that protects the edible seed inside. Once removed from the shell, almonds reveal a light brown color with a smooth, slightly wrinkled surface. What Do Almonds Taste Like? Mild and sweet Best Uses for Almonds: Baking, salads, yogurt toppings, oatmeal toppings, ground into flour, plant-based dairy products How to Open Almonds: Almonds have a hard shell that can be challenging to crack open by hand, so it is most efficient to use a nutcracker. Place the almond in the nutcracker and gently apply pressure until the shell cracks open, revealing the nut inside. How to Store Almonds: Almonds have a high oil content and can go rancid if exposed to heat or moisture, so keep them in an airtight container in a cool, dry place away from direct sunlight. To extend their shelf life, store them in the refrigerator or freezer. Pistachios vs Almonds While almonds are typically oval-shaped with a smooth surface, pistachios have a more oblong shape with a slightly pointed end. Pistachios are further distinguished by their vibrant green hue and possess a subtly sweet taste profile frequently used in desserts such as ice creams, pastries, and cakes, as well as in savory dishes like salads, pilafs, and pestos. Almonds boast a nutty and earthy flavor with a hint of sweetness commonly featured in baked goods such as cookies, cakes, and bread, as well as in salads, trail mixes, and nut butter. Almonds are often favored for their affordability compared to pistachios, making them a practical choice for businesses seeking to incorporate nuts into their offerings without exceeding their budget. Peanuts vs Almonds Peanuts, actually legumes, are characterized by their two-seeded pods that develop underground. Almonds are tree nuts with a hard shell encasing a single seed. Peanuts have a richer, beany, and earthy taste compared to almonds, which have a milder and slightly sweet flavor profile and crunchier texture. Peanuts, often used in the form of peanut butter, are a versatile ingredient in baked goods, sauces, and snacks. Almonds, known for their crunchy texture and mild flavor, are commonly used in confectionery, trail mixes, and as a topping for salads and desserts. Peanuts are more cost-effective, making them a popular option for businesses optimizing their budget. 9. Macadamia Macadamia nuts, scientifically known as Macadamia integrifolia, are commonly referred to as bush nuts or Queensland nuts. These nuts are primarily grown in regions with a tropical climate, such as Hawaii and Australia. The growing season for macadamia nuts typically occurs between fall and winter. Macadamia nuts are easily recognizable due to their hard shell and round shape, which sets them apart from other types of nuts. Macadamia nuts have a rich, buttery flavor, making them a favorite ingredient in both sweet and savory dishes. When you first bite into a macadamia nut, you'll experience a delicate crunch, followed by a smooth, creamy mouthfeel. They are often used in baking, confectionery, and as a topping for salads or desserts. In Hawaii, macadamia nut pie Co Poi Kulolo is a beloved delicacy. Additionally, macadamia nuts are a popular choice for snacking and can be enjoyed on their own or as part of a trail mix. What Do Macadamia Nuts Look Like? Macadamia nuts are round, creamy white nuts encased in a hard, brown shell. What Do Macadamia Nuts Taste Like? Creamy, buttery, smooth, and sweet Best Uses for Macadamia Nuts: Chocolate-covered macadamia nuts, baked goods, confectionary items, salad toppings, trail mix, and charcuterie boards How to Open Macadamia Nuts: Macadamia nut shells are one of the hardest to crack, requiring a special nutcracker or machinery for processing. They are typically sold without their shells. How to Store Macadamia Nuts: Store macadamia nuts in an airtight container in a cool, dark place away from sunlight and heat sources. Refrigeration is recommended for long-term storage, extending the nuts' shelf life and preventing them from turning rancid. Avoid storing macadamia nuts near strong-smelling foods, as they can easily absorb odors. Raw vs Roasted Macadamia Nuts Roasting macadamia nuts can greatly enhance their oil-rich flavor. The amount of nutrients that roasted macadamia nuts retain compared to raw macadamia nuts depends on the temperature at which they are roasted. As long as roasted macadamia nuts are cooked at a low temperature, they retain the same nutritional benefits as raw macadamia nuts. Macadamia Nuts vs Hazelnuts Macadamia nuts are round and smooth, while hazelnuts have a more oblong shape with a rougher texture. In terms of flavor, macadamia nuts are known for their rich, buttery taste, whereas hazelnuts offer a slightly sweet flavor profile with chocolate essences. Macadamia nuts' higher price point compared to hazelnuts may influence purchasing decisions for commercial applications. 10. Pine Nuts Pine nuts, also known as pignoli or pinon nuts, are the edible seeds of pine trees. While there are many species of pine trees, the most commonly harvested pine nuts come from the stone pine or pinyon pine trees. The scientific name for the stone pine is Pinus pinea, and for the pinyon pine, it is Pinus edulis. Pine nuts are typically harvested in the late summer to early fall, making them a seasonal delicacy. One of the distinctive features of pine nuts is their elongated, teardrop shape. They have a creamy white color with a softer texture than other seeds. Pine nuts have a mild, buttery taste with a hint of resinous sweetness. They are commonly used in Mediterranean cuisine, particularly in dishes like salads, baked goods, and pesto pasta sauce. What Do Pine Nuts Look Like? Encased in a hard shell within certain species of pine cones, pine nuts are small tear-drop-shaped seeds with a pale yellow-white color. What Do Pine Nuts Taste Like? Buttery, rich, creamy, slightly sweet, and milky Best Uses for Pine Nuts: Salad topping, pasta topping, pesto, baking, Pinolate cookies How to Open Pine Nuts: If eaten as a snack, you can crack them open with your teeth like a sunflower seed. If using them in a recipe, hold the pine nut between your thumb and forefinger and apply gentle pressure on the shell while rolling it between your fingers until it pops open. Save time by purchasing shelled pine nuts. How to Store Pine Nuts: Keep pine nuts in an airtight container in a cool, dark place, away from heat and sunlight. Refrigeration can extend their shelf life, but bring them to room temperature before using them to preserve their flavor. Additionally, freezing pine nuts can help prolong their freshness, but tightly seal them to prevent moisture absorption. Pinon Nuts vs Pine Nuts Pinon nuts are a specific type of pine nut with a unique flavor profile. The term "pinon nuts" refers to the edible seeds from the pinon pine tree, native to the American Southwest. They are prized for their richer, more buttery flavor. Pinon nuts also have a higher fat content than other varieties. Generic "pine nuts" are typically sourced from other pine tree species worldwide and offer a milder taste. Generic pine nuts are also less expensive, making them a more approachable choice for commercial kitchens. Back to Top Whether you're looking for the rich and buttery taste of macadamia nuts, the versatility of almonds, or the meaty texture of walnuts, each type of nut offers unique benefits. By understanding the differences between various nuts, you can choose the best variety to elevate the taste and texture of your dishes. While they're delicious and nutritious, nuts are also a common allergen, so take steps to prevent cross-contamination when using them in your commercial kitchen.

Candy Making Supplies List
In the world of candy making, having the right supplies is essential to achieving the perfect results. From molds and thermometers to ingredients and packaging, each component plays a crucial role in the candy making process. Whether you're a professional confectioner starting a candy shop or a hobbyist looking to create delicious treats, this guide will provide you with critical information you need to make informed purchasing decisions. Shop All Candy Making Supplies Use the following links to explore the supplies you will need for the candy making process: Chocolate Tools Candy Making Ingredients Candy Melting and Mixing Supplies Candy Molding, Filling, and Shaping Tools Candy Packaging Candy Merchandising Supplies

Baking Terms Glossary
Whether you're in culinary school or just starting your own bakery, reading recipes can be difficult. With so many terms to learn and so many different techniques to master, it can be difficult to keep track of it all. From foundational baking traditions to modern trends, refreshing yourself on the most important baking terms is essential when it comes to keeping on top of the industry. Our alphabetized glossary breaks down each term in detail to help novice bakers and industry veterans alike find exactly the definition they're looking for. Skip to the baking terms that interests you: A-D Culinary Terms E-I Culinary Terms J-Q Culinary Terms R-Z Culinary Terms List of Baking Terms Here are what our industry experts think are the most important baking terms every chef should know! A - D Baking Terms A Absorption: The ability of flour to absorb water during the mixing process. Acetic Acid: A byproduct of fermentation that contributes to the flavor profile of bread. Active Dry Yeast: Yeast that is granulated and needs to be rehydrated before use. Active Starter: A recently fed sourdough starter that is ready for use. Aerate: To incorporate air into a mixture, typically by beating or whisking, to create a light and fluffy texture. Agar-Agar: A flavorless, gelatinous substance used as a stabilizing agent in recipes. It is made from red algae seaweed. Airbrushing: A technique using an airbrush tool to apply a fine mist of color or edible paint onto cakes for a smooth and even finish. Albumen: The white of an egg. All-Purpose Flour: A versatile blend of flour made from both hard and soft wheats. It is suitable for most standard baking, cooking, and thickening needs. Alveoli: Alveoli are the air pockets in bread caused by fermentation and gluten development. Amylase: An enzyme that breaks down starches into sugars during fermentation. AP weight: As-purchased weight. The total weight of ingredients as they were purchased, before any food prep occurs. Arrowroot: A powdery, white starch with a neutral flavor commonly used as a gluten-free, vegan, and paleo-friendly thickening agent. Ash Content: Ash content refers to the mineral content of flour, which can affect the flavor and color of bread. Aspartame: An artificial sweetener that is 200 times sweeter than sugar, commonly used in soft drinks and confections. Autolyse: A resting period during mixing that allows flour and water to hydrate. B Baba: A type of small yeast cake that is soaked in alcohol syrup, typically rum. It is typically baked in a cylindrical mold, featuring a rich texture and sweet taste. Bain-Marie: A method of gently cooking or keeping food warm by placing a food container in a larger pan of hot water. Baker's Math: The method bakers use to calculate ingredients based on the total flour weight. Baker's Percentage: The ratio of each ingredient to the total flour weight in a recipe. Baking Powder: A leavening agent commonly used in baking to help baked goods rise, baking powder typically contains a combination of baking soda, cream of tartar, and a moisture-absorbing agent, which react to create carbon dioxide gas when mixed with liquid ingredients. Baking Soda: Baking soda, also known as sodium bicarbonate, is a leavening agent used in baking that reacts with acidic ingredients such as buttermilk or vinegar to produce carbon dioxide gas, which helps baked goods rise. Banneton: A proofing basket that shapes bread dough. Basketweave: A decorative piping technique that mimics the look of woven baskets on the surface of a cake. Bassinage: Bassinage is the process of gradually adding water to dough during mixing. Batter: A batter is a liquid mixture of ingredients used to make cakes, muffins, and cake donuts. Bavarois/Bavarian Cream: A rich dessert cream made by combining vanilla custard, gelatin, and whipped cream, and commonly used as a pastry filling. Bench Flour: Flour used to prevent dough from sticking to the work surface. Bench Rest: Allowing dough to rest on the work surface before shaping. Bench Scraper: A tool bakers use to divide and shape dough on the work surface. Biga: A type of Italian preferment or yeast starter, used to create a light, airy bread texture. Blast Chiller: A large type of kitchen equipment designed to rapidly cool hot baked goods to food-safe temperatures without affecting moisture retention, texture, or flavor. Blind Baking: Pre-baking a pie or tart crust with pie weights before adding the filling to ensure it is fully cooked and crisp. Blitz: A quick method of making puffy or flaky pastries. Pastry chefs cut cold butter directly into flour and make fast folds to create layers. The water trapped inside the butter then turns into steam in the oven, puffing the pastries. Bloom: The process of softening gelatin in a liquid before adding it to a recipe to ensure proper setting. Bookfold: A lamination technique commonly used to make croissants where a sheet of dough is folded with butter. The two short ends of the dough are folded toward the center until they meet in the middle, and then the entire sheet is folded in half like a book. Boule: A round loaf of bread with a tight crumb and crust. Bran: The hard outer layer of whole cereal grains, commonly found on oats, wheat, and rice. It is high in protein, iron, and fiber, as well as carbohydrates. Bread Flour: A type of flour with high protein content, allowing for higher elasticity and strong structural support. This provides more stability and allows bread dough to better hold its shape while baking. Bread Machine Yeast: Yeast specifically formulated for use in bread machines. Brulee: The process of caramelizing a layer of sugar on top of a dessert, creating a hard, crisp crust. Bulk Fermentation: Allowing dough to ferment in a bulk container before shaping. Buttercream: A creamy type of frosting made from butter, powdered sugar, and flavorings such as vanilla or cocoa, commonly used to decorate cakes. Buttermilk: The thin liquid left over after churning butter. Fermented and sour-tasting, it adds acidity, tenderness, and helps with leavening baked goods. C Cacao: The raw, purest form of chocolate, also known as cocoa beans when refined. Cake Border: A decorative edge or trim that is applied to the perimeter of a cake. Cake Flour: A finely milled type of flour with a lower protein content than all-purpose flour, resulting in a lighter and more tender cake crumb. Cake Tiers: Separate layers of cake stacked on top of each other in decreasing sizes to create a multi-tiered cake. Caramelization: The non-enzymatic process of heating sugar until it starts to brown, creating a chemical reaction that produces a golden-brown color and rich flavor. Carryover Cooking: Carryover cooking refers to the phenomenon where food continues to cook and increase in temperature even after being removed from a heat source. Celiac Disease: An immune and digestive disorder that causes gluten intolerance. Chantilly Cream: A type of French heavy whipping cream that has been sweetened and flavored with sugar and vanilla. It is often used as a pastry filling or cake frosting. Chiffon Cake: A light and airy type of cake made with oil, eggs, sugar, flour, and baking powder, resulting in a moist and tender crumb. Clarified Butter: A type of butter from which all milk solids have been removed. It boasts a longer shelf life and lower water content. Cocoa Butter: An edible fat extracted from cocoa beans, with a cocoa flavor and aroma. It has a pale-yellow flavor and is a key ingredient in making chocolate. Cold Proof: Proofing dough in a cold environment to slow down fermentation. Commercial Baker's Yeast: Yeast used in large-scale bakery operations. Compote: A type of chunky, loose fruit sauce made by simmering fruit in water with sugar and spices. It is used as a topping or filling. Conching: A key step in the chocolate-making process where ingredients are mixed, agitated, and heated until they are evenly distributed and reach an optimal texture and flavor. Cornelli: A delicate lace-like piping design commonly used to create intricate cake patterns. Couche: A linen cloth used to support and shape proofing bread dough. Coulis: A thin sauce that is made from pureed and strained fruits or vegetables. It is fluid and pourable, adding a pop of color and flavor when drizzled over a dish. Coupe: A type of sundae that consists of a scoop of ice cream, delicate fruit, and light syrup, typically served in a footed glass. Cream: To mix ingredients, typically sugar and fat, together until smooth and creamy. Crimping: A decorative technique used to seal the edges of a pie or tart crust by pinching or folding the edges of the dough, creating a decorative pattern and containing the filling. Crumb: The tender interior of a cake formed when the batter is mixed and baked, creating a soft and fluffy texture. For bread, it refers to its interior texture, including the size and distribution of air pockets. Crumb Coat: Crumb coat is a thin layer of frosting that seals in crumbs and creates a smooth base before applying the final layer of frosting. Crystallization: The process of dissolved sugar molecules coming back together to form a solid, crystal structure. Cultured Butter: A type of butter where live bacterial cultures are added to the cream after it is pasteurized and left to ferment before churning. It has a tangy, acidic flavor. Curd: A solid dairy mass formed from coagulated milk. Custard: A smooth, sweet ingredient made from eggs, milk, sugar, and vanilla. D Damask: A pattern resembling elaborate, symmetrical designs often seen on fabric, used as a decorative motif on cakes. Dead Dough: Dead dough is an artisan dough made without leavening agents. Non-yeasted and non-rising, it is also known as baker's clay or deco dough and is used for decorative showcase pieces and competition baking rather than eating. Deck Oven: A deck oven is a type of commercial oven that features multiple shelves or "decks" on which baking pans or trays can be placed, making it ideal for high-volume baking operations. Desired Dough Temperature (DDT): The ideal temperature for dough during mixing and fermentation. Desired Dough Weight (DDW): The target weight of dough for a specific recipe. Diastase: A group of naturally occurring enzymes that break down starches into maltose. Diastatic Malt: Malted barley flour that enhances fermentation and browning. Direct Method: Mixing all ingredients at once, both dry and wet, in a single bowl. Discard: Removing a portion of sourdough starter before feeding. Diving Arm Mixer: A diving arm mixer is a type of mixer with a rotating arm for kneading dough. Docking: Docking is pricking small holes in pastry dough, allowing steam to escape during baking and preventing the dough from puffing up too much. Dough Conditioner: Additives that improve dough handling and texture. Dowels: Wooden or plastic rods inserted into tiered cakes to prevent the layers from collapsing. Dry Yeast: A dehydrated, granulated form of baker's yeast that helps baked goods rise. E - I Baking Terms E Edible Yield: Edible yield refers to the portion of a food item that is usable and consumable after processing or preparation. In baking, understanding the edible yield of ingredients helps bakers accurately calculate recipe costs and portion sizes. Emulsion: Two liquids dispersed in each other that don't naturally mix. Endosperm: The starchy interior of the wheat kernel that is milled into white flour and supplies the starch and gluten-forming proteins that give baked goods their structure. Enriched Doughs: Doughs that contain added enriching ingredients other than the standard yeast, water and flour mixture such as fats, sugars, eggs, etc. Enrobing: A technique used in baking and confectionery to coat food items, such as cakes, cookies, or candies, with a layer of chocolate, icing, or glaze. This process adds flavor, texture, and visual appeal to the finished product. Extensibility: A dough's ability to stretch without tearing or snapping back. High extensibility makes dough easier to shape and roll, and is a key trait in pizza and pastry doughs. Extract: A concentrated flavoring made by drawing flavor compounds out of a source (such as vanilla beans) into alcohol or another solvent. Extracts deliver consistent flavor in small quantities. Extraction Rate: The percentage of the whole wheat kernel that becomes flour after milling. Lower rates yield refined white flour, while higher rates retain more bran and germ. F Fat Bloom: A dull, greasy, grayish-white film on chocolate caused by cocoa butter separating and rising to the surface, usually from temperature swings or improper tempering. Fermentation: The process of yeast and bacteria converting sugars into carbon dioxide and alcohol. Final Proof: The last stage of fermentation before baking. Firm Peaks: A stage in whipping egg whites or cream where the mixture holds shape when the whisk is lifted, but the tip bends slightly. Flambee: A cooking technique in which alcohol is added to a hot pan or dish and ignited, burning off the alcohol while adding flavor. Fluting: Fluting is a decorative technique used to create a scalloped edge on a pie or tart crust by pinching or pressing the dough between the fingers, creating a fluted pattern around the edge of the pastry. Folding: A gentle mixing technique that uses a spatula to combine a light, aerated mixture with a heavier one without deflating it. Fondant: A smooth, pliable icing made from sugar, water, and gelatin commonly used to cover cakes for a sleek and polished finish. Fork Mixer: A dough mixer with rotating tines for mixing dough. Frangipane: Frangipane is a sweet almond filling used in pastries like tarts and croissants. This filling is made with ground almonds, sugar, butter, and eggs, resulting in a rich and nutty flavor. Fresh Yeast: Live yeast used in baking that requires refrigeration. Fructose: A monosaccharide found in fruit and honey, and the sweetest of the natural sugars. It is highly hygroscopic, so it helps keep baked goods moist. G Ganache: A rich mixture of chocolate and cream used as a frosting, filling, or glaze for cakes. Gelatin: A protein derived from collagen that dissolves in hot liquid and sets into a gel when cooled. Gelatinize: The process of starches absorbing water and swelling during baking. Gelato: An Italian-style frozen dessert made with more milk than cream, less fat, and less air than American ice cream. Genoise Sponge: A French sponge cake leavened by whole eggs whipped with sugar, with little or no chemical leavener. It has a light, dry crumb and is typically soaked with syrup. Germ: The embryo of the wheat kernel, rich in oils, vitamins, and protein, which is removed in white flour production because its fat shortens shelf life. Ghee: Ghee is a type of clarified butter commonly used in Indian and Middle Eastern cooking made by simmering butter to separate the milk solids from the fat, resulting in a rich, nutty flavor and high smoke point, making it ideal for sauteing and frying. Glaze: A thin, glossy coating applied to baked goods or pastries for shine, flavor, or moisture retention. Glazes can be sugar-based, fruit-based, or egg-based. Gliadin: One of the two main proteins in wheat that form gluten, which allows dough to stretch. Glucose: A monosaccharide that is the primary sugar used by yeast during fermentation. Gluten: Gluten is a protein found in wheat flour that develops when flour is mixed with water, giving dough its stretchy texture. Gluten development is crucial in achieving the proper rise and crumb structure in baked goods. Glutenin: One of the two main gluten-forming proteins in wheat. It provides dough with strength and elasticity, allowing it to spring back after stretching. Gold Leaf: Thin sheets of edible gold cake decorators use to add a touch of luxury and elegance to cakes. Grease: To coat a pan or baking dish with a thin layer of oil or butter to prevent sticking. Grigne: The raised, crisp ridge that forms along a scored line on a baked loaf, particularly in lean breads like baguettes. It indicates proper scoring, oven steam, and good oven spring. Gum Paste: A pliable sugar dough that is often used to create intricate decorations such as flowers, figurines, and other embellishments for cakes. H Hand-Painted: A technique where edible colors are painted directly onto cakes for intricate designs and custom artwork. Hard Wheat: Dense wheat varieties with a high protein content that produce strong gluten. They are the preferred choice for bread flours. Heat Transfer: The movement of heat into food through conduction, convection, or radiation. Understanding it helps operators control browning, doneness, and bake times. High Altitude Baking: High altitude baking refers to the process of adjusting recipes and baking techniques to account for the lower air pressure and higher elevation typically found at higher altitudes, ensuring baked goods rise properly and cook evenly. High Hydration Dough: Bread dough with a high-water content, resulting in a more open crumb structure and chewy texture in the finished loaf. Homogenization: A process that forces liquid, typically milk, through small openings to break fat globules into tiny, uniform particles. This prevents the cream from separating and produces a smoother, more consistent product. Hooch: The liquid that forms on the surface of sourdough starter, indicating that it must be fed. Houndstooth: A two-tone textile pattern of broken checks, often replicated as a cake decoration for a classic and sophisticated look. Hydrogenation: A chemical process that adds hydrogen to liquid oils to make them more solid and shelf-stable. It is used to produce shortenings and margarines. Hygroscopic: Describes an ingredient's tendency to attract and hold moisture from its surroundings. Sugars, honey, and invert sugar are hygroscopic, which keeps baked goods moist and extends shelf life. I Icing: Typically made with powdered sugar, butter, and flavor extracts, icing can be spread, drizzled, or piped onto cakes, cookies, and pastries to add flavor and decoration. Icing Comb: An icing comb is a tool with ridged edges that creates textured patterns in frosting or icing on cakes and other baked goods. Immersion Blender: A handheld blender with a blade at the end of a shaft, used to blend or puree directly in the pot or container. Impression Mat: An impression mat is a textured tool used to create decorative patterns or designs on fondant, gum paste, or other pliable cake decorations. Insoluble Fiber: Dietary fiber that does not dissolve in water, such as the bran in whole grains. It adds bulk and coarse texture to baked goods. Instant Yeast: A type of yeast that does not require proofing and can be added directly to the dry ingredients in a recipe. Invert Sugar: A liquid sweetener made by splitting sucrose into equal parts glucose and fructose. It resists crystallization and retains moisture, making it useful in fondants, ice creams, and soft-textured baked goods. Isomalt: Isomalt is a sugar substitute used in baking and confectionery that has a lower glycemic index and is heat-resistant, making it ideal for creating sugar decorations and pulled sugar art. J - Q Baking Terms J Japonaise: A nut-based meringue, usually made with almonds or hazelnuts, baked into crisp layers. It is used as a base or layer in cakes and tortes. Jelly Glaze: A shiny, sweet glaze made from fruit juice, gelatin, and sugar that adds a glossy finish to baked goods and helps seal moisture for a fresh appearance. Jelly Roll Pan: A shallow type of baking pan with raised edges that prevents batters and liquids from spilling over the sides during baking, making it ideal for creating thin, even layers of baked goods. Jimmies: Also known as sprinkles, jimmies are small, rod-shaped confectionery decorations that add color and texture to baked goods. K Kataifi: Kataifi is a type of shredded phyllo dough used in Middle Eastern and Mediterranean cuisines to create delicate, crispy pastries and desserts. It is often wrapped around fillings or shaped into nests before baking, or added as a crunchy ingredient in Dubai chocolate bars. Kitchen Scale: Kitchen scales are tools used to accurately measure ingredients by weight. Knead: Kneading is working and stretching bread dough to develop gluten and create the desired texture in the finished bread. Knock (as in knocking dough): To "knock" dough refers to the process of gently punching down risen dough to release excess gas and redistribute yeast and gluten, ensuring a uniform crumb structure and proper rise during baking. Kosher: A kosher food certification shows that products adhere to Jewish dietary laws and regulations. These laws dictate which foods are permissible and how they must be prepared and consumed, ensuring that the food meets specific religious standards. L Laceration: The scoring or slashing of a dough surface before baking. It controls where the loaf expands and prevents random bursting. Lactic Acid Leaven or Leavener: A type of sourdough starter that relies on lactic acid bacteria for fermentation, resulting in a tangy flavor profile. Laminate: The process of layering butter between sheets of dough and folding it to create flaky, buttery pastries such as croissants. Lard: Rendered pork fat used as a shortening. It produces exceptionally flaky pie crusts and tender baked goods. Lattice: A lattice crust is a decorative pie crust design made by weaving strips of dough over the top of the pie filling, adding visual appeal to the pie and allowing steam to escape during baking. Lean Dough: A dough made with little or no sugar, fat, or eggs, consisting mainly of flour, water, salt, and yeast, producing a crisp crust and chewy crumb. Lecithin: A natural emulsifier found in egg yolks and soybeans that helps bind fat and water. It improves dough texture, extends shelf life, and stabilizes mixtures. Levain: Levain is a pre-ferment made from mixed flour and water. It develops flavor and improves the rise of bread dough. Lipid: A general term for fats, oils, and fat-like substances. In baking, lipids contribute tenderness, flavor, moisture, and shelf life. Live Dough: Dough that is actively fermenting and rising, with yeast still producing gas. It must be handled and timed carefully as it continues to change. M Macerate: To soak fruit in a liquid, typically alcohol or sugar, to enhance flavor and soften the fruit. Maillard Reaction: The Maillard reaction is a chemical reaction between amino acids and reducing sugars that occurs during baking, resulting in the browning and flavor development of bread crust. Maltose: A type of sugar formed during the enzymatic breakdown of starch in flour, which provides food for yeast during fermentation. Marble: A technique where two different colored batters are swirled together to create a marbled appearance in baked goods. Marzipan: Cake decorators use this sweet almond paste to create flower, fruit, or figure embellishments. Meringue: A foam made by whipping egg whites with sugar. It is used in toppings, cookies, and as a leavening or lightening agent. Mirror Glaze: A shiny, reflective glaze, typically made from gelatin, sugar, and chocolate or fruit, poured over chilled or frozen desserts. It creates a smooth, glossy finish. Monosaccharides: The simplest sugars, which cannot be broken down further. Glucose, fructose, and galactose are common examples. Mousse: A light, airy dessert made by folding whipped cream, egg whites, or both into a flavored base. It may be stabilized with gelatin for structure. N Nappe: Nappe is a French culinary term that refers to the consistency of a sauce when it can coat the back of a spoon. In baking, achieving the right nappe consistency is crucial for sauces, custards, and creams. Natural Yeast: Yeast cultivated from the environment, as in a sourdough starter, rather than commercially produced. It ferments more slowly and contributes complex, tangy flavors. Nibs: Crushed pieces of roasted cocoa beans with the husks removed. They are used for chocolate production or as a crunchy, bitter garnish. Nougat: Nougat is a confection made from sugar, honey, nuts, and egg whites. In baking, nougat is often used as a filling or topping for pastries, cakes, and candies. Nutmeg: Nutmeg is a warm, aromatic spice commonly used in baking to add depth of flavor to sweet and savory dishes. O Osmotolerant Yeast: yeast strain that functions well in high-sugar doughs, where regular yeast would be inhibited. It is used in sweet doughs such as brioche and Danish. Oven Spring: The rapid rise of dough during the first several minutes of baking, caused by gas expansion and a final burst of yeast activity. It contributes significantly to final loaf volume. Overcrystallize: To allow sugar to form large, gritty crystals, resulting in a coarse rather than smooth texture. Overproofed: Dough that has fermented too long and exhausted its structure. It collapses easily and results in a flat, coarse-textured, sour product. Oxidation of Dough and Flour: Refers to the exposure of dough or flour to oxygen, causing undesirable changes in flavor, color, and texture. Oxidizers: Ingredients such as ascorbic acid or potassium bromate that help strengthen dough and improve its volume and texture. P Par-Baking: Also known as partial baking, par-baking involves baking a pie crust partially before adding the filling. It is used for pies with fillings that require different baking times than the crust or to ensure a fully cooked bottom crust. Pasteurization: Heating a product to a specific temperature for a set time to destroy harmful microorganisms, and a common food safety step for milk, eggs, and other perishable ingredients. Pastillage: A sugar paste made from confectioners' sugar, gelatin, and cornstarch that dries hard and can be molded. Pastry Flour: A low-protein soft wheat flour that produces tender, delicate baked goods. This flour is used in pie crusts, cookies, biscuits, and some cakes. Pate a Bombe: A mixture of egg yolks whipped with hot sugar syrup until thick, pale, and voluminous. It forms the base for buttercreams, mousses, and frozen desserts. Pate a Choux: A cooked paste dough made from water or milk, butter, flour, and eggs, leavened by steam. Pate Brisee: A type of pastry dough typically made with flour, butter, water, and salt that has a crumbly texture when baked, that complements savory pies and quiches. Pate Sucre: A sweet pastry dough that contains sugar, butter, flour, and sometimes eggs, resulting in a tender and slightly sweet crust which complements desserts like tarts and fruit pies. Patent Flour: A type of refined white flour with a high protein content, ideal for making bread with a strong structure and good volume. Petal Dust: petal dust is a finely ground, edible powder that cake decorators use to add color and shading to sugar flowers and other cake embellishments. Petit Fours: Small, bite-sized pastries or cakes, often decorated elaborately. They are served as desserts or with coffee and tea, and work well for catering and banquet service. Phyllo Dough: Commonly used in Mediterranean and Middle Eastern cuisines, phyllo dough is a thin and delicate pastry dough made by rolling out paper-thin sheets of dough and layering them with butter or oil to create a flaky texture. Piping: Piping is the technique of using a piping bag and various piping tips to apply frosting, icing, or other decorative elements onto a cake. Poaching: Cooking food gently in liquid held below a simmer, typically 160 to 180 degrees Fahrenheit, commonly used for fruit, eggs, and custards where delicate texture matters. Polysaccharides: Complex carbohydrates made of many sugar molecules linked together, such as starch, cellulose, and pectin. They serve as thickeners, structure builders, and dietary fiber. Pots de Creme: Individual baked custards, usually chocolate or vanilla, cooked gently in a water bath. They have a rich, silky, dense texture and are served in small cups or ramekins. Praline: A confection of caramelized sugar cooked with nuts, typically almonds or hazelnuts, then cooled and often ground into a paste. Preferments: A portion of dough or batter, such as a poolish, biga, or sourdough starter, fermented in advance and added to the final dough, that improves flavor, extensibility, and shelf life. Primary Fermentation: The first stage of fermentation, occurring after mixing and before shaping. It develops flavor, gas, and gluten strength in the dough. Proofing: Proofing is bread dough's final rise before baking, allowing the yeast to ferment and the dough to develop flavor and structure. Puff Pastry: A light and flaky pastry dough made by layering butter between thin sheets of dough. When baked, the butter creates steam, causing the layers to puff up and create a delicate, crispy texture. Pulled Sugar: A technique where sugar is heated and stretched to create delicate, intricate cake decorations. Q Quenelle: A quenelle is a classic French culinary technique that shapes soft foods such as ice cream, mousse, or whipped cream into an oval or egg-like shape. Quick Bread: Quick breads are baked goods that leaven without yeast. They use chemical leaveners such as baking powder or baking soda to raise the dough or batter. Quick Mix Method: Combining both wet and dry ingredients at once. R - Z Baking Terms R Rapid Rise Yeast: A type of yeast specially formulated to shorten the rising time of bread dough, making it ideal for quick bread recipes. Red Wheat: Wheat with a reddish-brown bran color, typically higher in protein and more robust in flavor. This is the most common type used for bread flour and whole wheat products. Reduction: Simmering or boiling a liquid to evaporate water, concentrating its flavor and thickening its consistency. Retarding: Slowing fermentation by holding dough at refrigerated temperatures, typically 36 to 40 degrees Fahrenheit, to develop deeper flavor and give operators scheduling flexibility. Rough Puff Pastry: Rough puff pastry is a simplified version of traditional puff pastry that requires less time and effort to make. It involves layering butter and dough, then folding and rolling the dough multiple times to create flaky, buttery layers in the final baked product. Roulade: A type of cake made by rolling a thin layer of sponge cake or genoise with a filling, often served sliced to showcase the spiral pattern. Royal Icing: A hard, white icing made from egg whites and powdered sugar, commonly used for intricate decorations and piping on cakes. Rubbing: Also known as cutting in fat, this is the process of working solid fat into flour with fingertips or a mixer until it forms small, flour-coated pieces to create a flaky texture. Ruffles: Layers of fondant or frosting that are gathered and pleated to create a textured, ruffled effect on cakes. Rye Flour: Flour milled from rye grain, low in gluten-forming proteins and high in pentosans that produces dense, moist breads with a distinctive, earthy flavor. S Sabayon: A light, frothy sauce or custard made by whisking egg yolks with sugar and wine or liqueur over gentle heat, which can be served warm as a sauce or folded into other recipes. Sable Dough: Sable dough, pronounced sah-BLAY, is a rich and crumbly pastry dough made with butter, sugar, flour, and sometimes egg yolks, resulting in a tender, buttery texture often used for making cookies and tart crusts. Scald: To heat a liquid, usually milk, to just below boiling, when small bubbles form around the edge. This process was traditionally used to kill bacteria and deactivate enzymes that interfere with gluten and gelling. Score or Scoring: The act of slashing the surface of bread dough before baking, allowing for controlled expansion and a decorative crust pattern. Semolina: Semolina is a coarse durum wheat flour used in breadmaking to add texture and flavor to bread dough. Sherbet: A frozen dessert made from fruit juice or puree, sugar, and a small amount of dairy, typically 1 to 2% milkfat. It is creamier than sorbet but lighter than ice cream. Short Crust Pastry: A versatile pastry dough made with flour, butter, and water, resulting in a crumbly and tender crust commonly used for sweet and savory dishes. Shortening: Shortening is a fat used in baking to tenderize the crumb of bread and pastries, often in the form of vegetable shortening or butter. Sifting: The process of passing flour through a sieve to aerate it and remove any lumps, resulting in a lighter and more consistent texture in baked goods. Simple Syrup: A basic solution of equal parts sugar and water, heated until the sugar dissolves. Soft Wheat: Wheat with lower protein content that produces weaker gluten, which is milled into cake and pastry flours for tender, delicate baked goods. Soluble Fiber: Dietary fiber that dissolves in water and forms a gel, found in oats, fruits, and some seeds, which can increase moisture retention and thicken batters. Sorbet: A frozen dessert of fruit puree or juice and sugar, made without dairy. It has a light, refreshing texture and is often used as a palate cleanser. Souffle: A light, airy baked or chilled dish made by folding whipped egg whites into a flavored base. The whites expand when heated, causing it to rise dramatically. Spring Wheat: Wheat planted in spring and harvested in late summer, generally high in protein, which is a primary source of bread flour. Starch: A polysaccharide stored in plants that gelatinizes when heated with liquid. It thickens sauces and fillings, and provides structure in baked goods. Steaming: Cooking food with the moist heat of steam rather than direct contact with water. In baking, steam injection early in the bake keeps the crust flexible for better oven spring and a crisp, glossy finish. Stretch and Fold: A technique used during bread dough fermentation to strengthen gluten and improve dough structure by stretching each side of the dough and then folding it over itself toward the center. Sucralose: A non-nutritive artificial sweetener about 600 times sweeter than sugar. Sucralose is heat-stable, but lacks the bulk, browning, and structural properties of traditional sugar. Sucrose: Common table sugar, and the primary sweetener in baking. Sugar Bloom: A dry, powdery white coating on chocolate caused by moisture dissolving surface sugar, which recrystallizes when it dries. It results from humidity or condensation, typically from improper storage. Sugar Flowers: Intricate floral decorations made from sugar paste or gum paste to adorn cakes. Swiss Dots: Small, evenly spaced dots or circles piped onto cakes to create a classic and elegant design. T Tare Weight: Tare weight is the weight of a container or vessel deducted from the total weight to determine the net weight of ingredients. Temper: To gradually raise the temperature of a mixture by adding a hot liquid to prevent curdling or seizing; bakers typically temper chocolate or eggs. Triglycerides: The main chemical structure of fats and oils, consisting of three fatty acids attached to a glycerol molecule. The mix of fatty acids determines whether a fat is solid or liquid at room temperature. Tube Pan: A baking pan with a hollow tube in the center, designed to promote even baking and heat distribution in cakes like angel food and chiffon cakes. Tunneling: Long, irregular holes running through a baked product, typically caused by overmixing or overdeveloped gluten. Turn: Folding dough onto itself during lamination or bulk fermentation. In laminated dough, turns build layers, while in bread dough they strengthen gluten and redistribute temperature. U Ube: A purple yam commonly used in Filipino cuisine, ube is used in baking to add a unique flavor and vibrant, natural color to desserts. Ultrapasteurization: Heating dairy to at least 280 degrees Fahrenheit for two seconds or more, well above standard pasteurization. It extends refrigerated shelf life significantly, but can slightly affect flavor and whipping performance. Underproofed: Dough that has not fermented long enough before baking. The result is a dense, tight crumb, poor volume, and a tendency to burst or tear. Unleavened: Bread made without a leavening agent, so the product doesn't rise. Common examples include flatbreads and crackers. Unsweetened Chocolate: Unsweetened chocolate, also known as baking chocolate, is pure chocolate liquor made from cocoa beans. It contains no added sugar and is commonly used in baking to add a rich, intense chocolate flavor to recipes. V Vents: Small slits or holes cut into the top crust of a pie to allow steam to escape during baking, preventing the filling from bubbling over and ensuring the crust remains crisp and flaky. Vital Wheat Gluten: A concentrated form of gluten protein added to bread dough to improve its elasticity and rise, particularly in low-protein flours. Vol-au-Vent: A puff pastry shell that is typically filled with savory ingredients like chicken, seafood, or vegetables and is known for its light and flaky texture. Volume: The amount of space a finished product occupies, or a measure by capacity rather than weight. W Water Bath: A method of baking or cooking in which a container is placed in a larger pan of hot water. The gentle, even heat prevents curdling and cracking in custards and cheesecakes. Wheat Flour: Flour milled from wheat kernels, the most common flour in baking. Its gluten-forming proteins provide structure, and its type varies by wheat variety and milling. Whey: The liquid that separates from milk during cheesemaking or curdling. It is high in protein and is used in some baked goods as a dough enhancer or milk replacement. Whip: Whipping ingredients means beating them rapidly, incorporating air, and increasing volume. It is commonly used in recipes for whipped cream, meringues, and frostings to achieve a light and airy texture. Whisk: A whisk is a kitchen tool used for blending, whipping, and beating ingredients together. Whisks come in various shapes and sizes, with wire loops that efficiently incorporate air into batters and mixtures. Whole Grain Flour: Flour that contains all three parts of the grain. It is more nutritious than refined flour but has a shorter shelf life due to its fat content. Whole Wheat Flour: Flour milled from the entire wheat kernel, including the bran, germ, and endosperm, producing denser, nuttier baked goods with more fiber. Wild Yeast: Naturally occurring yeast found in the air, on grains, and on fruit that ferments dough without commercial yeast. It is the basis for sourdough starters. Winter Wheat: Wheat planted in fall, dormant through winter, and harvested in early summer. Winter wheat ranges from soft to hard and is used in many all-purpose and pastry flours. Work Surface: The work surface in a bakery refers to the countertop or table where baking tasks are performed. X Xanthan Gum: Xanthan gum is a thickening agent and stabilizer. It helps improve the texture and shelf life of baked goods, making them more elastic and less crumbly. Xerophyte: A xerophyte is a plant that has adapted to survive in dry conditions, making it ideal for use in recipes that require a drier environment. Xerophytes are often used to create unique flavors and textures in bread and pastries. Xylanase: An enzyme commonly used in baking to break down xylan, a complex sugar found in plant cell walls, resulting in a lighter and fluffier texture in the finished product. Y Yeast: A microorganism that ferments sugars in bread dough, producing carbon dioxide gas that causes the dough to rise and develop flavor. Yeast Nutrient: A supplement used in baking to provide essential nutrients for yeast growth and fermentation, yeast nutrient helps improve the overall performance of yeast, especially in high-sugar or low-nutrient doughs. Yeast Water: A natural leavening agent made by fermenting fruits or vegetables with water and sugar that can be used in place of commercial yeast to add flavor and complexity to bread and other baked goods. Z 0-0 Flour: Also known as double zero flour, this finely ground flour is often used in Italian baking for making pasta dough and pizza. Zest: Zest refers to the outer colored portion of citrus fruit peel, which adds flavor to baked goods. Only grate the colored portion of the peel, because the white pith underneath can be bitter. Now that you know essential baking terms, you can confidently navigate any bakery recipe or kitchen conversation. Take your baking skills to the next level by putting your knowledge of these terms into practice. Whether you’re baking fresh sourdough loaves or artisanal French pastries, challenge yourself with the more complex techniques described and see the difference they make in the quality of your baked goods. For more food and beverage terminology knowledge, check out our bartending terms glossary and baking terms glossary. <!-- Start Author Bio Block --> Written by Corrinn McCauley Corrinn loves writing, researching, and cooking, so she’s grateful she’s gotten to blend these three passions as a longform writer on the content team at WebstaurantStore for 5 years and counting. Creating resources that help operators succeed and lacing them with entertainment to make them smile is her "why". Learn more about this author and WebstaurantStore's Content Writing Team here! <!-- End Author Bio Block -->