How to Froth Milk
Last updated on Feb 9, 2026Janine JonesFrothing milk is a fundamental skill in the world of commercial beverage preparation. Whether you're a barista crafting specialty coffees or a chef adding a touch of elegance to your dessert creations, knowing how to froth milk properly can elevate the taste and presentation of your menu options. From milk steamers to blenders, there are various ways to achieve that foamy milk layer. We’ll teach you the best ways to froth milk and what you can do in a pinch with tools that may already be in your kitchen.
How to Froth Milk with a Frother
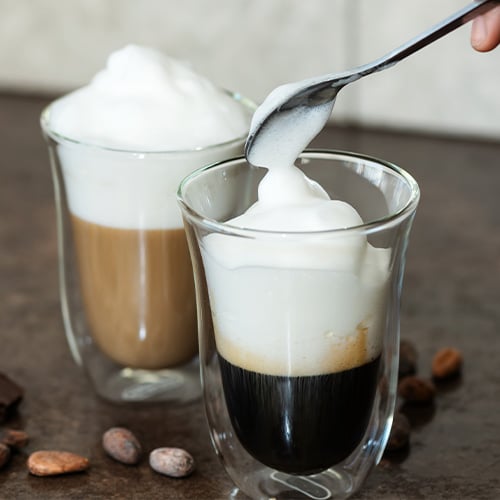
Frothed milk adds a creamy texture and a luxurious mouthfeel that can enhance the overall drinking experience for your customers. The two most popular frothing tools you can use in your cafe are milk steamers, which are often attached to espresso machines, or handheld frothers. Both provide that desirable foam in seconds with minimal effort.
How to Froth Milk with a Steamer
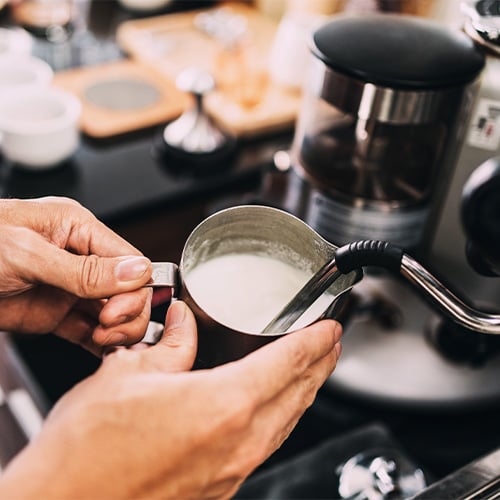
In a high-volume commercial cafe, the steamer is the most reliable tool for achieving velvety microfoam for beverage orders. It simultaneously heats the milk while incorporating air for a consistent texture every time. Follow these steps to froth milk with a commercial milk steamer:
- Fill the pitcher: Start by filling a stainless steel pitcher with the desired amount of cold milk. Use whole milk for a creamier texture or non-dairy milk alternatives like almond or oat milk for a plant-based option.
- Purge the steam wand: Before frothing the milk, purge the steam wand to remove any condensation or water that may be trapped inside. This ensures a clean and uncontaminated frothing process.
- Position the steam wand: Place the steam wand of the espresso machine just below the surface of the milk, ensuring that it is fully submerged to create a whirlpool effect.
- Froth the milk: Turn on the steam wand and position it at a 45-degree angle to create a vortex in the milk. This motion helps incorporate air into the milk as it heats it, resulting in a creamy and frothy texture.
- Texture the milk: As the milk froths, adjust the steam wand to control the amount of air being incorporated. For a latte, aim for a velvety microfoam with small bubbles by frothing for about 20 seconds. A cappuccino may require a thicker, denser foam and frothing for about 45 seconds.
- Finish frothing: Once the milk reaches the desired temperature and texture, turn off the steam wand and remove the pitcher from the machine. Give it a quick tap on the counter to remove any large bubbles and swirl the milk to further incorporate the foam.
- Pour and serve: Pour the frothed milk into your espresso shot to create a beautifully layered coffee beverage. Experiment with different pouring techniques to achieve latte art or simply enjoy the rich and creamy texture of your frothed milk.
How to Froth Milk with a Handheld Frother
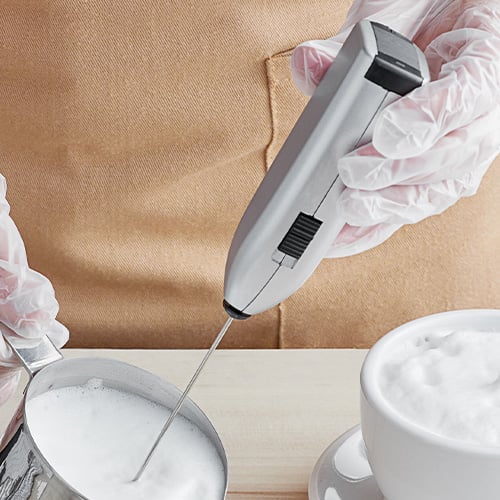
A handheld milk frother, also known as a milk frothing wand, is a compact and versatile tool designed to create rich and creamy milk foam. These frothers typically consist of a whisk-like attachment that rapidly aerates the milk, resulting in a light and frothy texture. Handheld milk frothers are easy to use, portable, and perfect for small-scale operations, providing a convenient solution for achieving professional-quality frothed milk. Use the following steps to effectively froth milk with a handheld milk frother:
- Heat the milk: Start by warming milk using a steam wand, stove top, or microwave. The ideal temperature for frothing milk is between 140 and 160 degrees Fahrenheit.
- Froth the milk: Insert the whisk attachment of the handheld milk frother into the pitcher at a slight angle. Turn on the handheld milk frother and start frothing the milk by moving the whisk up and down in a slow and steady motion to create a whirlpool effect. Avoid frothing too vigorously, as it may cause the milk to spill out of the pitcher.
- Check the texture: Continue frothing the milk until you achieve the desired frothiness and texture. The frothed milk should have a velvety consistency with small bubbles on top.
- Remove the whisk: Once the milk is frothed to your liking, turn off the handheld milk frother and remove the whisk attachment from the pitcher.
- Pour and enjoy: Pour the frothed milk into your beverage of choice, such as espresso or hot chocolate, and enjoy a delicious and creamy drink.
How to Froth Milk Without a Frother
In the absence of a milk frother, there are several ways to create milk foam with tools you may already have in your kitchen. From mason jars to blenders, we’ll teach you simple ways to create milk foam for your beverage menu.
1. Mason Jar
A staple in most kitchens, mason jars provide a quick and easy way to froth milk without any additional tools. This method is perfect for individual portion sizes. Here's a step-by-step guide on how to froth milk with a mason jar:
- Heat the milk: Start by heating the milk for the best frothing results. Using milk with a higher fat content helps create a creamier foam.
- Pour the milk: Pour the heated milk into a clean mason jar, filling it no more than halfway to allow room for the frothing process.
- Secure the Lid: Tightly seal the lid on the mason jar to prevent any spills during the frothing process.
- Shake the jar: Hold the mason jar and shake it vigorously for about 30-60 seconds. The shaking motion creates air bubbles in the milk, resulting in a frothy texture.
- Serve: Once the milk is frothed to your liking, carefully remove the lid and pour the frothed milk into your coffee or desired beverage.
2. Whisk
Frothing milk with a whisk is a simple and effective method for preparing milk foam in larger batches. Here's how to froth milk with a whisk:
- Heat the milk: Start by heating the milk on a stove top, taking care not to scald the milk.
- Whisk vigorously: Once the milk is heated, remove it from the heat and pour it into a heatproof container. Using a whisk, vigorously whisk the milk in a back-and-forth motion. This action helps incorporate air into the milk, creating froth.
- Check the texture: Keep whisking the milk until you achieve the desired level of frothiness. The more you whisk, the foamier and creamier the froth will become.
- Pour and serve: Once you have frothed the milk to your liking, carefully pour it into your coffee or other beverage.
3. Hand Mixer
Use a hand mixer to take out the manual labor of making milk foam without a frother. Follow these steps to achieve the perfect froth using a hand mixer:
- Heat the Milk: Start by heating the milk to your desired temperature. Avoid boiling the milk as it can affect the texture of the foam.
- Choose the right container: Transfer the milk to a heatproof container with high sides to prevent splattering and splashing while frothing the milk.
- Froth the milk: Place the hand mixer into the container with the heated milk. Turn on the mixer to its lowest setting. Slowly move the mixer around in the milk to create foam.
- Adjust the speed: Increase the speed of the hand mixer as you go. For light foam, keep the speed low. For a denser foam, increase the speed slightly.
- Pour and Enjoy: Once you have achieved the perfect froth, pour it over your favorite espresso or coffee to create a delicious and visually appealing drink.
4. Blender
Contain the mess of frothing milk while preparing large batches by using a blender. Whether you're making lattes, cappuccinos, or hot chocolates, a blender can quickly froth milk to the perfect consistency. Here's how to froth milk with a blender:
- Heat the milk: Start by heating the milk to your desired temperature.
- Pour the milk into the blender: Pour the heated milk into the blender. Make sure not to fill the blender more than halfway to allow room for the milk to expand as it froths.
- Secure the lid: Secure the blender lid tightly to prevent any spills or splatters during the frothing process.
- Blend on high speed: Turn the blender on to the highest setting and blend the milk for about 15-20 seconds. The high speed will create the agitation needed to froth the milk and incorporate air into it.
- Check the consistency: Stop blending once the milk reaches your desired frothiness. The milk should have a velvety texture with a thick layer of foam on top.
- Serve Immediately: Once the milk is frothed, it is ready to use in your beverage of choice.
5. French Press
A french press is a great option to froth milk in your cafe. The plunger tool can be used to incorporate air and create a velvety foam for your drinks. Use the following directions to learn how to froth milk with a french press:
- Heat the milk: Microwave or heat cold milk in a saucepan.
- Pour the milk into the french press: Once the milk is heated, pour it into the french press, filling it no more than halfway to allow room for frothing.
- Pump the plunger: With the lid on the french press, pump the plunger up and down vigorously for about 30 seconds. This action will create a frothy texture in the milk.
- Hold the plunger down: Once you've achieved the desired frothiness, hold the plunger down to keep the foam separate from the milk.
- Pour and enjoy: Carefully pour the frothed milk into your coffee or beverage of choice and enjoy.
Best Milk for Frothing
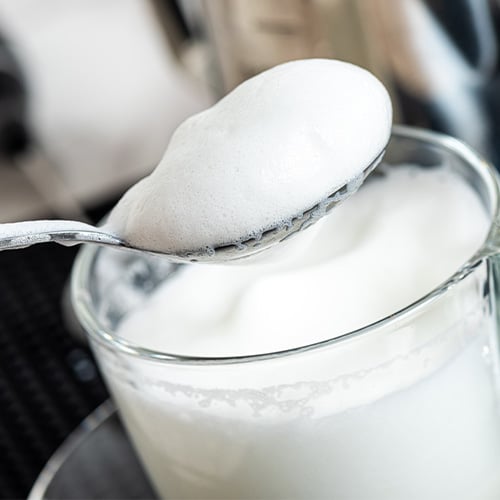
Different types of milk have varying fat content, protein levels, and sugar content, all of which can impact the frothing process and the quality of the foam produced. Below are some of the best types of milk for frothing:
- Whole Milk: Whole milk, with its higher fat content (around 3.25%), is often the preferred choice for frothing. The fat in whole milk helps create a rich and creamy foam that holds its shape well. The higher fat content also contributes to a smoother texture and a more luxurious mouthfeel in the final beverage.
- 2% Milk: 2% milk, which contains about 2% fat, is another popular option for frothing. It strikes a good balance between richness and lightness, producing a foam that is creamy without being overly heavy.
- Non-Dairy Milk Alternatives: For customers with dietary restrictions or preferences, non-dairy milk alternatives such as almond milk, soy milk, oat milk, or coconut milk can be used for frothing. These alternatives often have lower fat content than dairy milk, so it may be necessary to experiment with different brands and types to find one that froths well and produces a satisfying foam.
- Skim Milk: While skim milk may produce a foam that is lighter and less creamy than whole milk, it can still yield satisfactory results when frothed properly.
Mastering the art of frothing milk is a valuable skill for any barista or coffee enthusiast looking to elevate their coffee creations. There are various methods and tools available to froth milk, allowing you to add that perfect finishing touch to your comforting warm beverages and delicious dessert options that will have your customers coming back for more.