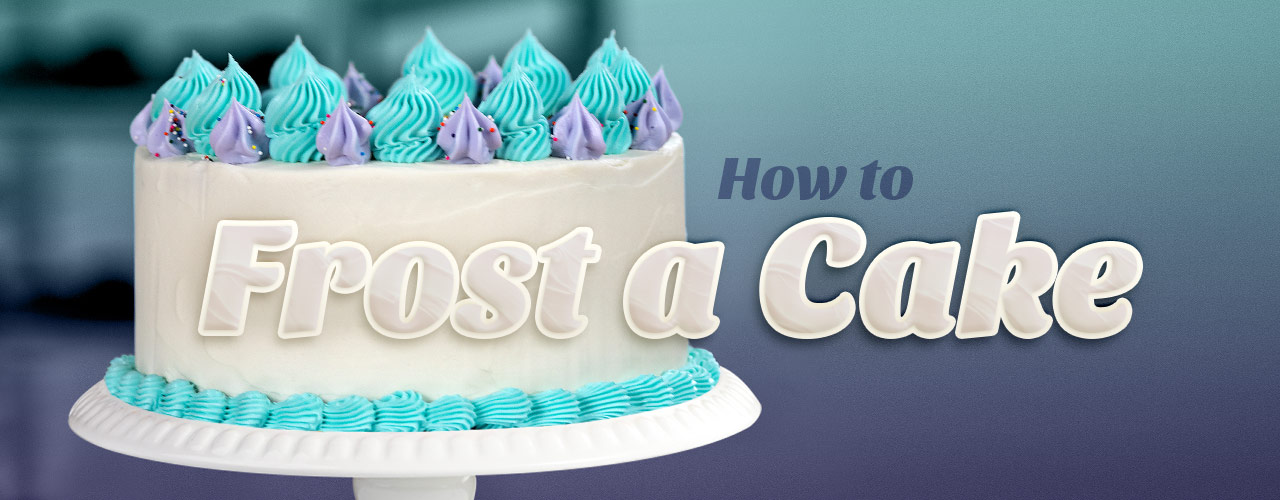
If you are planning to start a bakery, knowing how to ice a cake is an essential part of the business. We’ll show you a few frosting tips to help you achieve smooth and clean sides on your cakes for a professional-looking final product. Learning how to frost a layer cake helps you to create a strong foundation for any celebration, from weddings and graduations to birthdays and baby showers.
Shop All Cake Decorating SuppliesHow to Frost a Cake Video
Learn how to professionally frost a cake by watching our video below:
Cake Decorating Tools
In order to learn how to ice a cake smoothly, you’ll want to start by stocking up on the proper tools. Ranging from a turntable to different types of spatulas, here’s are some cake frosting tools we recommend to help you get started:
- Cake board or cake circle
- Cake turntable
- Cake leveler or serrated knife
- Straight baking spatula
- Offset baking spatula
- Cake scraper or bowl scraper
If you don’t have access to a cake turntable, it’s possible to make your own. This can be done by turning a mixing bowl upside down and placing a plate or an upside-down cake pan that fits the diameter of your cake on top.
How to Decorate a Cake Like a Professional
Use our easy-to-follow instructions to learn how to frost a cake like a professional:
1. Trim the Cake
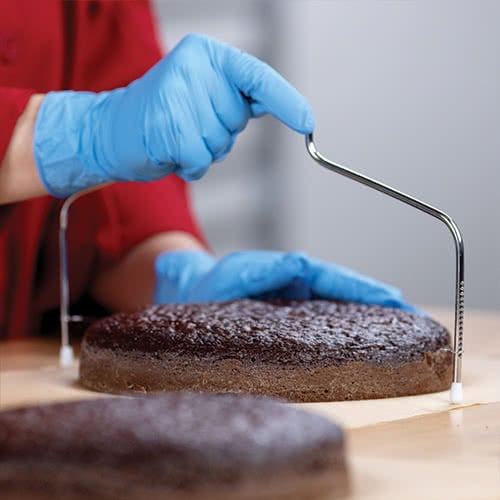
- Completely cool each tier before you start working with your cake.
- Start by using the cake leveler or serrated knife to cut off the slightly domed top of your sponges.
- Use your cake board as a template and trim off the browned edges around your sponge.
Tip: Place a piece of parchment under each sponge to make them easier to lift and maneuver. You can use the scraps of the cake to make cake pops afterwards.
2. Stack the Cake
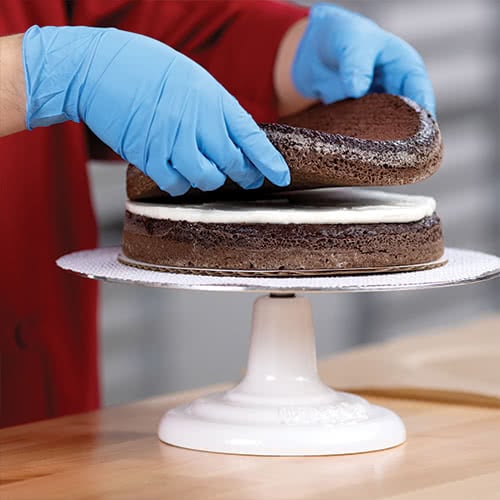
- Start by adding a dollop of icing onto the center of your cake board or plate and slightly spread it around. This keeps the cake sponge from sliding around while you work with it.
- Place the first sponge onto the center of your cake board.
- Using a piping bag, pipe a swirl of icing along the top of your first cake tier.
- Use your offset spatula to evenly smooth out the icing. You can add any additional fillings at this time.
- Set the next layer of sponge directly even with the layer of sponge below it.
- Repeat the icing and stacking steps until you have reached the top tier of the cake. Do not ice the top of the final sponge yet.
Tip: Consider placing a few strips of parchment paper under the edges of your cake. This makes it easier to remove excess icing and keep your cake clean and presentable.
3. Add the Crumb Coat
Follow these steps to learn how to crumb coat a cake:
- Spread a layer of frosting over the sides of the cake using a straight spatula. The icing layer does not have to be thick. You should be icing on the opposite side of the cake from the hand you are using.
- Spin the turntable with your free hand to reach each side of the cake instead of maneuvering yourself around the cake.
- Once the sides are covered, use the offset spatula to spread frosting over the top of the cake. Sweep the excess frosting towards the center of the cake to create a clean edge.
- Chill the cake in the refrigerator for about 30 to 60 minutes.
Tip: If you want to achieve a naked cake look, you can stop at this step.
What Is a Crumb Coat?
A crumb coat is a light layer of icing that forms a barrier between the sponge’s surface and the final coat of icing. It ensures that crumbs stay out of the outer layer of frosting so that the finished product is smooth and without blemishes.
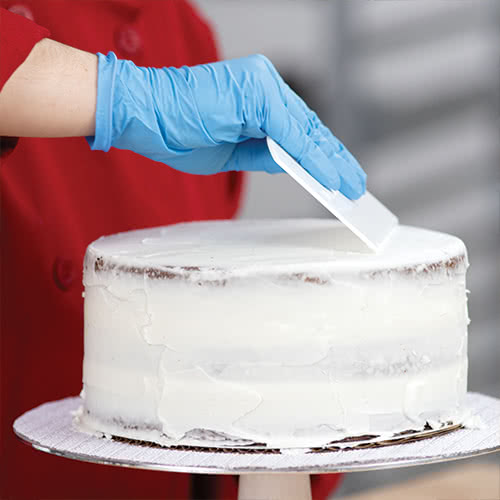
4. Frost Your Cake

- Spread a thick layer of buttercream icing over the sides of your cake, approximately 1 centimeter in thickness, using a straight spatula. Don’t worry about it being perfectly smooth at this stage.
- Angle the cake scraper at 90 degrees to the cake and sweep the scraper across the surface by spinning the turntable. This allows you to evenly distribute the buttercream icing. As the icing spreads, you’ll see some excess building on the front of the scraper. Simply return the excess to your icing bowl.
- Add a dollop of icing to the top of your cake and spread it evenly across the top with your offset spatula.
- Using the cake scraper, sweep the excess from the edges towards the center of the cake to create a smooth surface.
Tip: Be sure to not lift your spatula or scraper directly off the cake to keep from peeling off the crumb coat. Sweep the spatula over the surface of the cake and angle it off instead of lifting away.
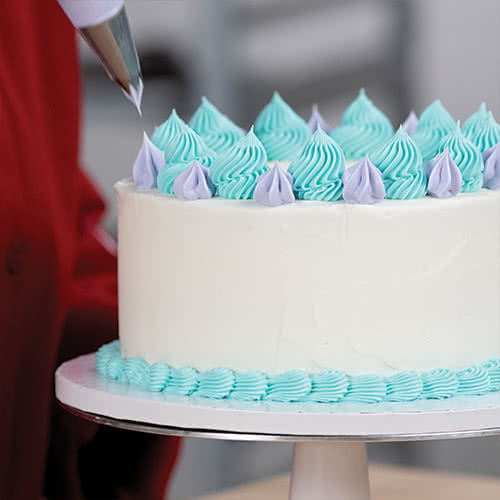
5. Add Final Decorations to the Cake
Once your cake has been frosted smoothly, it should be ready for further decorations. You can now add some piped buttercream roses or writing to the top of the cake to customize it to your customers’ liking.
Cake Decorating Tips and Tricks
Learning how to decorate a cake with icing is an essential skill for any baker. Here are a few more tips to keep in mind to improve your cake-making efficiency and ensure that your cakes look professional every time.
Reduce Cake Doming
Cake doming is usually caused by baking at temperatures that are too high for the batter. Use an oven thermometer to ensure that your oven is reaching the desired temperature of your recipe. You can also use a wet cake strip around your cake pan to keep the outside of your cake from cooking too quickly.
Easily Coat Your Cake
You may want to decorate the sides of your cake with baking toppings, like sprinkles, nuts, red velvet crumbs, etc. To do so, hold a bowl under the edge of your cake and pat a handful of your decorations onto the side of your cake, allowing the excess to fall into the bowl below.
Practice Your Piping
Piping words onto a cake can be challenging! Before you add your message to the cake, practice your piping on a piece of paper by testing out different types of pastry bags and piping tips. Once you’re comfortable piping your message, outline your message on the cake with a toothpick and follow the outline to create a neat and legible final product.
Once you frost your cake and decorate it, cut the cake for your guests and serve! You’ll be preparing showstopping cakes in no time after implementing some of these tips and tricks!