How to Customize Products at WebstaurantStore
Last updated on 1/2/2020Boost your brand recognition and customer base by adding customizable supplies throughout your establishment! Whether you’re outfitting your staff in personalized aprons or adding your logo to a custom coffee sleeve, customized products can provide an eye-catching and professional source of marketing for your business.
We offer an easy-to-use customization tool so you can design a full inventory of personalized supplies! Read on to find out how you can customize products right here at WebstaurantStore.
Product Customization Video Tutorial
How to Use the WebstaurantStore Customization Tool
Easily design a wide variety of custom printed restaurant supplies by following these simple steps to navigate through our customization tool!
Shop All Customizable Supplies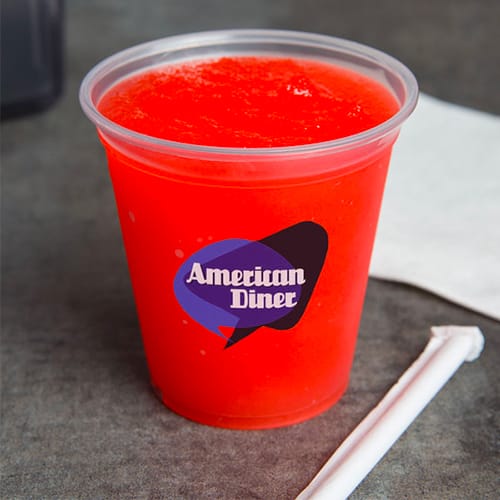
1. Accessing Customizable Supplies
- From the Homepage - Scroll down on the homepage and you will find a purple button on the right hand side that reads “Make It Personal With Customizable Supplies”. This will take you to all of the eligible customizable products. See Step 2 for your next step.
- From a Product Page - If a product is customizable, you will see a large red or purple button below the price that says “Customize & Add to Cart”. This will take you to the customization tool for that specific product. You can jump to Step 3 from here.
2. Select a Product to Customize
If you navigated to the customizable products from the homepage, you will then need to take the following steps:
- Select the type of items you would like to customize from the eligible categories.
- Select the specific item by using the dropdowns on the following page from the variations available.
3. Check the Design Considerations
The Design Considerations will have important instructions that pertain to the customization of the product you are interested in. Find essential details, such as the following:
- Maximum Printing Area
- Color Fees and Restrictions
- Plate Charges
- Required File Resolution
4. Explore the Customization Types
Once you’re familiar with the Design Considerations of your product, you are ready to move forward to selecting a customization type. The customization tool will show you what you can add to the product! Your options may include the following depending on the product:
- Image/Logo
- Text
- Both
5. Identifying the Available Product Regions
The available regions for customization will be listed below the Image/Logo section. For example, your logo may be able to wrap around a customizable foam cups, or you may be given the option to customize the left chest, right chest, and right shoulder of a chef coat.
6. Upload Your Images
Once you know how many images you can use and where you can place them, it's time to begin uploading your image files. Here are some important tips to keep in mind for selecting your images.
- Only one file can be uploaded per region.
- Select the file type that is listed in the Design Considerations for that product. Although the tool can accept file types such as .png, .jpg, .gif, .eps, .pdf, and .ai, the manufacturer may need a specific file type to proceed with your customization.
- Adjust the placement and size of your image to ensure you get the proper amount of coverage that you desire.
7. Inspect the 3D Rendering
The 3D rendering on the right side of the page will update as you upload images to the regions in the tool. This can help provide you with an idea of what the final product may look like. This is how you can toggle your 3D rendering to see it from all angles:
- Spin the image by left clicking
- Move the image by right clicking
- Zoom in to the image by scrolling
8. Check Different Product Options
You can easily try out your logo on different products within the same category by using the Product Options dropdown above the 3D rendering. The 3D rendering will automatically update as you toggle through the available options. These options will typically feature product variations and availability for the following:
- Sizes
- Colors
- Materials
Before you can move onto the next step, be sure that all other dropdowns in the tool are filled out with your preferences.
9. Review the Pricing
When you are satisfied with the 3D rendering, click the green button that reads “Get Pricing”. On this page, you’ll be able to do the following:
- Leave a note for Customer Solutions about your order if needed
- Check the pricing discounts you can receive based on the quantity of items you select
- Review the minimum quantities for the order
- Select a quantity for your purchase
- See your subtotal
- Add the purchase to your cart
10. Checkout
Once you hit the “Add to Cart”, you'll be led to the Cart page to proceed through the checkout process as usual.
What to Expect After You Place Your Custom Order With WebstaurantStore
Once you hit the “Complete Checkout” button for your customization order, here is what you can expect:
- You’ll receive your order confirmation email.
- The Customizable Team will review your order and email you to either confirm the uploaded artwork or request new artwork. Additionally, they will provide the estimated lead times for the proof process and production.
- Once the artwork is confirmed, the Customizable Team will request a proof of your custom product from the manufacturer.
- The manufacturer will provide a proof of the item with your customizations and request your approval; occasionally a signature is required.
- Once your approval is received, the manufacturer will begin production of your order.
- Your order will ship to you!
Customization FAQs
We addressed some of the more frequently asked questions regarding the customization process to help make your experience go smoothly.
Will I Be Able to See a Sample of My Customized Product?
The manufacturer will send you a proof PDF via email of your customized product for your approval. Cambro is currently the only one of our manufacturers that will send a physical sample before production.
When Will I See the Price And/Or Quantity Minimum?
The pricing and quantity minimums will be visible through the “Get Price” button after you have uploaded your image into the customization tool. This is because the pricing can be impacted by the options you select while designing your custom product.
I’m Having Trouble Uploading an Image. What Should I Do?
If the customization tool isn’t taking the image file you are trying to use, you may upload any image that is in a JPG, PNG, or Tiff format. The Customizable Team will then contact you after the order is placed to request the file in the proper format and resolution. You may leave a comment for Customer Solutions during the checkout process notifying them of the file issue.
I Want to Reorder, but I Can’t Add the Item to My Cart?
If you are looking to reorder a previously placed customizable purchase, just email us at [email protected]. Let us know the quantity you are looking for and the Customizable Team will be able to send you a quote to add to your cart during checkout.
How Long Will the Custom Order Take to Make?
Lead times for custom orders can vary depending on the item and manufacturer. Contact Customer Solutions through our chat system for an estimate on proof lead times and production lead times before placing your order.
Can I Expedite My Custom Order?
Custom items cannot be expedited since they are made to order.
What If I Get the Proof and I Change My Mind? Can I Cancel the Order?
If you don’t love your proof, you may cancel the order at this point. However, some products will still have a sample fee or proof fee that is non-refundable. You will receive an email from the Customizable Team after the order is placed to approve any additional fees before moving forward to the proof process.
How Can I Get My Image into the Accepted Format?
The final image for the customization will need to be in Vector format. If you are working with a designer, they should be able to convert the file for you. Vector converters and instructions are available online and may vary depending on the image program you are using.
How Many Colors Can I Use in My Custom Image?
The number of colors you can use in a customization depends on the product you choose. The color limit will be clearly listed in the Design Considerations for that product.
I Am a Plus Customer; Why Am I Being Charged Shipping?
Each new customization order will have a shipping cost even for WebstaurantPlus accounts due to the time and effort they take to get set up with the manufacturer. However, each reorder you place for your custom purchase will have free shipping since it is already established in their system!
Adding custom products to your establishment is a simple marketing strategy to build your restaurant branding and create recognition for your business! By familiarizing your customers with your logo or slogan through custom restaurant supplies, you can encourage impulse sales and enhance brand loyalty among customers.