Food ServiceResources


Recently Published
How to Temper Chocolate
If you are looking to elevate the dessert offerings served out of your commercial kitchen, mastering the art of tempering chocolate is a must. By carefully controlling the temperature of melted chocolate, you can achieve a shiny finish, that classic snap, and a longer shelf life for your chocolate c
Blender Parts and Accessories Guide
In the fast-paced environment of a bar or foodservice establishment, being familiar with the common replacement parts and accessories for your commercial blender can make a significant difference in the efficiency of your operations. When you know what to look for, you can inspect your unit regularl
Types of Air Conditoners
Air conditioners are essential components in various commercial settings, providing comfort and temperature control for employees, customers, and equipment. Understanding the different types of air conditioners available is crucial for businesses looking to invest in a cooling system that meets thei
Recent Blog Posts View Blogs

How to Cut Green Onions
From soups and salads to stir-fries and garnishes, green onions add a fresh and vibrant flavor to many recipes. While cutting green onions may seem like a simple task, there are several factors that you should take into account to ensure that you achieve the desired results. We'll walk you through the proper way to cut green onions below. How to Cut Green Onions Video Watch the video below for a step-by-step breakdown of the different ways to cut green onions: What Are Green Onions? Green onions, also known as scallions, are young onions harvested before they fully mature. As a result, they have an underdeveloped bulb and long, green leaves. One of the defining characteristics of green onions is their mild flavor compared to other types of onions. Their taste is less pungent and sharp, and they can be used for a wide range of culinary applications. Green onions enhance the visual appeal of your signature dishes and can be sauteed, grilled, and roasted. It's important to note that they are a relatively inexpensive ingredient, making them accessible to commercial kitchens with different budgets. What Part of the Green Onion Do You Use? Although every part of a green onion is edible, most recipes call for the white and pale green portion. The dark green portion is usually reserved for garnishing purposes. It's worth noting that most grocery stores sell green onions without the bulb attached. How to Cut a Green Onion The way you cut green onions can impact the texture and flavor of your final dish, so you should always read your recipe before cutting. Follow these steps to cut green onions the right way and get the best results: Clean the onions: Begin by cleaning your green onions. Rinse them thoroughly under cold water and pat them dry with a paper towel before proceeding. Trim the onions: Remove the root ends of the green onions, as they can be stringy and tough to chew. Next, trim the tips of the green leaves to make sure your onions are uniform. Be sure to remove any layers that seem unsightly or wilted. Cut the onions: The types of cuts you make will vary depending on the recipes you are preparing. Some recipes may call for the onions finely chopped, which you can achieve by holding them together with one hand while using the other hand to make even, small cuts. Other recipes call for diagonal cuts, which you can perform by positioning the knife at a 45-degree angle. Some recipes may also call for thick slices, which require you to hold the trimmed onions together and make perpendicular cuts. How to Store Green Onions When it comes to storing green onions, there are two main methods to keep them ready for use: in the refrigerator and the freezer. Each method has its own steps and considerations, and you should use the method that best fits your culinary needs. Storing green onions in the refrigerator: When stored properly in the refrigerator, green onions can last up to 5 days. Cut them in advance and place them in an airtight container to maintain freshness and prevent the onions from wilting quickly. For the best results, separate the whites and greens of the green onions before storing them. Storing green onions in the freezer: Green onions can last up to 4 months in the freezer. Before freezing, wash the green onions thoroughly and allow them to completely dry to prevent them from becoming mushy or developing freezer burn. Once dry, you can freeze them whole or chop them into smaller pieces depending on preference. Place them in an airtight container to prevent freezer burn and unwanted odors from seeping in. How to Keep Green Onions Fresh There are several methods you can use to keep green onions fresh. Not only does this ensure a better product, but it also allows you to reduce food costs. Use the tips outlined below to ensure proper storage conditions and reduce the risk of damage or spoilage. Transport with care: Green onions can easily be damaged if not handled gently. Avoid placing heavy items on top of the green onions or overcrowding them during transportation. Keep the roots intact: It's crucial to keep roots intact until you are ready to use them. The root is essential for drawing moisture and nutrients into the plant, which helps to keep the leaves crisp and vibrant. It's also important to trim any brown or wilted leaves before storage. Maintain moisture: To keep the leaves from drying out, place the green onions in a container with a damp paper towel or wrap them loosely in a damp cloth. Doing so retains moisture and keeps the leaves firm and fresh during storage. Keep bulbs damp: In addition to keeping the leaves hydrated, ensure that the bulbs remain damp. If the bulbs dry out, your onions may lose flavor and texture. Green Onion Substitute If your recipe calls for green onions but you don't have any on hand, there are a few substitutes you can use. These substitutes will vary in flavor and texture but can be used in a pinch if needed. Keep in mind that the substitution ratios may vary depending on the recipe and personal preference. It's always a good idea to taste as you go and adjust the amount of substitute accordingly. Chives: Chives are smaller and more delicate than green onions. They have a mild onion flavor and can be used as a garnish. Shallots: Shallots are the most comparable in terms of flavor to green onions. They have a similar mild taste and are uniform in texture and color. Leeks: The white and pale green areas of leeks have a mild onion flavor that can mimic the taste of green onions when cooked. Because of their distinct flavor and versatility, green onions are a popular ingredient in many cuisines. By following the information outlined above, you can prepare green onions the right way and ensure they stay fresh and flavorful.
Nigiri vs Sashimi
When it comes to Japanese cuisine, sushi is often the first thing that comes to mind. Within the world of sushi, various types offer unique flavors and experiences. Two popular options are nigiri and sashimi. They usually appear together on sushi menus, but what are the differences? While both invol

How Many Glasses of Wine in a Bottle?
When you’re pouring wine for your guests or performing a formal wine service, you should be familiar with how many glasses of wine you get out of one bottle. This way, you’ll always provide the right-sized pour for each person and be able to offer suggestions on how many bottles are needed per table
Restaurant Management View More


How Much Does It Cost to Start a Restaurant?
Opening a restaurant is your dream, but is it something you can afford? Don't give up if you're intimidated. Just like any big investment, most people require financial assistance in the form of a bank loan to afford the startup costs. We'll help you weed through the expenses of starting a restauran

Fine Dining Etiquette for Servers
Fine dining restaurants are known for delivering the highest level of customer service. Guests expect elegant ambiance, upscale table settings, and a menu with higher price points. They also expect servers to uphold fine dining etiquette. We’ve made a guide of fine dining etiquette tips to help new

How to Reduce Food Costs In Your Restaurant
According to the USDA, 30 to 40% of all food produced in the U.S. is wasted, which ends up costing approximately $161 billion every year. One of the biggest contributors to the food waste problem is the restaurant industry, and all of that waste can hurt your bottom line. By setting goals for your r

Overhead Cost for Small Businesses
Whether you own a restaurant, bar, or catering company, overhead costs are one of the greatest expenses you'll pay to run your small business. By tracking and looking for cost-saving opportunities in your overhead, you can lower expenses and become more profitable. We'll teach you about the differen
Coffee Shop Tips View More


Best Commercial Espresso Machines
Espresso is a concentrated type of coffee with a rich flavor and bold aroma, making it a favorite among coffee drinkers across the globe. It can be enjoyed in many forms, whether sipped on its own or used as an ingredient in coffee cocktails. If you want to offer espresso on your menu, buying a comm

Coffee Brewing Methods
Java, Joe, liquid energy, and brew are just some of the terms used to describe one of the world’s most highly consumed beverages - coffee. Did you know different coffee brewing methods affect the taste and aroma of your coffees? Understanding the types of brewing methods helps you choose the right c

How to Start a Coffee Shop
The coffee industry continues expanding as younger generations show a growing interest in high-quality gourmet coffee, freshly roasted beans, and supporting local artisan coffee shops. With the rising popularity of coffee, now is an ideal time to explore the possibility of opening a coffee shop or c

Coffee Grind Size Chart
The perfect cup of coffee starts with the perfect grind. Just like there are multiple types of coffee roasts, there are multiple grind consistencies and methods. Our comprehensive coffee grinding guide outlines everything you need to know about grinding coffee beans. Shop All Commercial C
Bar Management View More


How to Obtain a Liquor License
Selling wine, beer, and alcoholic drinks can boost your profits considerably, but you'll need a liquor license to do it. Unlike some other licenses and permits, a liquor license comes with a unique set of requirements based on the state where you operate. We'll walk you through the ins and outs of l

How to Run a Proper Wine Service
You don't have to own a wine bar to serve great wines. Wine has the unique ability to elevate the guest experience, enhance your menu, and boost your alcohol sales. From swirling wine to holding the glass correctly, wine comes with its own rules of service and etiquette, which can be a little intimi

Guide to the Most Popular Types of Wine
You want to create an elegant wine and cheese pairing, but you may not quite understand the difference between a cabernet sauvignon and a sauvignon blanc. Mastering wine knowledge is no easy feat. There are over a thousand wine varieties to choose from, all grown in countless unique wine regions wor

How Much Does it Cost to Open a Bar?
On average, opening a bar costs between $174,000 and $850,000. Your location and the type of bar you plan to open will determine the exact number. Whether you want to start a beer garden or a trendy cocktail lounge, we help you break down the individual costs so you can start budgeting for your drea
Eco-Friendly Tips View More

Restaurant Composting
Composting is an eco-friendly practice that has gained popularity in the foodservice industry as restaurants strive to reduce their environmental impact. Restaurant composting presents a sustainable solution to the waste issue by transforming food waste into valuable compost that can be used to enrich soil, promote plant growth, and reduce the need for chemical fertilizers. By implementing a composting program, restaurants can demonstrate their commitment to sustainability, attract eco-conscious customers, and differentiate themselves in a competitive market. Below, we’ll explore the benefits of restaurant composting, discuss the key components of a successful composting program, and provide useful tips for restaurants looking to integrate composting into their operations. Shop All Commercial Compost Bins Use these links to learn more restaurant composting and how you can integrate the practice into your restaurant: What Is Composting? Benefits of Composting How Does Composting Work? What Can and Can't Be Composted? How to Compost in Your Restaurant What Is Composting? Composting is the process of breaking down food scraps and other organic waste like grass clippings and certain paper and cardboard items. The process utilizes heat, moisture, agitation, air-flow, and sometimes even earthworms (a process known as vermicomposting). It's hard to imagine, but all of the organic waste that looks unappetizing when it leaves your restaurant can actually be turned into rich, dark soil through the process of composting. Composted soil can then be used to fertilize and enrich the land for local farmers and gardeners. Depending on the regulations in your area, you could even use the compost yourself for an herb garden or landscaped patio at your establishment. Benefits of Composting Commercial kitchens produce a significant amount of food waste daily, making restaurant composting a valuable sustainability practice. Implementing a composting program offers numerous benefits for restaurants, the environment, and the community. By diverting organic waste from landfills, restaurants can reduce their environmental impact and contribute to a more sustainable future. Cost Savings - By diverting organic waste from landfills and turning it into compost, restaurants can reduce their waste disposal costs. Additionally, using compost as a soil amendment can lead to savings on fertilizers and other soil additives. Reduces Waste - Composting helps restaurants minimize the amount of waste they send to landfills. When utilizing organic materials such as food scraps, coffee grounds, and paper products, restaurants can significantly reduce their environmental impact and contribute to a more sustainable waste management system. Sustainability - Restaurant composting plays a vital role in promoting sustainability within the foodservice industry. Recycling organic waste into nutrient-rich compost closes the loop on the food cycle and reduces a restaurant's carbon footprint. This sustainable practice not only benefits the environment but also helps create more resilient and healthy soil. Community Engagement - By demonstrating a commitment to sustainability and environmental responsibility, restaurants can attract eco-conscious customers and build a positive reputation within the community. Engaging with customers, employees, and local organizations on composting initiatives can help raise awareness about the importance of waste reduction and inspire others to take action. How Does Composting Work? For composting to be successful, the process depends on four main components: materials, temperature, moisture, and air circulation. Materials Successful composting relies on an equal mix of both nitrogen-rich and carbon-rich materials. Nitrogen-rich materials are items like coffee grounds, grass clippings, and food scraps. Carbon-rich materials include dead leaves, newspaper, and undyed paper. Temperature Composting piles need to stay warm so that heat-loving microbes can properly break down the materials. The typical compost pile temperature ranges from 100-140 degrees Fahrenheit. Compost piles should be turned or mixed every three or four days so the materials can get into the warm center. Moisture For microbes to break down everything in the compost pile, the materials need to constantly have the moisture level of a damp sponge. There needs to be a balance in moisture levels, as not enough moisture will prevent microbes from breaking down the materials, and too much moisture will slow down the decomposition. Air Circulation Without air circulation, composting materials will not properly break down. A lack of oxygen can also cause compost piles to release gases that smell similar to rotten eggs. Composting bins contain ventilation holes, so oxygen can circulate amongst the materials. What Can and Can't Be Composted? Most food scraps and paper products can be composted in a commercial facility. The options are slightly more limited if you choose to compost on-site, but you will still dramatically reduce the amount that you send to a landfill every day. Check out the table below for a more detailed breakdown of what can and can't be composted: Can Be Composted Fruit and vegetable waste Coffee grounds and filters Paper napkins Newspaper Yard clippings and wood ashes Can't Be Composted Diseased Plants Dairy products Coal or charcoal ashes Meat and bones Oil, fat, and grease How to Compost in Your Restaurant There are many things to consider before you start composting. Follow the steps below to learn how to incorporate a composting program in your restaurant. 1. Determine if You Will Compost On-Site or Use a Haul Away Service If you choose to compost through a haul away service, then you should contact your current waste management company and see if they offer this option, especially if you are currently locked into a contract with them. Should they not have a haul away option, you can use online resources to locate a facility near you. Once you’ve found a composting facility that is a good fit for your restaurant, talk to them about their involvement with the process. It’s important to find out if they pick up your compost waste and what they do with the waste after it’s gone through the composting process. If you choose to hire a haul away service, you'll need to have a separate bin in your restaurant for the organic waste that will eventually be composted. Composting On Your Own On the other hand, on-site composting gives you control of what goes into your compost pile and where the soil goes after it’s done going through the composting process. There may be health code restrictions in your area that prohibit or regulate on-site composting, so it’s important to check with your health inspector. Since space comes at a premium on a commercial property, you will also need to find a safe place for an on-site composting bin or pile that is protected from harsh weather. What You'll Need for On-Site Composting To successfully implement on-site composting at your restaurant, you will need a few essential items to get started. These items will help you efficiently manage your composting process and ensure that your organic waste is properly converted into nutrient-rich compost for your garden or landscaping needs. A Container - This container will be used to hold your materials. It can even be an old trash can, you just need to make sure that you have a fitted lid with ventilation holes. A Small Bag of Soil - In addition to your soil, you'll also want to add items like fallen leaves and grass clippings. If you have a landscaping service, ask them if they can collect these items as they are useful materials to have in your compost. A Shovel - A sturdy shovel will make it easier to maintain your compost pile and ensure that the organic matter breaks down effectively. It allows you to mix the compost materials, aerate the pile, and turn the compost for even decomposition. Composting Steps To effectively compost in a commercial setting, it's essential to follow specific steps that ensure the process is efficient and successful. Choose a Location - You’ll want to place your compost bin in an area that can be easily accessed by your employees during busy shifts. However, you should keep in mind that there’s a chance your compost could create undesirable odors if it is not turned often enough or not receiving enough oxygen. Add Soil - Your soil doesn’t have to fill the whole container, but you’ll want to have the bottom part of your bin filled. If you have extra soil, then feel free to add some between layers of your compost materials. Turn Your Compost Pile - Turn your compost pile every couple of weeks to move the materials around to the center. You’ll also want to make sure that your compost materials stay moist, like a wrung-out sponge. Wait for Results - It can take anywhere from a few months to a year for your compost to become usable. To know when your compost is ready, it should be pretty dark in color, almost black, and it should also have a crumbly texture with an earthy smell. 2. Educate and Train Your Staff A composting program in your restaurant will be useless if your employees don’t understand or care about it. Taking the time to make all of your employees, from cooks to bus boys, aware of what should go in the compost and recycling bins and what should into the dumpster will help to ensure that your business reaps the benefits of composting. Some composting facilities will even come to your restaurant to help train your staff on the process. Additionally, the busyness of a commercial kitchen can be a deterrent to conscientious composting, so you’ll want to have multiple compost bins located in prime areas throughout your business. This will make it quick and easy for your employees to responsibly dispose of organic waste. 3. Make Signs in Your Back-of-House Area Making signs and posting them around your kitchen and other employee areas will help remind your staff to keep up with the composting program. If you run an establishment where guests throw away their own food, then you’ll want to hang signs around those trash areas so that they know what should be disposed of in the composting bin. To effectively communicate the composting guidelines to your staff, consider using visuals such as pictures or icons to illustrate which items belong in the compost bin. This visual aid can help prevent contamination and ensure that only the appropriate materials are being composted. 4. Use More Eco-Friendly Materials By using Home Certified compostable takeout containers, plates and other acceptable products and trash can liners instead of non-compostable bags and containers, you can further reduce the amount of waste your restaurant contributes to the local landfill. Using these products can also help to spread the message to your guests that you are serious about making more environmentally friendly efforts. You should also utilize more environmentally friendly products when cleaning in your restaurant. Many conventional cleaning agents contain harmful chemicals that can disrupt the composting process and harm the environment. Look for green-certified cleaning solutions that are safe for composting. 5. Announce Your Efforts Make an announcement to your local community about your composting program. Communicating with your community about your composting efforts can help you gain their support and possibly even their business. You could even donate your finished compost to a local park or other public area, however this is something you would need to talk about with your composting facility and local planning council. Embracing composting as a part of your waste management strategy aligns with the growing trend of "going green" in the foodservice industry. It showcases your commitment to conservation and can be a powerful differentiator in attracting eco-conscious customers. Making the decision to implement restaurant composting is a win-win for both your business and the environment.

Green Disposable Dinnerware Guide
As more loyal customers are demanding a smaller carbon footprint from their favorite chain or local restaurant, the foodservice industry is focusing heavily on going green. Running a sustainable and eco-friendly establishment is a new standard, not just a distinguishing niche for marketing. Whether

Types of Eco-Friendly Food Packaging
As businesses seek to reduce their environmental impact, eliminating waste from plastics used in take-out and grab-and-go is one significant way food service establishments can go green. Eco-friendly disposables are a recyclable replacement for single-use Styrofoam containers and plastic bags, makin
Compact Fluorescent Light (CFL) F.A.Q.'s
If you have questions about the benefits of Compact Fluorescent Light bulbs, how to use them, and how to dispose of CFL light bulbs, check out our FAQs below. We also have helpful tips on how to choose the right CFL bulb and how ENERGY STAR rated CFLs can save you money. Use the links below to jump

ENERGY STAR Appliances and Rebates
If you’re looking for ways for your restaurant to go green this year, investing in ENERGY STAR appliances will help your business to save money while reducing your carbon footprint. In this guide, we’ll explain what ENERGY STAR is, what it means for appliances, and how you can check if you qualify f

Top 10 Energy Conservation Tips for Restaurants
Reducing your restaurant's overall energy consumption not only lowers your utility costs, it's also better for the environment. Many food service professionals have been adopting energy conservation methods for the past decade and have drastically cut their energy use and expenses. Here, we've outl
Catering Tips View More


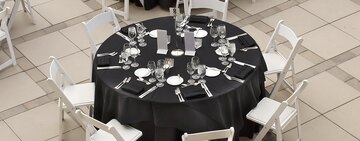
Different Types of Table Skirting
Table skirting can transform any table from dreary and drab to tidy and professional! Whether you're setting up for a business event or giving out free samples to showcase your products, table skirts are a great way to improve the overall look of your display.

Chafing Fuels Guide
Chafing fuels are an essential component for any catering or buffet setup, providing a reliable and efficient heat source to keep food warm and ready to serve. These fuels are specifically designed to be used with chafing dishes, which are commonly used in hotels, restaurants, and catering events. C

How to Start a Catering Business from Home
Starting a catering business from home can be a strategic way to test the success of your venture without the typical start-up fees and overhead associated with a commercial catering operation. This approach lets you to enter the industry with lower financial risk, allowing you to establish your bra
Folding Table Buying Guide
Coming in a variety of materials, shapes, and sizes, folding tables are great for indoor or outdoor events, banquets, parties, or even healthcare and institutional use. Thanks to their foldable designs, they offer a way to transform empty rooms into dining areas or lecture halls in minutes and maxim
Industrial View More
How to Set Up a Warehouse
If you've outgrown your current space, starting your own warehouse could be the next logical step in storing and selling your company’s products online. Or it could be a profitable new venture to create a warehouse and rent out your space to other businesses. No matter what your business goals are, setting up a warehouse from scratch requires some careful planning. The layout and allocation of your space need to be mapped out early on. We’ve created this warehouse layout guide to help you set up any type of warehouse for maximum efficiency. Shop All Industrial Supplies Click below to learn more about basic warehouse design: Inbound Loading Dock Receiving Storage and Putaway Picking Shipping Outbound Loading Dock Other Warehouse Spaces Common Warehouse Layouts Warehouse Layout Before you being laying out the schematic of your warehouse, you should be familiar with the essential functions of a fulfillment center and the equipment used to handle materials. Goods come in, they get put away in storage, and they get picked for shipping. To make this happen, the goods flow from one section of the warehouse to the next. Your warehouse setup will be the most successful if you provide space for the following locations: 1. Inbound Loading Dock The loading dock, also called a receiving dock or loading bay, is the entry point where inbound trucks deliver goods to your warehouse. On the exterior of the building, a large parking area provides room for trucks to back up to the building. The dock floor is built to be flush with the truck beds so workers inside the building can enter the trailer with forklifts and pallet jacks. Loading Dock Layout Tips The parking area outside the dock should provide enough room for the largest trucks to turn around and back up to the loading bay. Dock height should be based on the bed height of the most common delivery vehicle used. Consider the number of pallets you'll be unloading during peak delivery times and allocate space for the goods and the loading dock equipment. 2. Receiving The receiving process begins as soon as goods are unloaded on the dock. Shipments are inspected, invoices are checked, and permanent storage locations are assigned for each item. By allocating a holding space for these tasks to be performed, you avoid bottlenecks when multiple shipments arrive at once. A successful receiving area should be located right next to the inbound loading dock. You’ll need space for pallets and boxes to be unloaded and a temporary space for receiving tasks to be performed. The receiving manager needs a home base to work from, which might include a permanent desk with outlets for a computer and room for filing cabinets if you use paper invoices. Receiving Area Layout Tips You can make your receiving process more efficient by including space for temporary holding locations where goods can be staged before putaway. Allow space for performing a thorough quality control check before goods are put in storage. Catching any defects or damage now will help you in the long run. 3. Storage and Putaway Most of the square footage in your warehouse will be dedicated to storage space. When you look at your warehouse space in terms of cubic feet, your storage area should take up between 22% to 27% of the total warehouse space. That percentage may sound small, but it’s because cubic feet accounts for all the vertical space in between the floor and ceiling, not just floor space. For maximum efficiency, you’ll need to take advantage of the clear height of your warehouse. What Is Clear Height in a Warehouse? Clear height is the maximum usable vertical space in your warehouse where goods can be stored. The clear height in your building will be lower than the ceiling height and must account for sprinkler systems or ductwork. Storage Area Layout Tips Take advantage of the available clear height by using pallet racks and industrial shelving to store goods vertically. Using warehouse management system software helps you to maximize your storage space and assign locations. Aisles in your storage area need to be wide enough to accommodate pallet jacks (4' to 5' wide) and/or forklifts (12' to 13' wide) Don't forget to install the proper lighting in your storage area so that goods are visible to order pickers. 4. Picking Picking is the process of retrieving goods from storage to fulfill customer orders. The warehouse employees that perform this task are called pickers. Your picking area is the home base for order pickers — it's the place where they receive their list of items and where they bring orders that are fulfilled. Picking should be located very close to the storage area and may even share some square footage. The picking area should have enough room to store picking equipment like forklifts and pallet jacks. You'll also need space for the picking manager's desk and computers for accessing the warehouse management system. Picking Area Layout Tips Add space in your layout for roller conveyors to carry fulfilled orders from picking to shipping. If your warehouse is small and you don't store items on pallets, shopping carts and shopping baskets can be used to collect smaller items during picking. 5. Shipping After orders have been picked, they are sent to the shipping and packaging area to be boxed up for fulfillment. The shipping area should be close to your storage and picking locations so that goods flow efficiently from one area to the next. Make space in your shipping area for shipping stations — work tables that are set up with all the shipping supplies your workers need to package goods. Shipping Area Layout Tips Besides shipping stations and packing tables, you’ll need space to store your backup inventory of shipping boxes and supplies. It can be helpful to add space for order staging, or organizing shipments by carrier so they are ready to be loaded onto outbound trucks. 6. Outbound Loading Dock The outbound loading dock is the end of the line for your products. It's the exit point where goods are loaded onto trucks for shipping. Just like the inbound loading bay, the outbound bay area should be the same height as the truck beds that back up to the dock. Pallets that are staged in the shipping area can be quickly moved onto trucks and then onto their final destination. Creating two loading bays (inbound and outbound) in your warehouse is necessary for a couple of reasons. For efficiency, goods should always be flowing forward in your warehouse. If you use the same dock for shipping and receiving, you will have goods moving both ways, which creates space issues and confusion. You also have to consider the truck yard and how many trucks are coming and going from your warehouse. Separating the inbound and outbound traffic helps alleviate bottlenecks. Outbound Loading Dock Layout Tips Include plans for proper ventilation on your loading dock because idling trucks create a lot of exhaust fumes. Organizing outbound shipments by carrier type helps to make shipping more efficient. Provide enough space for your outbound loading equipment like pallet wrap machines, pallet jacks, and dock ramps. Other Warehouse Spaces There are other warehouse spaces you'll need to include in your building layout. These locations aren't related to the product cycle but are necessary for business operations. Returns No one wants to think about their products being returned, but it's a fact of life that returns will happen, and they need to be processed the right way. A separate space for processing returns helps to keep those items segregated from the other products in your warehouse. Returns require their own receiving, inspection, and putaway process. Offices In smaller warehouses environments where you are the owner and operations manager all-in-one, you might not need a dedicated office space. Sometimes a desk on the floor of the warehouse or a mezzanine will do. But in other cases, where you have a diversified team of managers and supervisors, it's useful to have office spaces for conducting phone calls, meetings, and administrative duties. Breakrooms Your employees need a place to take breaks, eat their lunch, and store their personal belongings. Designing a space for your workers to unwind when they are off the clock is important for job satisfaction and employee retention. Restrooms Restrooms are essential for any business. You'll need to base the number of restrooms in your warehouse on the size of your workforce. If you have under 15 employees, one restroom might be sufficient. OSHA provides guidance on their restroom and sanitation requirements page. Maintenance and Parts Outside of the storage space needed to hold your products, you'll need a space to store all the parts and replacements that keep your warehouse running. Items like lightbulbs, hardware for industrial equipment, and tools for performing maintenance should all have an organized home in your warehouse. Types of Warehouse Layouts If you are building a warehouse from the ground up, there are three popular layouts that you can rely on when you plan your schematic. These designs all feature a universal rule — keep the inbound and outbound docks separated. U-Shaped Warehouse U-shaped warehouses are very common. The layout is similar to a semi-circle, with the inbound loading dock on one side and the outbound dock on the opposite side. Storage and picking are usually stationed in the center. Products are delivered on one side of the U and flow in one direction to the other side. I-Shaped Warehouse In the I-shaped layout, also called a through-flow layout, the warehouse is shaped like a large rectangle. The inbound dock is positioned at one end of the rectangle with the outbound dock on the opposite side. Storage is located in the middle of the rectangle. L-Shaped Warehouse The L-shaped warehouse also positions the inbound and outbound docks on opposite sides. The flow of traffic and goods move from one side of the L to the far side, with storage located in the "corner". With the increase of consumer online ordering and e-commerce fulfillment, warehouse space has become very valuable. If your business is outgrowing a garage or stock room, it might be time to think about building your own warehouse space to store and distribute goods. Keep all the essential warehouse functions in mind when you create a layout and don't forget to account for future growth.

Types of Casters
Casters play a crucial role in the functionality of kitchen equipment, providing the ability to move heavy items with ease. From rigid to swivel, and from plate to stem, each type of caster serves a specific purpose based on your needs. Understanding the differences between these types will help you

Generator Buying Guide
Food spoils when the refrigerator won't cool, chefs can't cook when the oven won't heat, and power tools are useless when you're off the grid. Whether electrical access is unavailable or the power goes out in your building, you need a way to keep things running. That's where generators come into pla

How to Use a Fire Extinguisher
A fire extinguisher is an essential fire safety tool to keep in any workplace. For the safety of your employees and guests, it is required by law for any commercial business to keep a fire extinguisher readily available. Many states even require employees to be trained to use one. Below, we’ll inves

How to Install Casters on a Work Table
Kitchen work tables are an essential piece of equipment in foodservice establishments, and chefs use them to perform a variety of food prep tasks. While work tables provide an excellent space for kitchen prep, it's difficult to clean beneath a stationary table. That's where casters come in! It's eas

Emergency Supplies List For Businesses
A part of overall restaurant safety is to ensure that you have a business disaster plan in place to help protect your employees and customers in the event of an emergency. Whether it's a fire, an extended power outage, or a natural disaster, having the proper emergency supplies available can sometim
- Topics 1408
- Industrial 55
- Troubleshooting Guides 23
- Restaurant Management 130
- Bar Management 59
- Catering Tips 38
- Bakery Management 43
- Food Trucks & Concessions 50
- Advertising & Marketing 37
- Eco-Friendly Tips 11
- Facility Layout & Design 44
- Coffee Shop Tips 30
- Installation & Maintenance 56
- Janitorial & Pest Control 30
- Safety & Sanitation 95
- Startup Tips 104
- Menu Design 10
- Kitchen & Cooking Tips 85
- Hospitality Management 24
- Pizza & Sandwich Shop Tips 37
- Smallwares 37
- Food Prep 98
- Tabletop Items 18
- Disposables 23
- Calculators & Tools 6
- Consumables 53
- Warewashing & Laundry 18
- Cooking Equipment 98
- Food Storage & Refrigeration 52
- Beverage Equipment 38
- Office Supplies 6
Join Our Mailing List
Receive coupon codes and more right to your inbox.