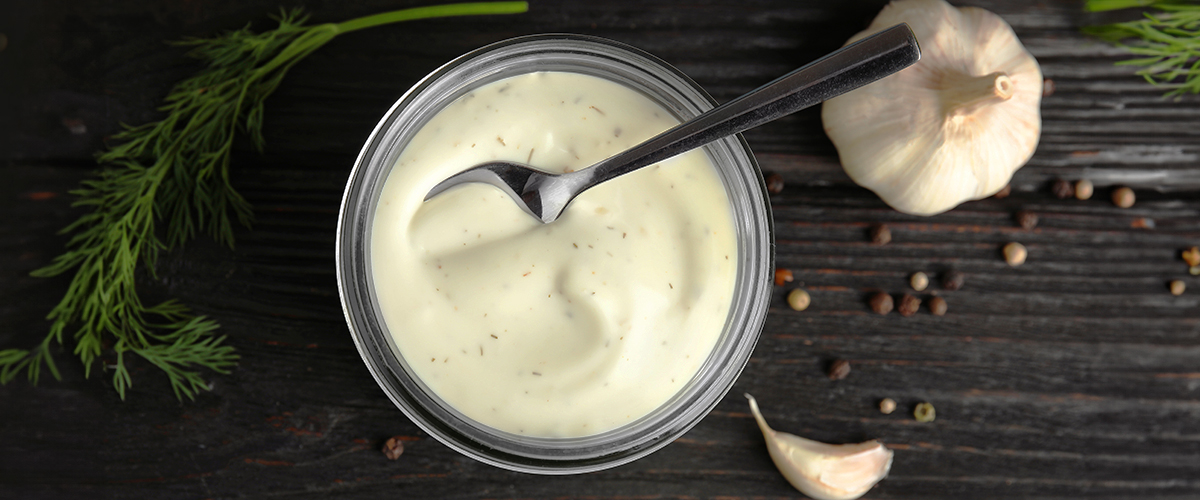
Roasted garlic aioli is a flavorful condiment that can elevate your dishes with its creamy texture and rich garlic flavor. Making your own roasted garlic aioli is easier than you might think, and the result is well worth the effort. Here's a simple recipe to help you create this delicious dipping sauce for your menu.
Make Your Own Garlic Aioli
Watch our video for a quick tutorial on making your own roasted garlic aioli:
Roasted Garlic Aioli Recipe
Is aioli the same thing as mayo? Almost! Both aioli and mayonnaise are sauces made from emulsified oil, but traditionally, mayo contains egg yolk and aioli does not. Authentic aioli is made by carefully emulsifying olive oil with mashed garlic. Our recipe is a simplified method that combines pre-made mayo with roasted garlic to achieve the same flavor as a traditional aioli. It's easy to whip up on the fly and goes great with a hot basket of fresh-cut fries!
You don't need any special equipment to make this recipe, but a mortar and pestle will come in handy for mashing the garlic.
Approximate Yield: 1 cup
Total Time: 1 hour 15 minutes
Ingredients
- 1 head of garlic
- 1 Tablespoon olive oil
- 1 cup mayonnaise
- 1 Tablespoon lemon juice
- Salt and pepper to taste
Directions
- Preheat oven to 400 degrees Fahrenheit (200 degrees Celsius).
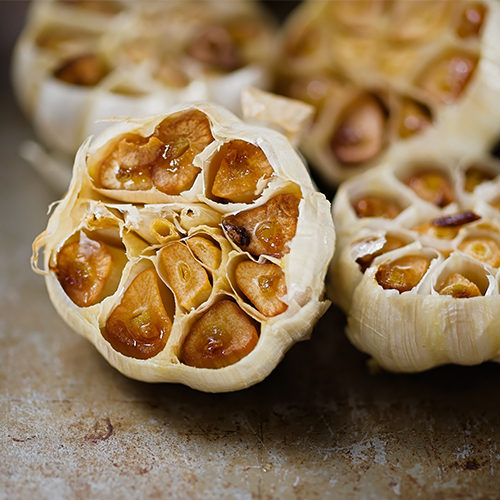
- Cut off top of garlic head to expose cloves.
- Drizzle exposed garlic cloves with olive oil.
- Wrap garlic head tightly in aluminum foil.
- Place garlic bulb directly on oven rack and roast for 30-40 minutes until softened.
- Remove garlic from oven and allow to cool slightly.
- Squeeze cloves out of garlic bulb and mash using fork or mortar and pestle.
- In small bowl, combine mashed garlic, mayonnaise, and lemon juice. Mix until combined.
- Add salt and pepper to taste.
- Refrigerate for at least 30 minutes to allow flavors to meld together.
If you're looking for a new condiment to add to your menu, try this easy roasted garlic aioli. You can use it as a dipping sauce, as a burger topping, or drizzled over cooked veggies. It's a simple recipe you can use to create a number of exciting new dishes.
Related Resources
Wing Sauce Ideas for Your Menu
Hot wings are a popular appetizer, especially during football season when customers like to park in front of the big screen and take advantage of all-you-can-eat wing specials. If you've been using the same standard sauce recipe, we have some wing sauce ideas to help you spice up your game day menu! Check our hot wing recipes below. Jump to hot wings recipes: 1. Vegan Wings Recipe 2. Korean BBQ Wings Recipe 3. Garlic and Herb Wings How to Make Your Own Wing Sauce Don't get us wrong, we love classic pre-made hot sauces like Frank's Red Hot and Sweet Baby Ray's buffalo sauce. But sometimes you need to up your game and wow your customers with a signature recipe. We'll show you how you can incorporate house-made sauces into your wing recipes to take them to the next level. What Special Equipment Do I Need? Before getting started, gather the following items: Deep Fryer or Dutch Oven - If you don't own a commercial deep fryer, you can use a large heavy-bottom dutch oven to deep fry the wings. Sheet Pan and Rack - Our hot wings are baked first to lock in flavor. Line a sheet pan with parchment paper to catch any drips, then place a baker's rack on top. This will ensure the wings cook evenly. Skimmer or Slotted Spoon - If you're using a dutch oven instead of a deep fryer, you'll need a skimmer to add and remove the wings from the pot. 1. Vegan Wings Yes, you read that right! Vegan wings are a real thing, and you can put them on the menu for your plant-loving customers. Our recipe features vegan wings that look like real drumsticks but are made from 100% plant-based ingredients. Offering an alternative like this is a great way to take part in Veganuary or just expand your menu. Recipe by: Ronne Day, WebstaurantStore Food Stylist Yield: 2 - 4 servings Total Time: 20 minutes Ingredients 1/2 cup vegan butter (1 stick) 1/2 cup Frank’s hot sauce 1 Tablespoon sugar 1/2 teaspoon Tajin 1/4 teaspoon granulated garlic 1/4 teaspoon granulated onion 2 pounds vegan wings 3 medium carrots, cut into sticks 3 stalks celery, cut into sticks 1 cup vegan ranch dressing 3 quarts oil for frying (optional) Directions Set deep fryer to 350 degrees Fahrenheit or heat 3 quarts oil to 350 to 375 degrees Fahrenheit in large Dutch oven or stock pot. Preheat oven to 400 degrees Fahrenheit and place rack in center. Melt butter in saucepan over medium heat. Whisk in hot sauce, sugar, Tajin, granulated garlic, and granulated onion. Set aside. Deep fry wings to golden brown, about 4 minutes. If using a dutch oven, gently lower wings into oil with skimmer to avoid splashing. Transfer wings to large bowl and toss with half of sauce. Place wings on sheet pan lined with parchment and a rack and bake for 10 minutes. Return wings to large bowl and toss with remaining sauce. Sprinkle wings with sesame seeds and scallions, then transfer to serving platter. Drizzle wings with any remaining sauce. Serve with ranch dressing, carrot sticks, and celery sticks. 2. Korean BBQ Wings Slathering wings in a sweet and spicy Korean BBQ sauce is a tasty twist on traditional hot wings. This recipe features some unique ingredients like gochujang, mirin, and rice vinegar for Korean-inspired flavor. Recipe by: Ronne Day, WebstaurantStore Food Stylist Yield: 2 - 4 servings Total Time: 25 minutes Ingredients 6 Tablespoons butter (3/4 stick) 2 Tablespoons gochujang, divided 2 Tablespoons mirin 2 Tablespoons rice vinegar 2 pounds frozen chicken wings 1 Tablespoon sweet chili sauce 4 Tablespoons Kewpie mayonnaise 1 Tablespoon black and white sesame seeds, toasted 1 Tablespoon finely chopped scallions 3 Persian cucumbers, sliced into sticks 1 yellow pepper, cut into slices 3 quarts oil for frying (optional) Directions Set deep fryer to 350 degrees Fahrenheit or heat 3 quarts oil to 350 to 375 degrees Fahrenheit in large Dutch oven or stock pot. Preheat oven to 400 degrees Fahrenheit and place rack in center. Melt butter in saucepan over medium heat. Whisk in mirin, rice vinegar, and 1 Tablespoon + 2 teaspoons of gochujang. Simmer for about 10 minutes or until reduced to 2/3 cup, then set aside. Deep fry wings for 4 minutes. If using a dutch oven, gently lower wings into oil with skimmer to avoid splashing. Transfer wings to large mixing bowl and toss with half of gochujang sauce. Place wings on sheet pan lined with parchment and bake in oven for 10 minutes. After baking, return wings to mixing bowl and toss with remaining sauce. Make dipping sauce in small bowl by combining remaining 1 teaspoon gochujang with mayonnaise and sweet chili sauce. Sprinkle wings with sesame seeds and scallions. Transfer to a serving platter and drizzle with any remaining sauce. Serve with mayo dip, cucumber sticks, and pepper slices. 3. Gourmet Garlic and Herb Wings Think your restaurant is too upscale to put wings on the menu? Check out our gourmet wings recipe and you might change your mind. These wings are roasted, not fried, and covered in a delicious butter and herb sauce. Recipe by: Ronne Day, WebstaurantStore Food Stylist Yield: 2 - 6 servings Total Time: 1 hour 15 minutes Ingredients 1 cup apple juice 1 cup dry white wine 2 Tablespoons green olive tapenade or finely chopped olive bruschetta 4 large garlic cloves, mashed to a paste 1 Tablespoon tarragon, finely chopped (plus extra for garnish) 2 teaspoons dried basil leaves 1/2 Tablespoon + 1/4 teaspoon kosher salt, divided 1/4 teaspoon freshly ground black pepper 2 Tablespoons olive oil 2 pounds chicken wings 1 Tablespoon shallot, finely chopped 2 teaspoons white balsamic glaze 1/2 teaspoon smoked paprika 4 Tablespoons unsalted butter, softened Flaky sea salt Lemon wedges Directions Position rack in middle of oven and preheat to 425 degrees Fahrenheit. Make glaze in small saucepan. Whisk apple juice, wine, and olive tapenade over high heat and bring to boil. Lower to simmer and cook, whisking occasionally, until reduced to about 1 cup (30 to 45 minutes). Transfer to refrigerator to cool. In small bowl, combine garlic, tarragon, basil, salt, pepper, and oil. Toss wings in mixture until fully coated. In separate small bowl, combine shallot, balsamic glaze, smoked paprika, and salt. Allow to sit for 5 minutes while flavors develop. Add butter and stir to combine. Set aside. Place wings on large sheet pan lined with parchment and baker's rack. Roast wings for 10 minutes, then brush with glaze. Return to oven and brush with glaze every five minutes, rotating pan each time, until glaze is gone and wings are deep golden brown (about 20-25 minutes). Transfer wings to large bowl and toss with butter-shallot mixture until wings are fully coated. Place wings on serving platter, sprinkle with tarragon and flaky sea salt. Garnish with the lemon wedges and serve. Buffalo wings are a crowd-pleasing appetizer option, and they're very easy to make. Deep fry the wings, toss with the sauce of your choice, and serve! Try our wing recipes to add a little something extra to your typical hot wing order.
How to Fry the Perfect French Fries
The secret to achieving the perfect french fries is to fry them twice. Eliminating a majority of your potatoes' moisture before the final frying is key to yielding a crispy, golden brown product. To help you improve your restaurant's fries, we share the best potatoes for frying, how to choose the best oil, potato preparation tips, and how to season your french fries for the best flavor. Shop All Fryer Oil and Cooking Oil The Best Potatoes for French Fries The following varieties are some of the best types of potatoes for making french fries: Russet Katahdin Norkotah Kennebec Choose a Starchy Potato with Low Moisture The best frying potatoes have a high starch content and low moisture content. Starchy, low-moisture potatoes will yield the crispiest french fries. Once you choose a starchy variety like the ones above, you can test the moisture content of each potato with a saline test. Here is how to test the moisture content of your potatoes: Create saline solution: Dissolve 1 cup of salt into 8-10 cups of water. Insert potato: Place each potato individually into the saline solution. Observe potato: Look at the potato in the solution. If the potato floats, it has a high moisture content. If it sinks or is suspended in the middle, it has a low moisture content. Organize: Sort your potatoes, setting aside the high moisture potatoes to be used for another dish that isn’t fried. The Best Oil for Deep Frying French Fries The best cooking oil for deep frying french fries is any neutral oil with a high smoke point. Canola oil and peanut oil are two common choices. A neutral oil won’t affect the flavor of your fries, and an oil with a high smoke point (the point at which an oil starts to break down when heated) will be stable throughout your frying process. How Old Should My Oil Be for Frying French Fries? Ideally, you should use oil that has been used a few times and has had the chance to break down a bit. Since they haven't broken down at all, the molecules in brand new oil may not bond well with your french fries. As a result, your fries won't be as crispy. On the other hand, oil that is at the end of its life in your deep fryer may have some residual flavors from other menu items, or it may start to smoke as a result of too much breakdown. How to Deep Fry French Fries The best method for achieving perfect, crispy french fries is to deep fry your potatoes twice. Below, we’ll explain the best way to prepare potatoes for frying, how long to fry french fries, and how long you can hold fries before serving. Wash the potatoes: Ensure that your potatoes have been properly washed before you begin the cooking process. Optional: Peel the potatoes Depending on your preferences, peel your potatoes before frying. Cut the potatoes to your desired size: You can cut them by hand or use a french fry cutter for maximum efficiency and uniformity. Soak the potatoes: Be sure to soak the potatoes for 3 to 24 hours in a water and vinegar mixture. Soaking them will help to remove the excess starch and promote crispness. To make the mixture, put 1 tablespoon of vinegar into a gallon of water. This vinegar will help to keep the potatoes from oxidizing and discoloring. Dry the potatoes: It is important to dry your potatoes before frying them to prevent spattering. Use a clean towel to pat them dry on a sheet pan or put them into a salad dryer to remove the excess moisture. If you store the potatoes uncovered in your cooler overnight, this will help to further dry them out. Blanch the potatoes: Begin to blanch the potatoes by frying them at 325 degrees for 3-6 minutes. The time will vary depending on the cut of your fries. Shoestring fries, also known as matchsticks, are only 1/8 inch thick and cook in a minute or less. Small, 1/4 inch French fry cuts take 2-3 minutes. Larger cuts like 3/8 or 1/2 inches will take 4-6 minutes. You are done blanching the potatoes when you can bend them without breaking them. Cool the fries: For efficiency, you can blanch several batches of potatoes and let them cool in your fridge or walk-in cooler. When it’s almost time to serve them, remove them from the cooler to be fried a second time. Fry them again: After cooling the fries, fry them a second time at 375 degrees for 2-3 minutes. Since you have already blanched the potatoes to partially cook them, this second round in the fryer will make them crispy. Look for a golden brown exterior to know they’re finished. Season the fries: Be sure to season your fries while the oil is hot. The hot oil will help your seasonings stick to the fries. Use salt, spices, fresh herbs, or even oils to flavor your fries. Serve: The ideal holding time for french fries is no more than 5 to 10 minutes. After that, the fries will lose some of their crispiness and become cold. Creating the perfect french fries takes time. This process will help you to achieve the crispiest final product, but you can always adjust the frying time if you prefer soft fries. Experiment with seasonings, cuts, or even frying oils to create the best signature fries for your establishment.
French Fry Holder Guide
French fries are an all-time favorite, and serving them up in the right french fry holder is important. French fry containers come in a variety of materials and shapes, making it easy to find one to match the style of your business. As a bonus, they also help you serve a consistent portion to guests and manage product costs efficiently.