Even the most experienced bakers make cake mistakes from time to time. For the novices among us, making the perfect cake with the right texture, shape, and rise can seem downright unattainable. To help clear up some of the mystery surrounding common cake failures, we’ve got tips that will help you avoid cake mishaps and gain confidence in your cake-baking skills.
Why Did My Cake Sink in the Middle?
Your cake may have sunk in the middle from being underbaked, having too much or too soft of butter, the oven door being opened too often, or due to overmixing. Below we go in-depth about these cake mistakes:
1. Underbaked
The number one culprit of a sunken cake is underbaking. Make sure to test your cake with a toothpick when you take it out of the oven. If it’s supposed to be a moist cake, only a few crumbs should be clinging to the toothpick.
You can also test the cake by lightly pressing two fingers on top of the center of the cake. The cake should bounce back almost all of the way. Another way to test a cake is with a thermometer. The thermometer should read 205 degrees Fahrenheit. This temperature will leave you with a tender and moist cake that’s baked perfectly.
2. Too Much or Too Soft of Butter
Another common cake mistake is using a type of butter that’s the wrong temperature. Many cake recipes call for butter at room temperature, which should be soft and yield to pressure, but not so soft that it’s melted and oily.
Take your butter out of the fridge about an hour before beginning your recipe, checking frequently to test the consistency. If the butter yields too easily to pressure and appears melted and oily, it will produce a silky batter that rises too soon and collapses. Your cake will have big air pockets and an uneven texture.
3. Opened Oven Door Too Much
It's really hard to resist taking a quick peek at your cake, but opening the oven door too soon is a big no-no. It's especially important to keep the oven door closed during the first 3/4 of the cooking time. If you open the door during this crucial baking period, cold air rushes into the oven and disrupts the rise of your cake. The rising batter could contract and collapse, producing a cake that sinks in the middle. Wait until the end of the cooking time to check your cake and test it for doneness.
4. Overmixed
Overmixing your batter will cause it to look very pale and fluffy, with a lot of air whipped into the mixture. Too much air will cause the cake to rise too soon and shrink as it cools. It will sink in the middle and have an uneven texture.
Back to TopWhy Is My Cake Dense?
A dense cake can be due to too much liquid or sugar, or not enough leavening agents. Below is why those mistakes have left your cake dense:
1. Too Much Liquid or Sugar
Using too much liquid or sugar will overpower your dry ingredients, which help give your cake structure. And, yes, sugar is considered a wet ingredient since it turns into a liquid form when heated.
2. Not Enough Leavening Agent
Baking powder and baking soda are common leavening agents, which means they help baked goods rise during their cooking time. If you do not have enough of these ingredients in your recipe, then they will not emit enough gas and your cake will not rise.
Back to TopWhy Is My Cake Crumbly?
Your cake may be dry and crumbly from adding too much flour, undermixing, or baking your cake in too hot of an oven. We’ve provided an in-depth explanation of these three crumbly cake culprits.
1. Overbaked
If your oven temp is too high, you will bake the cake past 212 degrees Fahrenheit, which is the temperature where water evaporates. If all of the moisture from your cake is evaporated, you will be left with a dry and crumbly cake. Avoid this by using the “low and slow” method, which means baking the cake at a lower temperature (try 325-350 degrees Fahrenheit) and for a longer time to more easily control the cake’s doneness.
2. Undermixed
The ingredients won't be incorporated well if you don’t mix the batter long enough. There will be less air whipped into the mixture, which yields less batter and creates a crumbly cake.
3. Too Much Flour
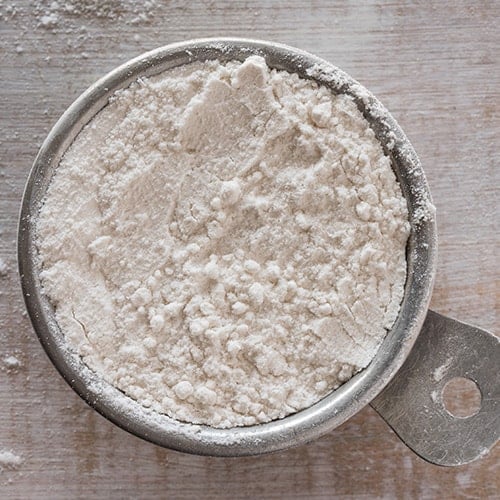
A cake batter with too much flour will be dry, crumbly, and heavy. To avoid this, make sure you weigh your flour instead of scooping it. Although it’s quick, scooping with a measuring cup can easily result in too much flour. However, weighing your flour variety gives you a precise measurement, ensuring a consistent cake crumb every time.
How to Measure Flour Correctly
Follow these tips for measuring your flour correctly to avoid crumbly and dry cakes:
- Skip the measuring cup completely and use a scale to weigh the flour (1 cup = 120-125 grams).
- Never use a liquid measuring cup for dry ingredients like flour.
- Use a sifter or fine-mesh sieve to sift flour before measuring.
- Add sifted flour to the measuring cup one spoonful at a time.
- Level off the flour in the measuring cup with a knife.
Why Didn’t My Cake Rise?
A cake not rising may be due to using expired baking powder or baking soda, not creaming the butter and sugar enough, using cold ingredients, or just simply overmixing. Find out more about these cake mistakes below:
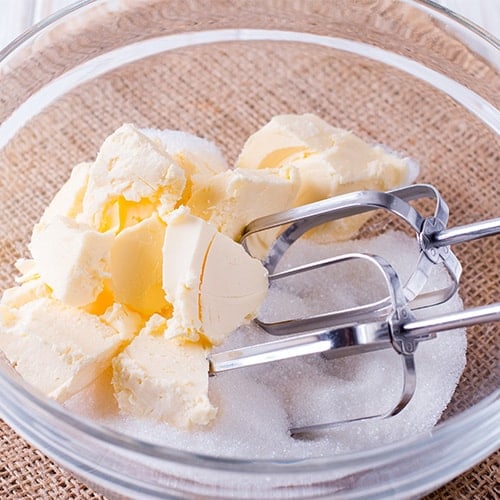
1. Improperly Creamed Butter and Sugar
The first step when baking cakes and cookies is creaming together butter and sugar. This does not mean mixing until combined. Butter and sugar should be whipped on high for 3-5 minutes until pale and fluffy.
2. Ingredients Too Cold
All of your ingredients should be at room temperature before mixing. Cake batters are an emulsion, so a homogenous final product is the end goal. For example, if your butter is too cold before being whipped, then there will be cold lumps of butter that won’t incorporate into your batter, preventing the mixture from being whipped properly.
3. Overmixing
Overworking the batter, especially if it contains gluten, will result in a tough, chewy cake. You’ll often see the instructions, “mix until just combined,” in cake recipes. This means to stop mixing as soon as you see that all ingredients are evenly incorporated.
Alternating between adding dry ingredients and wet ingredients to your stand mixer is a common technique that helps to prevent gluten fibers from toughening up. Folding in your ingredients by hand is another method that ensures your ingredients are well-incorporated without being overworked.
4. Leavening Agents Are Old
Baking soda and baking powder can lose their potency over time and, if used, will result in a cake with no rise. A good rule of thumb is to test your baking soda and baking powder if they’ve been in your cupboard for more than 6 months.
How to Test Baking Soda and Baking Powder
Effective leavening agents will bubble immediately when mixed with the right liquids. Try these tests and look for bubbling:
- Baking Soda - mix 1/4 teaspoon baking soda with 2 teaspoons of vinegar
- Baking Powder - mix 1 teaspoon baking powder with 1/2 cup hot water
If no bubbling occurs when you perform the test, the leavening agents are past their prime for baking purposes.
Back to TopWhy Is My Cake Domed and Cracked on Top?
A cake that is domed and cracked may be due to the cake pan being overfilled, an excess of baking powder, or your oven is too hot. Read below about why your cake might have cracked and domed:
1. Overfilled
If you’re pouring too much batter into your cake pans, then it can either cause a dome that will be cut off later and wasted, or the entire contents will spill out the sides and cause a big mess. Avoid overfilling by measuring your batter, or pour in your batter and spread it to the sides of the cake pan so the batter falls inward instead of going upwards.
2. Too Much Baking Powder
An excess of baking powder can cause the middle of your cake to rise too quickly and hold that dome shape.
3. Oven Is Too Hot
Cracking is a sign of dryness, and if your cake is dry, that means your oven temperature is far too high. Even if you've set the oven temperature to 350 degrees Fahrenheit, the only way to be sure the temperature is exact is by using an oven thermometer.
Back to TopOther Cake Mistakes to Avoid
Here are some other best practices to always keep in mind when baking and finishing a cake:
1. Be Careful With Substitutions
When it comes to baking cakes, it’s not always possible to make an ingredient substitution in a recipe and achieve the same results. This is because different types of ingredients react uniquely during the baking process. Stick to the recipe unless you’ve done research on alternative ingredients and you’re prepared to experiment with some unexpected outcomes.
Dairy-free baking is pretty straightforward, but gluten-free cake baking requires a few adjustments to produce the same light, fluffy texture produced by wheat flour. If you’re playing around with gluten-free flour substitutions, keep these tips in mind:
- Instead of using one type of flour, try a gluten-free flour blend that combines rice flour, potato starch, tapioca starch, and xanthan gum.
- Increase the moisture in the batter to counter the dryness of gluten-free flour.
- Mix the batter longer than normal to incorporate more air bubbles and help the cake rise.
- After mixing, let the batter sit so that all of the gluten-free flour is absorbed.
- Cook the cake at a lower temperature setting for a longer period of time.
2. Weigh Your Ingredients
Some chefs like to get creative in the kitchen and add a pinch of this and a dash of that to their recipes. As many aspiring bakers can attest, this expression of culinary freedom doesn’t work out so well when baking a cake. The art of baking requires exact measurements and little to no deviation from the original recipe. If you want professional results, weighing your baking ingredients is the answer.
Instead of fussing with measuring cups, use a portion scale to make sure your ingredients are exact. If your recipe doesn’t list the weights of your ingredients, follow this guide:
- All-Purpose Flour / Bread Flour 1 cup = 120-125 grams (varies slightly between brands)
- Baking Powder 1 teaspoon = 4 grams
- Baking Soda 1 teaspoon = 6 grams
- Brown Sugar (packed) 1 cup = 213 grams
- Butter 1/2 cup = 113 grams
- Cake Flour 1 cup = 120 grams
- Cocoa Powder 1 cup = 85 grams
- Confectioners Sugar (sifted) 1 cup = 115 grams
- Granulated Sugar 1 cup = 200 grams
- Whole Wheat Flour 1 cup = 120 grams
3. Prep Your Pan
A cake that sticks to the pan is a common cake failure that can be easily avoided with a little bit of prep work. Take a few minutes to grease and flour your pans before pouring the batter and you shouldn’t have any trouble.
- Apply a generous amount of butter, shortening, or cooking spray to the interior of the pan. Make sure the entire pan is covered.
- Sprinkle a couple of spoonfuls of flour into the pan.
- Hold the pan in your hands and tilt it back and forth to disperse the flour over the entire surface.
- Turn the pan upside down to shake out any excess powder.
You can go one step further and line the pan with parchment paper for the most professional results. Grease and flour the pan like normal, then add a piece of parchment paper to the bottom of the pan. Using this method, your cakes will release from the pan without sticking. Try a springform pan with a removable bottom and sides for the trickiest types of batters.
4. Let Cakes Cool Completely Before Icing
Everyone knows you should let your cake cool before trying to add a type of frosting, but often the temptation to complete your creation as quickly as possible wins out. If you don’t let the cake cool properly, the frosting will melt away and you’ll have a drippy mess on your hands.
Not cooling cakes properly can also affect their texture. If you leave the cake to cool in the pan for too long, moisture will collect in the bottom of the pan and create a sticky texture. Follow these steps to cool your cake properly so it’s ready to be decorated:
- Remove the cake pan from the oven and place the pan on a cooling rack for 10 minutes.
- Carefully remove the cake from the pan and continue to let it cool on the rack for the best air circulation.
- It can take up to an hour or more for the cake to cool completely.
- If the cake needs to be stored, wrap it in plastic wrap and place it in the fridge overnight.
Baking failures that produce bad cakes can be avoided by following our guidelines. With time and repetition, you'll find that many of these baking tips will become second nature. A combination of preparation, ingredients, and technique will create professionally baked cakes with the perfect texture and consistency.