What Is Lard?
Last updated on Jan 14, 2026Michale LeRoyLard is the semi-soft, white fat located in the fattiest portions of a pig. Used as a cooking fat for centuries, lard fell out of favor when hydrogenated vegetable shortening was invented in the early 20th century. We now know that hydrogenated fats, also called trans fats, may increase the risk of heart disease. Lard has become a popular cooking fat once again because it contains no trans fats and offers a number of benefits.
What Is Lard Made Of?

Lard is made of 100% pork fat. It's separated from the fatty parts of a pig through a process called rendering. Portions like the pork belly, pork butt, or pork shoulder will render the most lard. The separated fat is solid and opaque at room temperature and turns into a clear liquid at around 95 to 113 degrees Fahrenheit, depending on its purity.
What Is Rendering?
Rendering is the process used to extract lard from fatty tissue. To perform rendering, the tissue or meat is cooked slowly until the fat turns into a melted liquid. The liquid fat can be separated from the solids and used for cooking. Rendering is easy to do at home and only requires a fatty cut of pork and a dependable pot or pan.
What Is Leaf Lard?
Leaf lard is a special type of lard that comes from a leaf-shaped portion of fat around a pig's kidneys. Considered the choicest lard available, leaf lard is softer and creamier than other types of lard. It's prized for its smooth consistency and is commonly used for baking. The best way to obtain leaf lard is through your local butcher or by rendering the fat yourself.
Is Lard Bad For You?

When used sparingly, lard is not particularly worse for you than other cooking fats. In fact, cooking with lard has many benefits, and more chefs are choosing lard over other traditional cooking oils or shortening.
- Pure lard has a neutral taste and contains no pork flavor
- Lard contains no trans fats, which makes it a healthier option than hydrogenated fats
- Lard has less saturated fat and cholesterol than butter
- Lard contains healthy monounsaturated fats, just like olive oil
- It has a high smoke point, making it ideal for frying foods
How to Use Lard?
Lard is just as versatile as any other cooking fat and can be used for roasting, grilling, sauteeing, frying, and baking. In its solid form it can be used just like butter or shortening and added to baking recipes. Use a small amount to grease a pan, or add it by the cup full to your cast-iron skillet for deep frying. It can even be spread onto toast.
What Can I Cook with Lard?
Lard can be used to cooked a wide variety of foods, but these are some common items prepared with lard:
- Fried Chicken - Lard is ideal for frying chicken because of its high smoke point
- Tamales - Tamales are traditionally made with whipped lard for the best texture
- Pie crust - Many bakers attest that lard produces the flakiest pie crust
- Biscuits - Use lard for flaky, defined layers in your biscuits
- Donuts - Donuts deep-fried in lard are crisp on the outside and soft in the middle
Lard vs Butter

Lard and butter are both used in baked goods, but there are some properties of lard that make it a favorite of many bakers. The melting point of lard is lower than butter, which means that more air and steam are released during bake times. This results in greater leavening and a flakier texture in baked goods. Lard also has larger fat crystals that leave open spaces as they melt, creating more layers than you would achieve with butter. For biscuits and pie crusts, lard, or a combination of lard and butter produce the ideal texture.
Lard vs Shortening
The difference between lard and vegetable shortening is that lard is made of pure animal fat and shortening is made of vegetable oil. When vegetable shortening was invented in 1911, it was very appealing because it was affordable and shelf stable. It could also be used in place of lard with very similar results. Shortening behaves the same way as lard in baking, producing flaky layers. However, shortening doesn't impart the same flavor or richness as lard.
What Is a Substitute for Lard?
If lard isn't available to you, there are other cooking fats that you can use in your recipes instead:
- Shortening - Shortening is made of 100% fat, just like lard. Use a 1:1 ratio when substituting shortening.
- Butter - Butter is only made of 80% fat, so if you are substituting butter for lard, you'll need a little extra butter. For every 1/4 cups of lard needed, use 1/4 cup butter plus 1 tablespoon.
- Vegetable oil- Use a 1:1 ratio for olive or coconut oil. For vegetable oil, substitute a 7/8 cup for 1 cup of lard.
When choosing a cooking fat, don't count out lard as an option. It contains less saturated fat than butter and unlike vegetable shortening, it has no trans fats. Lard produces crumbly, flaky pie crusts and tender, moist baked goods. Not only that, it's affordable and can be rendered in your own kitchen.
Related Resources

What Is Beef Tallow?
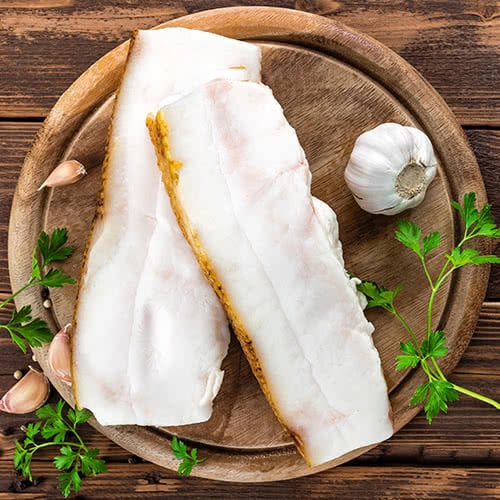
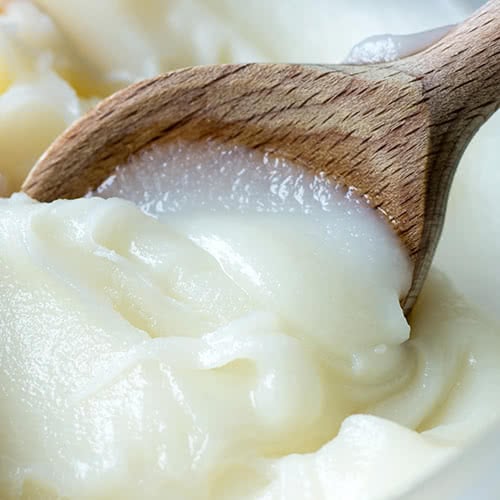
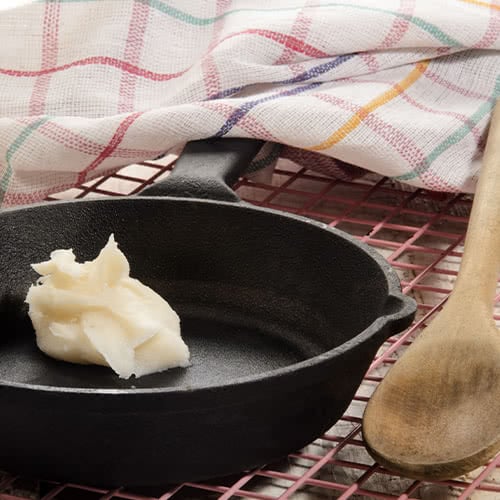
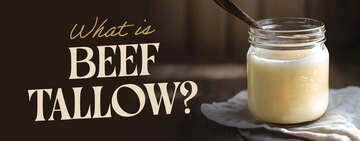
Beef tallow is rendered beef fat, typically sourced from the suet surrounding the kidneys and loins of cattle. Once melted and purified, it transforms into a versatile, shelf-stable cooking fat prized for its umami flavor, cost-effectiveness, and high smoke point. From its traditional uses in frying and roasting to its modern applications in enhancing menu items and improving kitchen efficiency, beef tallow is a valuable ingredient for operators. Whether you're running a food truck, a fine dining establishment, or anything in between, beef tallow could be a game-changing ingredient for your business. Shop All Tallow Use these links to learn more about the various aspects of beef tallow: What Is Beef Tallow Used For? How to Make Beef Tallow How to Store Beef Tallow Beef Tallow vs Lard Beef Tallow FAQ What Is Beef Tallow Used For? Beef tallow is a powerhouse ingredient in the commercial kitchen, offering versatility and efficiency across several applications. Here are some of the most common ways operators utilize beef tallow to enhance their operations: Frying - With its high smoke point beef tallow is ideal for deep frying. It delivers perfectly crisp textures and a rich, savory flavor profile that enhances fried foods like donuts, french fries, chicken, and onion rings. Unlike many vegetable oils, tallow can be reused multiple times without degrading, making it a cost-effective choice for high-volume frying. Roasting and Searing - Chefs love using beef tallow to roast vegetables, sear proteins, and coat roasting pans. Its ability to add depth to the natural flavors of ingredients makes it a favorite for preparing everything from roasted potatoes to prime cuts of beef. Baking - In baking, beef tallow can replace fats like butter or shortening to create flakier pastries, richer pie crusts, and tender biscuits. Its neutral flavor and unique fat composition contribute to exceptional texture without overpowering other ingredients. Flavor Enhancement - Beef tallow can be used as a finishing fat to enhance the flavor of sauces, gravies, and even soups. Some operators drizzle it over dishes like steak or mashed potatoes for an extra layer of indulgence. Preservation and Food Prep - Historically used as a preservative, beef tallow can still play a role in modern kitchens by sealing and protecting prepared foods like pates or confit. Additionally, it’s an excellent choice for seasoning cast iron cookware, ensuring even heat distribution and a natural non-stick surface. How to Make Beef Tallow For operators looking to control costs and enhance ingredient quality, rendering beef tallow in-house is a straightforward process that can deliver significant benefits. By converting raw beef suet into tallow, you gain access to a versatile cooking fat at an affordable price. Below we've outlined a step-by-step guide to making beef tallow on a commercial scale: Source Quality Fat: The quality of your beef tallow starts with the fat you use. Suet, the dense fat surrounding the kidneys and loins of cattle, is ideal for rendering due to its purity and high fat content. Many operators source suet directly from local butchers or meat suppliers to ensure freshness and reduce procurement costs. Prepare the Fat: Begin by trimming any remaining meat or connective tissue from the suet to prevent impurities from affecting the flavor or texture of the tallow. Cut the fat into small, uniform pieces, or use a meat grinder for faster, more consistent rendering. Melt the Fat: Place the prepared suet into a large, heavy-bottomed pot or commercial-grade rendering equipment. For dry rendering, heat the fat slowly over low heat. For optional wet rendering, add 1/4 to 1/2 cup of water and 1 tablespoon of salt per pound of fat to help draw out impurities. Maintain a gentle simmer over low heat for approximately 3 to 4 hours, depending on the quantity of fat. Stir occasionally to promote even melting and prevent sticking or scorching. As the fat renders, liquid tallow will separate from the solids. Strain and Purify: Once the fat has fully melted, remove it from the heat and allow it to rest for 5 to 10 minutes, allowing the remaining solids to settle. Carefully strain the hot liquid through a fine-mesh strainer, cheesecloth, or a commercial-grade filtration system to remove solid impurities. For wet rendering, strain the entire liquid mixture (tallow and water) together; the water will later separate and capture additional impurities. For dry rendering, strain only the liquid fat. Multiple filtration passes may be required to achieve a clear, clean tallow. For high-volume or commercial operations, automated filtration systems can improve efficiency and ensure consistent results. Cool and Store: Dry-rendered tallow may be used immediately or stored for later use. Allow the strained liquid to cool slightly before transferring it to storage containers. As it cools, the tallow will solidify into a creamy, off-white fat. When using the wet rendering method, allow the container to cool undisturbed until fully solidified; the tallow will form a solid layer on top of the water. Once firm, lift off the hardened tallow and scrape away any residual gelatin or impurities from the underside. If long-term storage is intended, the tallow may be gently reheated to drive off any remaining moisture before final packaging. How to Store Beef Tallow Proper storage of beef tallow is essential for maintaining its quality, extending its shelf life, and ensuring food safety in commercial kitchens. Whether you're storing small batches for daily use or large quantities for long-term supply, the right storage methods can help preserve its integrity and usability. Use Airtight Containers - Store beef tallow in airtight containers to prevent oxidation and contamination. Stainless steel canisters, glass jars, or food-grade storage containers with secure lids work best for keeping your tallow fresh. Keep Away from Heat and Light - You'll want to store your tallow in a cool, dark place to prevent the fat from degrading. Avoid placing containers near sources of heat and light like stoves, fryers, or direct sunlight. Label and Date Storage Containers - Clearly mark containers with the date of rendering or purchase to track freshness and stay on top of inventory. You'll also want to rotate stock using a first in, first out (FIFO) system to ensure the oldest tallow is used first. Prevent Cross-Contamination - Always use clean, dry utensils when handling tallow to avoid introducing moisture or bacteria. If you're considering using tallow for multiple applications such as frying and baking, consider storing separate batches to maintain flavor integrity. Does Beef Tallow Need to Be Refrigerated? Beef tallow does not strictly need to be refrigerated, but its storage method depends on how long you plan to keep it and how often you use it in your kitchen. While refrigeration isn’t always necessary, it’s a good practice for maintaining the quality and safety of beef tallow in kitchens, especially for long-term storage or irregular use. How Long Does Beef Tallow Last? Depending on the storage method, beef tallow can last anywhere from a few months to a few years. This extended shelf life helps reduce waste and secures a consistent supply for high-volume operations. Room Temperature - If stored in an airtight container away from heat and light, beef tallow can last up to 6 months at room temperature. This makes it a convenient option for kitchens that use it frequently in cooking or frying. Refrigeration - For longer shelf life, refrigerate your beef tallow. Properly sealed, it can last 12 months or more in the refrigerator without losing quality. Freezing - To maximize its longevity, freeze beef tallow in tightly sealed containers or vacuum-sealed bags. Frozen tallow can remain fresh for up to 2 years, making it an excellent option for large-scale storage in commercial operations. How to Tell If Beef Tallow Is Rancid Fresh beef tallow has a neutral, slightly meaty aroma, so if it smells sour, metallic, or otherwise unpleasant, it may have oxidized and gone bad. Rancid tallow may also develop a yellow or brown tint instead of the off-white or creamy color of fresh tallow. If the texture of your beef tallow feels sticky or overly grainy instead of smooth and solid, it could be a sign of spoilage. Rancid beef tallow will also have an unpleasantly bitter taste that indicates its gone bad. Beef Tallow vs Lard The main difference between beef tallow and lard is beef tallow is rendered fat from cattle, while lard is rendered fat from pigs, often sourced from back fat or kidney fat. While beef tallow has a rich, savory, beefy flavor that enhances fried foods, lard offers a more neutral taste with subtle pork undertones. Lard also has a lower smoke point than beef tallow, making it suitable for frying but less stable at very high temperatures. Both fats are cost-effective alternatives to vegetable oils, but beef tallow is better suited for savory, beef-focused dishes, while lard excels in applications requiring a more neutral fat. Beef Tallow vs Beef Fat Beef tallow is rendered and purified beef fat, free from impurities like connective tissue or meat remnants, while beef fat is raw fat trimmed directly from the beef. Beef fat often contains bits of meat or tissue and requires rendering to become usable as tallow. In terms of storage, beef tallow can be stored at room temperature or refrigerated for months, while beef fat is perishable and must be stored in the refrigerator or freezer until rendered. Using raw beef fat requires rendering, which can increase prep time and equipment usage. Opting for pre-rendered tallow saves time and helps guarantee consistency in your dishes. Beef Tallow FAQ Below we answer some of the most common questions regarding beef tallow: What Is Wet Rendering Tallow? Wet rendering is a method of making beef tallow by slowly heating fat with a small amount of water, often with added salt, to prevent scorching and help separate impurities. As the fat melts, the water absorbs proteins, blood, and other solids, resulting in a cleaner, lighter-colored tallow once cooled and separated. The primary benefits of wet rendering are improved purity, reduced odor during processing, and a lower risk of burning. This method is especially well-suited for producing tallow intended for baking, soapmaking, candles, skincare products, or long-term storage. What Is Dry Rendering Tallow? Dry rendering is the process of melting beef fat using heat alone, without added water, allowing the fat to liquefy and separate directly from the solids. This method is faster and produces a tallow with a richer, beefier aroma and flavor. Dry rendering is preferred when making tallow for cooking, frying, or roasting, or when crispy cracklings are desired as a byproduct. However, it requires closer temperature control to avoid scorching or darkening the fat. What Is Wagyu Beef Tallow? Wagyu beef tallow is the rendered fat from Wagyu cattle, known for their high marbling and superior fat quality. Unlike regular beef tallow, Wagyu tallow has a softer texture, a lower melting point, and a more buttery mouthfeel due to its higher concentration of fats. While Wagyu tallow offers distinct advantages, it is more expensive than conventional beef tallow, making it best suited for restaurants and food businesses looking to offer a premium experience. Is Beef Tallow Expensive? Beef tallow is generally more cost-effective than many other cooking fats, particularly in high-volume commercial kitchens. However, the price can vary based on sourcing, quality, and whether it’s rendered in-house or purchased pre-rendered. Not only is beef tallow cost-effective, its long shelf life helps reduce waste costs and allows for it to be bought in bulk. Is Ghee Beef Tallow? No, ghee and beef tallow are not the same, though both are popular cooking fats with high smoke points and rich flavors. The key difference lies in their source and composition, as ghee is made from clarified butter, and beef tallow is made from rendered beef fat. Choose ghee for dishes that require a dairy-based richness, like curries, pastries, or sauteed vegetables, while beef tallow is better served for deep frying, searing meats, and adding a robust, beefy depth to dishes. Beef tallow is a versatile, cost-effective, and long-lasting cooking fat that offers significant benefits for commercial kitchens. Its high smoke point, rich flavor, and ability to be reused make it a smart choice for operators looking to optimize costs without compromising performance. By understanding how to store, use, and even render beef tallow in-house, businesses can take full advantage of this valuable ingredient, reducing waste and elevating their culinary offerings.

Best Oil for Frying Donuts
Donuts are the ultimate sweet indulgence, prized for their warm, pillowy texture and irresistible flavor. But many don’t realize that the type of oil you fry them in is just as important as the dough's ingredients when crafting the perfect donut. The right oil can significantly influence a donut’s taste, mouthfeel, and appearance. We’ve rounded up the five best oils for frying donuts, selected for their neutral or close-to-neutral taste, high smoke point, and affordability. Shop All Donut Frying Oils 1. Vegetable Shortening The oil of choice for many donut chains, including the famous Krispy Kreme, vegetable shortening is ideal for all donut types due to its versatility, neutral flavor, and cost-effectiveness. Typically made from soybean or a blend of vegetable oils, it gives donuts a light golden color, airy texture, and crisp exterior without altering the flavor. It comes in solid and liquid forms, with the solid variety offering better consistency and stability during frying. Shortening creates a firm texture with a tender crumb, achieving the perfect balance of crispy outside and soft inside. With a higher melting point than liquid oils, the donut absorbs less oil, resulting in a less greasy product. Its high smoke point also allows it to withstand the high temperatures needed for frying without breaking down or affecting flavor. Make sure to choose a vegetable shortening specifically made for frying since baking shortening has a much lower smoke point. Vegetable Shortening Smoke Point: 360 to 450 degrees Fahrenheit (182 to 232 Celsius) Vegetable Shortening Price Point: $ 2. Canola Oil Canola oil rivals vegetable shortening as the top choice for frying donuts and is a great alternative. Since it’s liquid at room temperature, it coats the donuts more evenly, resulting in a more delicate crust, tender crumb, and lighter golden color compared to shortening. The neutral taste ensures that the natural sweetness of the donuts shines through without being overshadowed by the oil itself. Canola oil is a healthier alternative, with lower levels of saturated fats and higher amounts of heart-healthy omega-3 fatty acids. While slightly more expensive than vegetable shortening, it remains a cost-effective option, especially if you’re looking for an oil to use across various menu segments. Versatile in its uses, canola oil is ideal for a wide range of culinary applications, including baking, salad dressings, deep frying, and grilling. Canola Oil Smoke Point: 400 degrees Fahrenheit (204 degrees Celsius) Canola Oil Price Point: $ 3. Palm Oil Palm oil is known for its stability, which is why it is the preferred choice for many commercial donut chains, including Dunkin' Donuts. It gives donuts a crisp, firm bite while yielding a soft center. It is generally inexpensive and is not derived from seeds, making it a cost-effective option to seed oils without sacrificing performance. It's important to note that palm oil production has significant environmental concerns, particularly concerning deforestation and habitat destruction. If eco-friendly practices are integral to your business model, prioritize sourcing palm oil from certified, ethically managed sources. Palm Oil Smoke Point: 450 degrees Fahrenheit (232 degrees Celsius) Palm Oil Price Point: $ 4. Cottonseed Oil Cottonseed oil is the preferred choice for frying beignets, a classic French donut. Its high smoke point and neutral flavor make it perfect for achieving the light, airy texture and crisp golden-brown exterior that defines a great beignet, and these same qualities make it equally effective for other types of donuts. Though it ranks in the middle in terms of affordability on our list, its exceptional stability and high smoke point allow it to be reused multiple times without sacrificing the quality of the food or the oil, making it a cost-effective option over time. Cottonseed Oil Smoke Point: 420 degrees Fahrenheit (216 degrees Celsius) Cottonseed Oil Price Point: $$ 5. Peanut Oil Refined peanut oil is made by pressing, filtering, and purifying raw peanuts, resulting in a light color and mildly nutty flavor that is versatile enough for all types of donuts. It works particularly well if you're planning to coat your donuts with crushed nuts or glaze them with peanut butter, as the subtle nutty taste complements these flavors. Its high smoke point makes it one of the best oils for deep frying foods, ensuring a consistent fry that results in a crisp exterior and soft, fluffy interior. While it’s the most expensive oil on this list, its price is justified by its high performance. Highly refined peanut oil is considered safe for most people with peanut allergies, as the protein that causes reactions is removed. However, if you choose to use this oil, your menu should clearly state that your items are fried in peanut oil to ensure customer safety. Peanut Oil Smoke Point: 450 degrees Fahrenheit (232 degrees Celsius) Peanut Oil Price Point: $$ What Oils Should You Avoid When Frying Donuts? When frying donuts, it's important to choose oils that can handle deep fryer temperatures without burning or imparting strong flavors. Therefore, it's best to avoid oils with a low smoke point or those with a strong, distinctive flavor. Here are some oils to avoid: Extra Virgin Olive Oil: While olive oil has health benefits, extra virgin olive oil has a relatively low smoke point, which makes it unsuitable for deep frying. Additionally, its rich, vegetal flavor will alter the taste of your donuts and isn’t the best pairing with sugary glazes and toppings. Unrefined Coconut Oil: Unrefined coconut oil has a smoke point of around 350 degrees Fahrenheit (175 degrees Celsius), which is at the low end for frying donuts and might not be enough. It also has a distinct coconut flavor that could overpower the flavor of the donuts. Opting for refined coconut oil can help mitigate its strong flavor while increasing its smoke point, but this is an expensive route to take so consider your clientele. Avocado Oil: Both refined and unrefined avocado oil have smoke points high enough to be used for deep frying, making them technically suitable for frying donuts. However, given the premium cost of avocado oil, it’s not the most cost-effective choice for bulk frying. The expense may outweigh any potential benefits, especially when there are more affordable oils that perform just as well in the fryer. When choosing an oil for your donut shop, let frying performance guide your decision. Most customers order donuts as a special treat rather than for health reasons, so it's best to prioritize flavor, smoke point, and cost when selecting your oil, rather than focusing solely on health aspects. To withstand the high temperatures required for deep frying, most oils must be refined to raise their smoke point, thus reducing their nutritional value. Can You Fry Donuts in Lard or Beef Tallow? Yes, lard and beef tallow have been used for centuries in donut frying, lending an old-fashioned taste. In fact, lard is the traditional frying medium to create authentic paczki and fastnacht. However, the cost is considerably higher to fry with animal fats than to use plant-derived oils. Lard has a smoke point of approximately 370 degrees Fahrenheit (188 degrees Celsius), while beef tallow boasts a smoke point of 400 degrees Fahrenheit (204 degrees Celsius). If you opt for lard or beef tallow, ensure they are properly rendered to maintain a neutral taste. It will also result in non-vegan or vegetarian donuts, which is something to keep in mind when choosing your target demographic. What Temperature Should You Fry Donuts At? The ideal temperature for frying donuts is between 350 and 375 degrees Fahrenheit (175 to 190 degrees Celsius). This temperature range ensures that the donuts cook quickly, becoming golden brown and crispy on the outside, while remaining soft and fluffy on the inside. It's important to maintain a consistent temperature throughout the frying process. If the oil is too hot, the donuts may brown too quickly on the outside while remaining raw inside. If the oil is too cool, the donuts will absorb more oil and become greasy. Using a thermometer to monitor the oil temperature can help ensure perfect frying results. How Long Should You Fry Donuts For? Donuts should typically be fried for 1 to 2 minutes on each side, depending on their size and thickness. The exact time may vary slightly, but you want the donuts to turn golden brown and crisp on the outside while remaining soft and fully cooked on the inside. Donut shops can ensure consistent product quality by opting for a neutral oil with a high smoke point to fry their donuts. Each oil on our list is an excellent option for creating one of America’s most beloved baked goods, offering both versatility and stability at high temperatures. These oils help achieve the perfect crispness and flavor without imparting any unwanted tastes or aromas, allowing your signature creations to shine.

Pie Crust Designs
Whether you own a professional or home bakery, mastering the art of pie crust designs can impress your guests and elevate your desserts to the next level. Our easy-to-follow tutorial and accompanying video will guide you through the process of creating a variety of pie crust styles, including beautiful lattice and decorative cut-out designs, that will make your pies stand out. Click on any of the links below to skip to the pie crust design that interests you: Crumb Pie Crust Lattice Pie Crust Double Pie Crust Single Pie Crust Cookie Cutter Heart Pie Crust Basic Pie Crust Recipe Pie Crust Tips Five Easy Pie Crust Designs There are countless ways to make your pie crust look as delicious as it tastes. We'll show you how to easily make five pie crust designs, from the classic crumble crust to a decorative heart pie crust! Each of the pie crusts can be made using our basic pie crust recipe. Watch our video tutorial on how to make different pie crust designs or follow our step-by-step guide with pictures below: <iframe scrolling="no" width="392" height="226" src="/v/?num=3947&width=600&height=500&embed=1" frameborder="0"></iframe> What Special Equipment Do I Need? Fortunately, many of these pie designs do not require special tools to create once you've rolled out your dough. Below are the standard items you'll need for each pie design - we'll note any special tools needed in each pie crust design's directions. Pie Pan: Either a metal pie pan or a disposable pie pan will do. Knife: Some pie styles will require you to trim the excess pie dough with a knife. 1. Crumb Crust Pie A crumble crust is ideal for fruit pies like apple, blueberry, and cherry pie. This delicious crust can also form the bottom layer of bar and cheesecake recipes. Crumb Crust Ingredients 1/2 cup flour 1 cup packed brown sugar 1/4 cup oats 1 stick butter, softened 1 Tablespoon cinnamon 1.Grease pie pan, add your prepared bottom crust to pie pan, and use knife or kitchen shears to trim off excess dough. 2.Crimp pie crust edge. 3.Add in pie filling. 4.In mixing bowl, combine crumb crust ingredients and hand mix. 5.Cover pie with crumb crust topping and bake according to your recipe's instructions. 2. Lattice Pie Crust The classic lattice pie crust is made by weaving strips of pie dough on top of the filling, creating a visually appealing basket weave pattern. This decorative technique not only enhances the pie's appearance but also allows steam to escape through the gaps between the dough strips, making it great for fruit-filled pies. 1.Grease pie pan and add your prepared bottom crust to pie pan. 2.Add in pie filling. 3.Use pastry wheel or dough cutter to cut prepared top crust into 1-inch strips. 4.Lay half of strips vertically and evenly spaced on top of filled pie. Leave about 1/2 inch of space between each strip to allow for weaving. 5.Take two strips of dough on either side of center strip and gently lift them, folding them back halfway. Place another strip of dough horizontally across pie filling, above folded strip. Unfold folded strip back over horizontal strip. Repeat this process with remaining vertical strips, alternating over and under each horizontal strip. 6.Take next set of vertical strips and fold them back, placing another horizontal strip over them. Unfold folded strips and repeat process until you have completed lattice pattern across the entire pie. 7.Once lattice is complete, crimp bottom and top pie crust edges together and bake according to your recipe's instructions. 3. Double Pie Crust A double crust pie is a type of pie that has both a bottom and top crust. It is a classic and versatile pie style that can be filled with a variety of sweet or savory fillings. The double crust not only adds an extra layer of flavor and texture but also helps to seal the filling and keep it moist during baking. Just be sure to be sure to vent it so you don't rupture the top crust. 1.Grease pie pan and add your prepared bottom crust to pie pan. 2.Add in pie filling. 3.Lay prepared top crust on top of filled pie. 4.Crimp bottom and top pie crust edges together. 5.Use knife to cut small hole out of center of pie and make four diagonal slits around hole to allow steam to vent. Bake according to your recipe's instructions. 4. Single Pie Crust The easiest out of all the pie styles to make, a single crust pie is a type of pie that only has a bottom crust and no top crust. It is often used for pies that have a custard, cream, or fruit filling that does not require a top crust for baking. 1.Grease pie pan and add your prepared bottom crust. 2.Add in pie filling. 3.Crimp pie crust edge and bake according to your recipe's instructions. 5. Cookie Cutter Heart Pie Crust One way to create visually appealing and unique pie crust designs is by using cookie cutters. In this tutorial, we use a heart-shaped cookie cutter, but you can use virtually any cookie cutter shape or theme to cater to a special occasion or holiday. 1.Grease pie pan and add your prepared bottom crust. 2.Add in pie filling. 3.Place prepared top crust on clean work surface and use pie pan of equal diameter and knife to trim off excess dough. 4.Starting in crust's center, use cookie cutter to cut out rows of hearts. Make sure to leave about 1/2 inch of space around edge. 5.Place decorative top crust onto pie. 6.Crimp bottom and top pie crust edges together and bake according to your recipe's instructions. Basic Pie Crust Recipe Creating a delicious pie starts with a basic pie crust recipe. This simple recipe is easy to make and consistently produces a buttery, flaky pie crust. With just a few ingredients, you can create a foundation for a wide variety of sweet and savory pies. Ingredients 2 1/2 cups all-purpose flour 1 Tablespoon salt 1 Tablespoon sugar 2 sticks cold unsalted butter, chopped 4 Tablespoons ice water Directions Combine dry ingredients and chopped butter in food processor. Blend until mixture begins to look crumbly. Slowly add ice water and continue blending. Dough should start to form large clusters. To check if it's ready, pinch some dough - if it holds together, it's good to go. If it falls apart, add 1 more tablespoon of ice water at a time and blend until dough comes together. Transfer dough from bowl onto clean work surface and lightly work it to form a ball. Wrap dough with plastic wrap and refrigerate for at least one hour, or up to two days, before using it in your recipes. Alternatively, you can freeze it for up to three months (thaw it overnight in fridge before using). Pie Crust Tips To achieve a beautiful and flaky pie crust, it's important to follow a few key tips. By keeping your pie crust cold, using a quality pie crust, and avoiding excessive handling of the dough, you can create a pie that not only looks stunning but also tastes amazing. Keep the Pie Crust Cold: One of the most crucial aspects of working with pie crust is to ensure it stays cold throughout the process. This is because cold dough is easier to handle and results in a flakier crust. To keep your pie crust cold, chill all the ingredients, including the flour, butter, and water, before you start making the dough. Additionally, refrigerate the dough for at least one hour before rolling it out. If the dough becomes too warm while you're working with it, place it back in the refrigerator for a few minutes to cool it down. Use a Quality Pie Crust: The quality of your pie crust can greatly impact the final result. Homemade pie crusts allow you to control the ingredients and ensure a flaky, buttery crust. Our basic, buttery pie crust recipe is tried and true and suits all skill levels. Don't Handle the Dough for Too Long: Overworking the dough can lead to a tough and chewy crust. When mixing the ingredients, aim to combine them just until they come together. Avoid kneading or overmixing the dough, as this can develop the gluten, resulting in a less tender crust. Once the dough has been formed, roll it out gently and as quickly as possible. The more you handle the dough, the warmer it becomes, which can lead to a less flaky crust. Blind Bake the Crust: If you're using wet or custard-like fillings, consider blind baking the pie crust before adding any fillings. Blind baking involves pre-baking the crust without any filling, which helps prevent a soggy bottom. By blind baking the crust, you'll ensure a crisp and flaky base for your pie, allowing your intricate designs to shine. Use pie weights to achieve the perfect blind bake. Back to Top Ditch the same old pie routine and master new pie crust designs that will leave your guests in awe. With our decorative pie crusts tutorial, you can confidently create a variety of designs, including the simple crimped edge single crust or the timeless lattice pattern that are perfect for your Thanksgiving feast. Elevate the visual appeal of your pies to match their mouthwatering taste with exquisite and detailed designs.