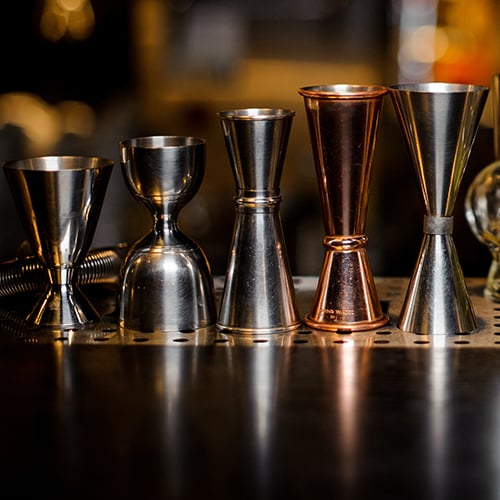
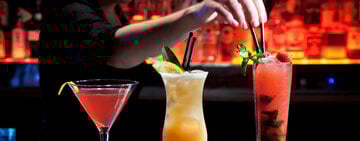
Whether you’re opening a new bar or aspiring to become a bartender, having the right tools is essential for crafting delicious cocktails and keeping up with a bustling barroom. For those not sure where to start, we’ve rounded up the top 10 bar tools every business that offers beverage service should have in stock. Equipping your bar with these basics will set you up for smooth service and expertly crafted cocktails. Shop All Bartending Supplies Learn about the most popular tools for bartenders: 1. Juicer 2. Jigger 3. Muddler 4. Cocktail Shakers 5. Liquor Pourers 6. Corkscrews and Bottle Openers 7. Bar Spoon 8. Bar Towels 9. Cocktail Strainer 10. Glass Rimmer 1. Juicer When it comes to crafting delicious cocktails with fresh ingredients, a juicer is a vital tool for bartenders. Manual juicers, such as citrus squeezers and reamers, are perfect for extracting juice from citrus fruits like lemons and limes. These handheld tools are easy to use and ideal for small batches or individual drinks. High-volume bars especially benefit from using electric juicers to streamline their cocktail preparation process. Electric juicers are excellent for batching your house-made sour mix or making super juice. Using juicers ensures flavor consistency in cocktails by quickly extracting the maximum yield from fruits. This not only enhances the taste of the drinks but also helps cut costs on fresh produce in the long run. Types of Juicers: Citrus squeezers, hand press juicers, reamers, electric juicers Juicer Benefits: Fresh fruit flavor, consistency, maximum extraction, and reducing waste Cocktails That Require a Juicer: Sour mix cocktails such as a margarita, whiskey sour, and long island iced tea, as well as a paloma, Moscow mule, screwdriver, and French 75 2. Jigger A jigger is a small, hourglass-shaped measuring device used to accurately pour liquid ingredients for cocktails, helping to maintain the quality and flavor of the drink. Not only does it help bartenders create consistent and well-balanced cocktails, but it also helps to reduce waste by preventing over-pouring. Additionally, jiggers can improve efficiency behind the bar by streamlining the measuring process and reducing the risk of errors. There are several types of jiggers, each with its own unique design and features. The most common types of jiggers include bell jiggers, classic jiggers, and Japanese jiggers. Classic jiggers typically have two cone-shaped measuring cups. This allows bartenders to switch between different measurements with ease. Bell jiggers have two different measuring cups on each end as well, but in a bell-shaped design. Japanese jiggers are known for their elongated, slender, hour-glass-shaped design and a more precise measurement scale. Types of Jiggers: Classic cone-shaped jiggers, bell jiggers, Japanese jiggers Jigger Benefits: Prevents overpouring alcohol, cost savings, flavor consistency Cocktails That Require a Jigger: A jigger is a useful tool for preparing any mixed drink 3. Muddler A muddler serves as a practical instrument for mashing, or "muddling," ingredients at the bottom of a glass or shaker. By exerting gentle pressure, bartenders can effectively extract the essential oils, juices, and aromas from the ingredients, elevating the overall taste and presentation of the cocktail. A muddler functions similarly to a miniature pestle, allowing for precise control over the muddling process. These versatile tools are particularly well-suited for crafting popular drinks such as mojito varieties, old fashioned, and sangria. When selecting a muddler, consider the design that best suits your needs. Flat-bottomed muddlers are ideal for muddling herbs as they help prevent bruising and bitterness, preserving the delicate flavors of the ingredients. On the other hand, toothed or ridged muddlers are better suited for crushing fruits and sugar, providing the necessary texture and consistency for certain cocktails. By choosing the right muddler for the job, bartenders can ensure optimal results in their mixology process. Types of Muddlers: Flat-bottomed muddlers, ribbed muddlers Muddler Benefits: Crushes fruits, herbs, and spices directly in a glass or shaker so the full range of essential oils, juices, and aromas are absorbed into the beverage Cocktails That Require a Muddler: Mojito, old fashioned, sangria, caipirinha, mint julep, whiskey smash 4. Cocktail Shakers Cocktail shakers facilitate the mixing, chilling, and dilution of ingredients through a vigorous shaking process with ice. This technique is specifically designed to expedite the blending of spirits with other ingredients compared to stirring, resulting in a thoroughly mixed cocktail. The act of shaking mixed drink ingredients introduces air, creating a frothy consistency. This aerated consistency enhances cocktails containing ingredients like egg whites or dairy. Whether concocting a refreshing summer drink menu or a refined martini, possessing a high-quality cocktail shaker in your bar toolkit is essential for bartenders aiming to craft flavorful and harmonious cocktails. Cocktail shakers are a must-have for bartenders, and there are several types to choose from. The Boston shaker is a classic two-piece set that is versatile and easy to use. The Parisienne shaker features a built-in strainer, making it convenient for quick and efficient mixing. The three-piece cobbler shaker consists of a base, strainer, and cap, making it easy to mix and strain cocktails in one vessel. Another option is the beehive cobbler shaker, which features a unique beehive design on the cap, adding a stylish touch to the bartending experience. Most cocktail shakers are made of stainless steel due to its durability, ease of cleaning, and fast chilling capabilities. Types of Cocktail Shakers: Boston shakers, Parisienne shakers, cobbler shakers, beehive cobbler shakers Cocktail Shaker Benefits: Efficiently blends mixed drink ingredients, cools cocktails, and aerates the beverage, creating a frothy consistency Cocktails That Require a Shaker: Useful for making any mixed drink, but particularly helpful for emulsifying drinks with juice, egg whites, or dairy, such as a Ramos Gin Fizz, grasshopper, or Brandy Alexander 5. Liquor Pourers Liquor pourers help bartenders accurately measure liquor with precision and consistency. By using liquor pourers, bartenders can ensure that each drink contains the correct amount of alcohol, reducing the risk of over-pouring and ultimately saving money on liquor costs. The precise pouring capabilities of liquor pour spouts help to maintain the balance and composition of cocktails, ensuring that each drink is perfectly crafted every time. Liquor pour spouts are available in a variety of designs to suit different preferences and needs. Choose between speed pourers, free-flow pourers, screened pourers, whiskey pourers, and wide-mouth pourers to meet your specific requirements and preferences. This versatility allows bartenders to customize the way they prepare mixed drinks, whether they prefer a controlled pour or a faster flow. Additionally, liquor pourers can be integrated into rack systems for efficient storage and organization behind the bar, making it easy for bartenders to access different spirits quickly during busy service hours. Types of Liquor Pourers: Free flow, screened, speed, whiskey, wide mouth, with collar, without collar Liquor Pourer Benefits: Reduces risk of overpouring, speeds up service, creates consistency Cocktails That Require a Liquor Pourer: Any mixed drink containing a hard alcohol can benefit from a liquor pourer 6. Corkscrews and Bottle Openers Corkscrews and bottle openers cater to a wide range of businesses, including bars, breweries, and wine tasting rooms. Bottle openers allow bartenders to quickly and effortlessly open beer bottles and other capped beverages. There are various types of bottle openers available, including traditional handheld lever openers, mounted openers for convenient installation on walls or countertops, and pocket-sized openers for on-the-go use. Some models even come with cap catchers to keep the workspace tidy. Corkscrews are essential for opening wine bottles and are commonly used in establishments that serve wine or cater events where wine is served. Wine bottle openers, also known as wine cork extractors, come in different styles, such as the classic corkscrew design or the eclectic cork extractor models. Bartenders can choose from handheld corkscrews for portability or, for a more sophisticated approach, continuous pull corkscrews offer a seamless and efficient way to extract corks from wine bottles. Waiters' corkscrews, also known as wine keys, feature a corkscrew, a small knife for cutting foil, and a bottle opener for beer caps. Types of Corkscrews and Bottle Openers: Handheld lever openers, mounted openers, pocket-sized openers, waiters' corkscrews, and continuous pull corkscrews Corkscrew and Bottle Opener Benefits: Quick and efficient opening of wine bottles and beer bottles Corkscrew and Bottle Opener Applications: Beer and wine service 7. Bar Spoon Bar spoons offer functionality and showmanship when mixing drinks. Japanese-style bar spoons are designed with a dual-purpose functionality, allowing bartenders to mix drinks with one end and handle small quantities of ingredients with the other. Knob bar spoons are typically 10 to 12 inches in length and feature a long handle with a small plastic or metal cap on the end. This design is ideal for stirring cocktails in tall glasses and shakers. Weighted end bar spoons are designed to add balance and efficiency to drink preparation, making them a favorite tool among professional bartenders. Fork-end bar spoons are specifically crafted to stir drinks with one end and spear pieces of fruit and garnishes with the other, adding an elegant touch to cocktail presentation. Muddler bar spoons feature a flat end that doubles as a muddler, allowing bartenders to gently crush herbs, fruits, or other ingredients directly in the glass. Bar spoons with a strainer end provide a convenient way to strain out chunks of ice or other cocktail ingredients, ensuring a smooth and consistent drink texture. Types of Bar Spoons: Japanese bar spoons, fork-end bar spoons, knob bar spoons, muddler-end bar spoons, strainer-end bar spoons, weighted bar spoons Bar Spoon Benefits: Smooth stirring, layering, and measuring of mixed drinks Cocktails That Require a Bar Spoon: Martini, Manhattan, Negroni, old fashioned, Rob Roy, Vesper 8. Bar Towels Bar towels are an essential tool for bartenders to maintain a clean and efficient workspace. Available in white and natural color choices, these towels are designed to pick up liquids and reliably hold them to prevent drips and spills. Purchasing bar towels in bulk offers several benefits for commercial establishments; it ensures bartenders always have a fresh supply of clean towels on hand, reducing the risk of cross-contamination and maintaining a high level of cleanliness in the bar area. Additionally, buying in bulk can result in cost savings for businesses over time. Cotton bar towels are a popular choice thanks to their absorbency and durability. They are soft to the touch and can easily soak up spills and messes, making them ideal for wiping down bar surfaces and glassware. Microfiber bar towels are another excellent option, known for their superior absorbency and quick-drying properties making them ideal for cleaning and polishing glassware without leaving streaks or lint behind. Bar towels come in solid or striped designs, allowing bartenders to easily differentiate between towels designated for specific tasks. If your business doesn't have the capability to launder its bar towels, disposable towels and wipers are an effective alternative. Types of Bar Towels: Cotton bar towels, microfiber bar towels, solid color bar towels, striped bar towels, disposable bar towels and wipers Bar Towel Benefits: Maintaining a clean bar space, reducing cross-contamination 9. Cocktail Strainer Cocktail strainers remove ice from a mixed drink before it is poured into a serving glass, ensuring that only the liquid portion of the cocktail enters the glass. This step is crucial to achieving a perfectly chilled cocktail served straight up, without any ice dilution. This step is necessary when making traditional gin martinis or cosmopolitans. In the world of mixology, the cocktail strainer is a tool that goes beyond mere functionality, elevating the presentation and taste of your cocktails. There are various types of cocktail strainers available to cater to different mixing techniques and preferences. The Hawthorne strainer is a popular choice, featuring a coil that helps strain out ice and other solid ingredients while pouring the drink. The julep strainer is another timeless option, designed with a perforated bowl shape that allows for smooth pouring without any unwanted particles. For those who prefer a more refined approach, the mesh strainer offers a fine sieve that ensures a silky texture and removes any small ice chips or herb remnants. Additionally, cocktail strainers come in a range of designs, including vintage-inspired styles and scalloped shapes that add an extra touch of elegance to your bar top. Whether you are a seasoned bartender or a home enthusiast, investing in a quality cocktail strainer is a must for mastering the art of crafting exceptional drinks. Types of Cocktail Strainers: Hawthorne strainer, julep strainer, mesh strainer Cocktail Strainer Benefits: Removing ice before a cocktail is poured, perfectly chilled straight-up cocktails, bartending showmanship, and presentation Cocktails That Require a Cocktail Strainer: Martini, cosmopolitan, sidecar, Manhattan, daiquiri 10. Glass Rimmer Glass rimmers help you add sugar and salt to the rim of your cocktail glasses, creating eye-catching drinks that leave a lasting impression on your customers. They not only enhance the aesthetic appeal of your beverages, but they also enhance their flavor. Salt and sugar glass rimmers are equipped with round compartments designed to fit a wide variety of cocktail glasses, ensuring even coverage along the rim of your drink. This uniform application of salt or sugar not only enhances the visual appeal of your cocktails but also ensures that every sip is perfectly balanced in taste. Incorporating glass rimmers into your bartending toolkit will expedite your workflow and help you create memorable drinking experiences for your customers. Glass rimmers help keep the bar tidy by offering a convenient, contained setup for rimming glasses. For bartenders looking to streamline their garnish organization, glass rimmers with multiple compartments and labels are a must-have tool. These glass rimmers allow you to easily organize and identify different cocktail rimming agents such as salt, sugar, and Tajin, making it simple to create consistently beautiful and flavorful drinks every time. Whether you are preparing salt-rimmed classics like the margarita, bloody mary, paloma, and mezcal cocktails, or sugar-rimmed favorites like the sidecar, cosmopolitan, and lemon drop martini, glass rimmers are indispensable tools for achieving professional-quality results. Types of Bar Glass Rimmers: Units come in 1 to 5 compartment models and various lengths and diameters to accommodate different cocktail glasses Bar Glass Rimmer Benefits: A bar glass rimmer provides a convenient and efficient way to apply salt, sugar, or spices to glass rims, allowing bartenders to enhance the presentation of drinks and create a harmonious blend of flavors Cocktails That Require a Bar Glass Rimmer: Margarita, bloody mary, paloma, sidecar, cosmopolitan, and lemon drop martini Back to Top Best Bartending Tool Brands When purchasing bar tools, it is crucial to be well-versed in the top bar smallwares brands. We have curated a list of top-rated bartending tool brands that bar operators and aspiring bartenders must familiarize themselves with to choose the highest quality products for their establishments. Acopa Acopa is known for its high-quality items that offer exceptional value. They're an ideal option for new businesses looking to stock up on bartending tools in bulk without overspending. Acopa's catalogue includes a wide range of everyday food and beverage service essentials at affordable prices. Can Acopa Products Be Customized? Customization is available on a selection of Acopa bar tools Acopa Bar Tools: Bar spoons and forks, bar accessories, cocktail shakers, liquor pourers, corkscrews, and bottle openers See what our customers are saying about Acopa cocktail shakers here! Barfly® Barfly® is a top-tier bartending tool brand known for its unwavering dedication to the artistry behind cocktail making. As a subsidiary of Mercer, a company established in 1968 with a strong focus on innovation, Barfly® was created to cater to a specific need in the foodservice industry by offering high-quality barware that meets the demands of professional bartenders and mixologists. Each Barfly® item is designed to be both efficient and elegant, ensuring an eye-catching presentation for any establishment. Can Barfly® Products Be Customized? Customization is available on a selection of Barfly® bar tools Flavors: Cocktail shakers, liquor pourers, jiggers, muddlers, manual juicers, graters, cocktail strainers, bitters bottles, stirring glasses, ice picks, cocktail stirrers, corkscrews, and bottle openers See what our customers are saying about Barfly® muddlers here! Choice Choice brand is dedicated to providing products at an economical price point, allowing entrepreneurs without a lot of capital to enter the foodservice landscape. Perfect for bars looking for functionality while keeping costs low, Choice offers a wide range of mixology essentials. With Choice, you can get everything you need to run your bar efficiently, even on a smaller budget. Can Choice Products Be Customized? Customization is available on a selection of Choice bar tools Choice Bar Tools: Bar glass rimmers, bar accessories, muddlers, bar spoons and forks, bar towels, corkscrews, and bottle openers See what our customers are saying about Choice bottle openers here! American Metalcraft Established in 1947 by the esteemed Archer Kahn, American Metalcraft has become a leading figure in the realm of tabletop supply manufacturers within the foodservice industry. Boasting a storied legacy of over seventy years, American Metalcraft has earned acclaim for its commitment to providing top-notch products that cater to the ever-changing demands of the hospitality field. Their bartending tools meet the rigid quality standards American Metalcraft is known for, making them valuable additions to any bar. Can American Metalcraft Products Be Customized? Customization is available on a selection of American Metalcraft bar tools American Metalcraft Bar Tools: Liquor pourers, cocktail shakers, barspoons and forks, corkscrews and bottle openers, cocktail strainers See what our customers are saying about American Metalcraft stainless steel jiggers here! Back to Top These foundational tools help you create delicious cocktails efficiently and effectively. From juicers and jiggers to muddlers and cocktail shakers, having the right tools on hand is crucial for a successful bar operation. Upgrade your bar tools today to increase sales, provide faster service, and maintain flavor continuity in every drink you serve. <!-- Start Author Bio Block --> Written by Kayla Nelson Kayla has 8+ years of experience at Webstaurantstore, specializing in writing about foodservice operations, culinary techniques, and unique ingredients. When she's not writing, she's in the kitchen passing her love of cooking onto her toddler, one messy, joy-filled recipe at a time. Learn more about this author and WebstaurantStore's Content Writing Team here! <!-- End Author Bio Block -->