
IQF stands for individual quick freezing. It is a common freezing method in the foodservice industry and consists of freezing individual pieces of food separately from the other pieces at extremely low temperatures. IQF is also referred to as flash freezing, quick freeze, or super freeze. You can also freeze food individually by blast chilling foods at a rapid pace.
Shop IQF FoodCommon Flash Frozen Foods
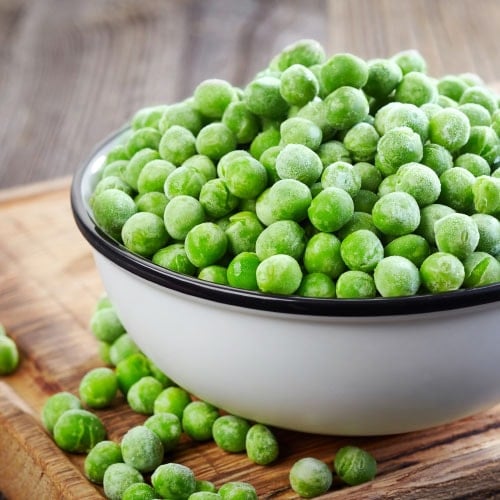
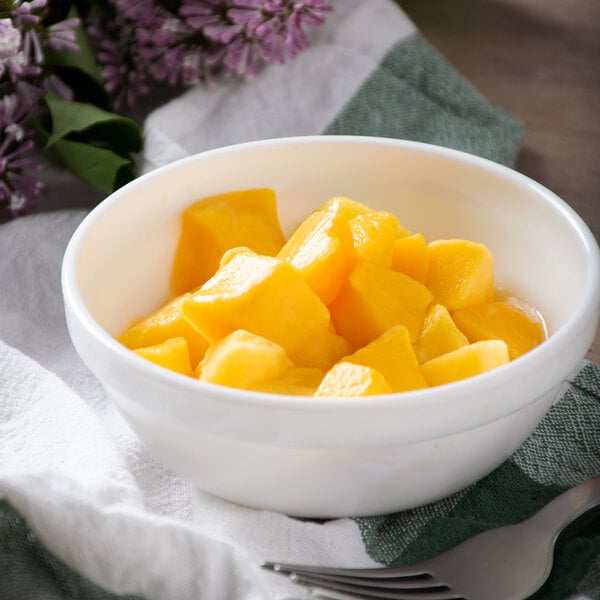
A common example of this is IQF shrimp, where each shrimp in the bag is frozen individually instead of frozen into a block of shrimp. Below are examples of typical flash frozen foods:
- Mixed Berries
- Green Beans
- Corn
- French Fries
- Chicken Breasts
- Steaks
- Bread and Rolls
Benefits of Flash Freezing
As IQF popularity grows, the benefits of flash freezing have become more evident in the foodservice industry. IQF can help you cut down costs and defrost food as you need it, instead of in large portions.
Better Quality
Essentially, the faster you freeze your food the better quality it will remain in. When food is frozen slowly, ice crystals form. Big ice crystals typically dry out the food and impact the overall taste and flavor. To avoid this when flash freezing, consider using a blast chiller or IQF freezer.
Small Portions
One of the biggest benefits of individual quick freezing is having small portions of frozen food available at any time. Instead of thawing out an entire bag of frozen chicken breasts, IQF makes it easy to just defrost only the amount you need. Additionally, restaurants can appeal to customers who are trying to eat healthy by offering small portions on their menu.
How Do I Flash Freeze My Food?
The process of flash freezing your food is simple and just takes a little bit of extra prep time. Below, we outline the best way to flash freeze your food.
- If your food needs washed or rinsed, do so first. Products such as fresh fruit may need to be cleanedand have their stems removed before freezing.
- Separate the food into individual pieces to prepare for IQF.
- Place the food on a large baking sheet or tray to prepare for freezing. Ensure that the edges of the food are not touching to make sure they don’t stick together.
- Place the foods into a blast chiller, IQF freezer, or regular freezer.
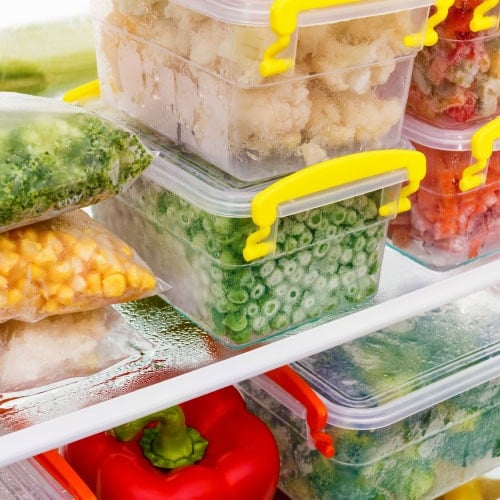
- Once fully frozen, remove the food from the sheet or tray and place it into freezer safe storage containers or bags.
- Label the container or bag and return the food to the freezer. Your food is now flash frozen!
- Remove individually frozen food portions as needed from the freezer.
How to Flash Freeze Food Video
Use the following video to learn how to flash freeze your food and pracite IQF:
IQF foods are specifically easy to work with in the foodservice industry and prove to be a growing trend. IQF foods are perfect for making smoothies, meal prep, or offering smaller portion sizes in your restaurant.
Related Resources
How to Cool Foods Properly
While most people are aware of the food safety concerns related to improper cooking or preparation methods, the importance of cooling food the right way often goes overlooked. Improper cooling of potentially hazardous foods is one of the leading causes of foodborne illness in commercial foodservice operations and can lead to the rapid multiplication of bacteria. For that reason, you and your staff need to be well-trained and informed on the correct procedures for cooling food to ensure the safety of your guests and comply with health regulations. Click below to skip to the food cooling tip most interests you: The Two Stages of Cooling Food Food Cooling Methods How Not to Cool Food Avoiding the Danger Zone While Cooling Food Training Staff on the Food Cooling Process How to Log Food Temperatures The Two Stages of Cooling Food According to FDA regulations and CDC's food cooling guidelines, food should be cooled in two stages to keep it safe for consumption. The two-stage process that you should use in your kitchen is as follows: Food must be cooled from 135 to 70 degrees Fahrenheit (57 degrees Celsius to 21 degrees Celsius) within 2 hours. Food must then be cooled from 70 to 41 degrees Fahrenheit (21 degrees Celsius to 5 degrees Celsius) within 4 hours. If cooling foods don't reach 70 degrees Fahrenheit within the first two hours, they must immediately be reheated to 165 degrees Fahrenheit for 15 seconds. Once this is done, the cooling process can start again until the food reaches 40 degrees Fahrenheit. If a staff member fails to monitor food or the cooling process isn't followed, dispose of the dish. Food Cooling Methods There are several different food cooling methods, and no method is better than the rest. Each one is helpful for a different type of food, depending on factors such as volume, density, and moisture content. Understanding the various food cooling methods can help you choose the most appropriate one for your specific needs, and we've listed the most common ones below. 1. Ice Cubes Using ice cubes as a cooling method is particularly effective for soups and gravies. This approach works well for water-based dishes that can easily be thickened during reheating. When using the ice cube method, keep the following tips in mind to ensure optimal results: Separate: Consider separating the dish into shallow pans to accelerate the cooling process. Doing this increases the surface area exposed to the cold, promoting quicker cooling. Stir: This helps distribute the cold temperature evenly throughout the dish and prevents potential hot spots that may compromise quality. Monitor: Monitor food temperature throughout the cooling process to ensure prompt results. 2. Ice Baths Ice baths offer a controlled environment. They allow you to cool food from the outside in, efficiently lowering the temperature throughout the entire dish. This method is especially useful for foods that would be diluted or watered down by ice cubes. To use the ice bath method of cooling, follow these steps: Fill a sink basin or food storage box with ice and a small amount of water. Place hot food into the ice until it is below ice level but not fully submerged. Shift the pan every few minutes, adding more ice if needed. Monitor food temperature to ensure it drops according to the 2-step cooling process requirements. 3. Ice Paddles Ice paddles work effectively without diluting the flavor or consistency of your dishes. Made from food-grade plastics such as polycarbonate, ice paddles are safe for contact with food products and will not react with hot dishes. In most cases, ice paddles are more efficient than using an ice bath, making them ideal for busy kitchen environments where time is of the essence. They are versatile and work well with many foods, including soups, sauces, vegetables, rice, and beans. Follow the instructions below to use your ice paddle the right way: Fill a cooling paddle with water and freeze overnight. If you need to use it the same day, fill the paddle with ice and cold water. Place the paddle into your hot food and stir every 3-5 minutes to get the food to 70 degrees Fahrenheit within 2 hours. Use a probe thermometer to monitor the temperature of the food. Place the food into the refrigerator with the paddle still submerged and check the temperature every 20 minutes as it descends to 41 degrees over the next 4 hours. Remove the paddle when the food reaches a safe cooling temperature. 4. Blast Chillers If you have room for one, a commercial blast chiller can be a quick, effective tool for cooling food and getting it out of the danger zone. A blast chiller or flash freezer blows forced cold air over the food, bringing the temperature down rapidly while minimizing the ice crystals that can form during the cooling process. This cools the food safely, extends its shelf life, and ensures a great-tasting product when reheated. To use a blast chiller the right way, follow these steps: Divide the food into shallow pans (approximately 4 inches deep) to allow it to cool evenly and quickly. Check the manual of your blast chiller to see which pans are compatible with your unit. Follow the instructions to start your unit. The chamber temperature will gradually drop while blowing air to cool the food safely. Once the food is at a safe temperature, place it in cold storage. How Not to Cool Food While it is important to understand which methods are best for cooling food, it is equally important to understand which methods you should avoid and why. Some methods may seem convenient, but in practice will jeopardize the safety and quality of your food. Avoid using these common practices to ensure the best cooling results: Placing food in a refrigerator: Some individuals place hot food directly in the refrigerator or freezer to speed up the cooling process. Doing so can lead to a significant increase in the internal temperature of the appliance, compromising other perishable items stored inside. The hot food may not cool evenly, creating an environment conducive to bacterial growth. Placing food on the counter to cool at room temperature: When left at room temperature for an extended period, food enters the danger zone, which increases the risk of foodborne illness. Placing food in a cooler: While coolers keep food cold, they aren't suitable for rapidly cooling hot food. Placing hot food in a cooler can elevate its internal temperature, potentially causing other items stored inside to reach unsafe temperatures. Avoiding the Danger Zone While Cooling Food Bacteria and microorganisms multiply rapidly between the temperatures of 135 and 41 degrees Fahrenheit, thriving between 125 and 70 degrees Fahrenheit. This temperature range is known as the danger zone, and it is the cause of most foodborne illnesses. Because of the danger zone, food must be chilled correctly and monitored through the two-stage cooling process. Foods that are moist and protein-rich, such as meats, cooked rice, cooked beans, cooked pasta, gravy, soups, stews, and sauces, are prone to accelerated bacteria growth. Training Staff on the Food Cooling Process Implementing food cooling and monitoring procedures into your staff training process is crucial to ensure that every team member is well-versed in the proper food cooling techniques. When training your staff, make sure they are well informed about the following aspects: Calibrating a thermometer: Train your staff to calibrate a thermometer to ensure accurate temperature readings. When to check food temperatures: Emphasize the importance of checking temperatures at regular intervals during the cooling process to monitor progress and ensure food is cooling within the specified time frame. How to check food temperatures: Train your staff on the correct method of checking temperatures using a calibrated thermometer to ensure accuracy and consistency. How to log temperatures: Staff should be familiar with the procedure for logging temperature readings accurately and promptly to maintain accurate records. Familiarity with the 2-stage cooling method: Educate your staff on the 2-stage cooling method and its importance. How to adjust the cooling process: Ensure your staff understands how to adjust the cooling process if food is not cooling within the specified time frame. How to store cooled foods: Make sure your staff knows how to store food once it is cooled. Ready-to-eat foods should be stored on the top shelf of your refrigerator and kept sealed in airtight containers to prevent cross-contamination. How to Log Food Temperatures Monitoring and recording food temperatures is imperative for upholding food safety standards, and your kitchen should have a designated food cooling log to ensure all correct safety procedures are followed. These recording procedures are also a key part of implementing a HACCP plan. Be sure to include the following information to make sure your records are accurate and up-to-date. Once the cooling is complete, have a manager sign off on it. Name of the staff member recording Date recorded Food cooled Starting time and temperature Cooling method used When the food reaches 135 degrees Fahrenheit Temperature of the food each hour for the next 6 hours Food Cooling Questions Now that you are familiar with the correct food cooling practices, let’s put your knowledge to the test. Answer the questions below to see if you're ready to cool food safely: <!-- STATES --> <nav class="accordion accordion--arrows"> What are 3 acceptable methods for cooling food? Leave food on the counter until it feels cool enough Use an ice bath to cool food Place hot food in the refrigerator to cool Stir food with an ice paddle Use a blast chiller to cool the food <label class="box__title" for="cb1">Click to Reveal Answer</label> <label class="box__close" for="acc-close"></label> Correct Answers: Use an ice bath to cool food Stir food with an ice paddle Use a blast chiller to cool the food When cooling food, what is the maximum time that the food can be in the 135 to 70 range? 1 hour 2 hours 3 hours 4 hours <label class="box__title" for="cb2">Click to Reveal Answer</label> <label class="box__close" for="acc-close"></label> Correct Answers: 2 hours Which of these methods is not safe for cooling food? Put hot food in a blast chiller Use ice cubes to bring down the temperature of food Place ice paddles in hot food Put hot food in the freezer <label class="box__title" for="cb3">Click to Reveal Answer</label> <label class="box__close" for="acc-close"></label> Correct Answers: Put hot food in the freezer </nav> Back to Top Knowing how to cool food properly is essential to maintain food safety in your kitchen. By following the correct procedures, you can reduce the risk that harmful bacteria will grow and help eliminate the potential for foodborne illnesses. No matter how experienced you are in the foodservice industry, educating yourself on proper food cooling techniques is an easy way to keep your customers safe.

Types of Cooking Methods
There are three types of cooking methods: dry heat cooking, moist heat cooking, and combination cooking. Each method describes how chefs use heat to cook food and bring out unique flavors and textures. Understanding these different cooking methods can help you choose the best technique for your ingredients and create delicious meals. Additionally, knowing which cooking methods align with your menu allows you to choose the right kitchen equipment to achieve consistent, flavorful results in your cooking. Use this guide to learn more about the different types of cooking methods and the best food for each technique. Click any of the cooking methods below to learn more: Sous Vide Poaching Simmering Steaming Boiling Baking Grilling Roasting Sauteing Frying Broiling Braising Stewing Glossary 1. Moist Heat Cooking As the name indicates, moist heat cooking relies on the presence of liquid or steam to cook foods. Use this method to make healthy dishes without any added fat or oil. It's also a great way to tenderize the tough fibers in some beef cuts, like chuck or brisket. When cooking fibrous vegetables and legumes, moist heat softens the food until it reaches the perfect tenderness. Unlike dry heat methods, moist heat cooking will not produce a browned crust. Sous Vide Though this cooking method recently gained popularity for home chefs, commercial kitchens have used sous vide to cook delicious meals for decades. Sous vide, a French term meaning "under vacuum," involves placing vacuum-sealed food in a hot water bath to slow-cook it. This cooking method requires an immersion circulator, a hot water tank, and vacuum sealing equipment. In addition to reducing food waste and energy consumption, sous vide reduces prep time and contamination risk. The final product is moist, tender food perfectly marinated by the natural juices trapped in the bag. Best Foods for Sous Vide Meats: In addition to perfectly cooking meat to whatever doneness customers prefer, meat cooked with sous vide will not be scorched or have overcooked edges. Even tough cuts will turn out juicy and tender. Poultry: Cook light and dark meat until it falls off the bone without worrying about undercooking or the chicken drying out. Fish: While sous vide does not allow you to cook whole fish, fish filets can be tender, flaky, or well-done using sous vide. Even salmon, which is notoriously difficult to cook, maintains its size, color, and tenderness with sous vide cooking. Eggs: Make scrambled, poached, or hard-boiled eggs easily without monitoring them while they cook. You can vary the texture and style by manipulating the water bath's temperature and cooking time. Poaching Poaching is a gentle cooking method that submerges food in hot liquid between 140 degrees and 180 degrees Fahrenheit. The low heat works well for delicate items, preserving moisture and flavor without needing fat or oil. Best Foods for Poaching Eggs: Poaching is a common method of cooking eggs that results in a soft, tender egg white and creamy yolk. It's more health-conscious than pan frying since you don't need oil. Poultry: You can use broth, wine, or aromatics for poaching liquid, which adds flavor to boneless, skinless chicken breasts. The finished product is tender chicken that can be cubed, sliced, or shredded and added to salads, pasta, or sandwiches. Fish: Poaching is a great way to preserve the delicate texture of light fish like tilapia, cod, and sole. A special broth called court bouillon adds flavor to the fish as it cooks. Fruit: Use a sweetened liquid to poach fruits like pears or apples for a unique dessert. This method deepens the flavor of the fruit and softens the texture until the fruit is tender. Use any leftover liquid to make a flavored syrup to serve with the fruit. Simmering Simmering is a gentle method of cooking food that utilizes higher temperatures than poaching, usually between 180 degrees and 205 degrees Fahrenheit. This temperature range lies below the boiling point and produces tiny bubbles. To achieve a simmer, bring water to the boiling point and lower the temperature. Best Foods for Simmering Rice: Simmering produces cooked rice with a light, fluffy texture. Using boiling water causes the rice to become sticky and dry. Meats: Choose tough cuts of meat that will release fat and collagen as they simmer, like chuck roast. Soups and Stocks: Because simmering releases fat and proteins from meat, it produces a rich flavorful broth used in soups or stews. Vegetables: Gentle simmering cooks tough root vegetables like potatoes and carrots to the perfect texture. Grains: You can simmer grains like quinoa, oats, or millet until they reach a soft edible texture. Hot cereal is made by simmering grains until most of the water evaporates, creating a smooth porridge. Legumes: Simmer dried beans and legumes for a soft, edible texture. Some beans, like lentils, cook quickly, while others take several hours of gentle simmering to become fully cooked. Steaming To steam food, boil water continuously to produce a steady steam cloud. The steam surrounds food and cooks it evenly while retaining moisture. For high-volume kitchens, the most efficient steaming method is a commercial steamer or combi oven. You can also use a pot and steamer basket, a microwave, or wrap food in foil and cook it in the oven. Best Foods for Steaming Vegetables: You can steam most vegetables with excellent results. Steam sturdy veggies like beets, carrots, and potatoes longer than delicate foods like leafy greens. Fish and Shellfish: For more flavorful fish, broth or wine can be used instead of water. Fish stays tender, while shellfish like clams, mussels, lobster, or crabs are cooked inside their shells. Desserts: Some desserts are steamed rather than baked, producing a moist, silky texture. Creme brulee, flan, and panna cotta are all custards made using this cooking method. Tamales: Tamales are a popular food made by steaming masa, a dough made of ground corn, and fillings inside a corn husk packet. The steam makes the corn dough tender and moist. Boiling This cooking technique involves submerging food in water heated to the boiling point of 212 degrees Fahrenheit. The boiling water produces large bubbles, which keep foods in motion while they cook. The expression slow boil means that the water has just started to bubble slowly but is not quite heated to the boiling temperature. A full boil occurs at the boiling point, appearing as fast-moving, rolling bubbles. Steam is also released from the water as it boils. Best Foods for Boiling Pasta: Pasta is one of the most commonly boiled foods. The hot water cooks the pasta quickly, allowing chefs to remove it from the water before starches break down to prevent a mushy texture. Eggs: Boiling eggs in their shell produces hard- or soft-boiled eggs. The texture of the yolk can range from firm to creamy, depending on the cook time. Vegetables: Tough root vegetables like potatoes and carrots will cook more quickly in boiling water. Test their tenderness with a fork so they don't overcook. Back to Top 2. Dry Heat Cooking Dry heat cooking works without any moisture, broth, or water present. Instead, it relies on circulating hot air or contact with fat to transfer heat to foods. Temperatures of 300 degrees or more create browning, a reaction where amino acids and sugars in food turn brown and create a distinct aroma and flavor. The unique scents of toasted bread or seared meat are examples of dry heat cooking at work. Baking Baking and roasting use indirect heat to surround foods and cook from all sides. However, roasting refers to cooking meats or vegetables, and baking indicates making bread, rolls, and cakes. Additionally, baking usually uses lower temperatures than roasting. Best Foods for Baking Baked Goods: Baking transforms wet dough or batter into a final product with a firm texture. Bread, pastries, and cakes are all baked. Pizza: Bake pizzas in a hot oven to form the crust, harden the dough, and melt the cheese. Grilling Grilling is similar to broiling because grills use radiant heat to cook food quickly. Most grilling equipment features an open grate with a heat source beneath the food. Flip food items to cook both sides and adjust the grill's temperature to get grill marks from the hot grate or rack. Best Foods for Grilling Burgers: Ground hamburger meat is moist and cooks well on a hot grill. The high heat sears the outside of the patty for a delicious charred flavor. Meats: The dry heat from grilling removes moisture from meat quickly, so choose tender cuts or marinate the meat first. Ribeyes, porterhouses, t-bones, and strip steaks have higher fat content and marbling that produces a succulent grilled steak. Poultry: Boneless cuts of chicken, such as boneless wings, grill more evenly than other chicken cuts. You can grill whole chickens, but spatchcocking is a more effective method. Fish: Salmon, tuna, and swordfish steaks are sturdy enough for the grill and won't dry out quickly. Wrap fish in foil before placing it on the grates to prevent it from falling through the slots. Roasting Roasting is performed inside an oven and uses indirect heat that cooks from all sides for even browning. This cooking method works more slowly, coaxing flavors out of meats and vegetables. Choose low temperatures of 200 degrees to 350 degrees Fahrenheit to roast tough cuts of meat, or higher temperatures that reach up to 450 degrees Fahrenheit for more tender cuts. Best Foods for Roasting Meats: Roasting cooks large cuts of meat slowly and evenly. Prime rib, beef tenderloin, pork butt or shoulder, and pork loin all benefit from roasting. Poultry: Place whole chickens or turkeys in a roasting pan or on a rotisserie spit and cook them for several hours to get a moist and flavorful product. Fruits and Veggies: Roasting is a great way to bring out the best qualities in fruits and vegetables. Use this cooking method for grapes, cherries, and tomatoes to intensify their flavors. Pumpkin, squash, eggplant, and cauliflower are also excellent when roasted. Sauteing Originating from a French word that means "to jump," sauteing is performed over a burner in a hot, shallow pan and uses a small amount of oil or fat to coat food for even browning. This method cooks food quickly, so keep the food moving by tossing or flipping. Heat the oiled pan before adding food to achieve great results with sauteing. Additionally, stir or toss items frequently without overcrowding the pan with too much food. Best Foods for Sauteing Meats: Since sauteing cooks food quickly, use tender cuts of meat like ground beef, tenderloin, or medallions. Small, uniformly sized cuts are best since they brown evenly. Poultry: Saute boneless breasts, strips, or cutlets to sear in flavor. Vegetables: Zucchini, squash, and leafy greens can all be sauteed in olive oil or butter. Use this cooking method for carrots, celery, and onions, which often make a flavorful base for other dishes. Frying Frying is a popular cooking method that involves immersing food in hot oil or fat. The hot oil cooks the food quickly, creating a crisp exterior while retaining moisture. There are different types of frying techniques, including shallow frying, deep frying, and stir-frying. Pan-frying cooks food in a shallow layer of oil, while deep-frying cooks food by completely submerging it in hot oil. For the best final product, use the right oil, maintain the proper temperature, and avoid overcrowding the pan. Best Foods for Frying Meats: While some restaurants choose to deep-fry ham or other large cuts, pan-frying tender meat in small cubes provides a delicious addition to salad, pasta, or rice. Poultry: Fried chicken is a staple in country diners, but you can also pan-fry chicken for stir fry or chicken sandwiches. For Thanksgiving meals, prepare the main entree by deep-frying a turkey. Vegetables: Starchy vegetables are renowned for being fried and served as side dishes, such as french fries. However, dipping vegetables in batter and deep frying them creates a unique menu item to appeal to customers. Fish: Since fish is lean meat, most chefs dip it in batter before frying it for the best finished product. Broiling Broiling cooks food by transferring extremely high heat onto food items, usually directed from a radiant above the food that cooks on one side at a time. Browning can occur quickly in this process, sealing juices and flavor inside and leaving a crisp exterior. Because this cooking method is fast, use a timer and check food frequently so it doesn't become burnt or overcooked. In commercial kitchens, you can broil items using a salamander or broiler oven. Best Foods for Broiling Meats: Broiling works best on thinner cuts of meat, like steaks, pork chops, or hamburger patties. Tender cuts are preferred because the dry heat will quickly evaporate moisture and dry out the meat. Poultry: Use chicken or turkey cutlets, breast halves, quarters, and legs in the broiler for flavorful results. Fish: Choose thick, sturdy fish, like salmon, that can handle high heat and won't dry out during the cooking process. Fruits and Veggies: Broiling can cook fruits and vegetables for different flavors and textures. Try broiling peaches or grapefruit for a unique menu item. Back to Top 3. Combination Cooking Combination cooking utilizes both dry and moist cooking methods. Foods are cooked in liquids at low heat for an extended period, resulting in fork-tender meat and vegetables. This technique works with the toughest cuts of meat, gradually breaking down fibers until they melt into the liquid. Braising During braising, foods are first seared in a hot oiled pan and transferred to a larger pot to cook in hot liquid. Then, partially submerge the food in simmering water, broth, or stock. Low heat softens the food and reduces the liquid over an extended cooking time, intensifying the flavors. Due to these qualities, braising produces fork-tender meats that fall off the bone. Best Foods for Braising Meats: Braising is most commonly used with cheaper, tougher cuts of meat such as pork shoulder, chuck roast, and lamb shank because it softens and tenderizes the muscle fibers. Vegetables: You can braise vegetables alone or alongside meat to add more flavor. Root vegetables like potatoes, beets, and turnips soften during braising. Celery and fennel absorb liquid but maintain a firm texture. Legumes: Lentils, chickpeas, and green beans can be braised in broth or wine for a soft texture that isn't mushy. Stewing Unlike braising, stewing completely submerges food in hot liquid. Use small cuts of meat in a stew, which are slow-cooked at low heat. As the stew cooks, fibrous vegetables break down while the meat's fat and collagen melt away. This leads to a thick, flavorful gravy filled with tender meat and soft vegetables. Best Foods for Stewing Meats: Meats rich in collagen and fat do well in a stew pot. Avoid lean cuts in favor of brisket, oxtail, or chuck roast. Vegetables: Vegetables add depth to your stews. Onions, carrots, potatoes, and celery are common, but some recipes use parsnips, turnips, or rutabaga. Glossary of Cooking Terms As you follow recipes, you might come across some cooking terms that are unfamiliar to you. We've added descriptions of some of the most common cooking terms below: Al Dente: describes pasta that is firm and slightly undercooked Barbecue: to roast or broil meat on a rack or rotating spit over hot coals or a gas flame Baste: to pour juices or liquid fat over meat while it cooks Blanch: to scald food in boiling water for a quick moment and then place it in cold water to stop the cooking process Brunoise: to cut foods into a 1/8" size dice Caramelize: to heat sugars until they brown Chiffonade: to roll up leafy greens or herbs and cut into long, thin slices Clarify: to melt butter and separate the solids from the butterfat Cure: to preserve foods by adding salt and drawing out moisture Deglaze: to dissolve browned food residue in a hot pan with liquid Dredge: to coat moist foods with a dry ingredient, like flour Emulsify: to blend two liquids, like oil and water Fillet: to cut a portion of meat or fish Flambe: to cover food in a flammable liquid, like brandy or rum, and light it briefly on fire Fold: to incorporate an ingredient with a careful motion that retains air Julienne: to cut foods into long thin strips Meuniere: a method of cooking, usually used with fish, in which the food is lightly dusted with flour and sauteed in butter Parboil: to precook foods by boiling for a short time Reduce: to thicken a liquid mixture by boiling or simmering so the moisture evaporates Scald: to heat a liquid just to the boiling point Sear: to expose food, usually meat, to a high temperature to brown the exterior Spatchcock: to split open a whole chicken or turkey for easy grilling Back to Top Cooking Methods Demonstration Watch the following video for a practical demonstration on the types of cooking methods. <iframe scrolling="no" width="392" height="226" src="/v/?num=16916&width=600&height=500&embed=1" frameborder="0"></iframe> With a basic understanding of the three types of cooking methods, you can choose the best technique for each dish you prepare. As you create signature recipes, use dry cooking to achieve a crispy, brown exterior on meats or utilize moist cooking to keep your meat tender. When needed, combine dry and moist heat to transform tough cuts of meat into mouthwatering morsels. Printable Version

The Danger Zone: Following Food Safety Temperatures
The top priority in a commercial kitchen is understanding and enforcing food safety temperatures. Neglecting them can put customers at serious risk of contracting foodborne illnesses. To ensure food safety, foodservice operators and handlers must understand the temperature danger zone and its impacts. We'll explain the danger zone temperature range, which foods are most at risk, and how to prevent food from lingering at hazardous temperatures so you can provide patrons with the peace of mind that everything they eat is safe and handled with care. Shop All Kitchen Thermometers Click below to learn about the temperature danger zone: What Is the Danger Zone for Food? What Is Time-Temperature Abuse? How Long Can Food Stay in the Danger Zone? Safe Holding Temperatures For Food Temperature Danger Zone FAQ Temperature Danger Zone Video Watch the video below for a visual overview of the temperature danger zone: <iframe src="../../v/?num=14915&width=600&height=500&embed=1" width="392" height="14404" frameborder="0" scrolling="no"></iframe> What Is the Danger Zone for Food? The danger zone refers to the temperature range that accelerates bacterial growth in food. According to ServSafe recommendations, the danger zone falls between 41 and 135 degrees Fahrenheit (or 5 and 57 degrees Celsius). Bacteria thrive and multiply most rapidly between temperatures of 70 and 125 degrees Fahrenheit. When food enters the temperature danger zone, bacteria may grow to unhealthy levels and cause the food to spoil. Dangerous bacteria growth like this may occur without any visible signs that the food is unsafe to consume at first. Foods may smell and appear normal, but could contain harmful amounts of bacteria that cause different types of foodborne illness. As a food service professional, it’s your responsibility to keep foods out of the danger zone by using approved methods to chill, heat, and store foods. What Is Time-Temperature Abuse? Time-temperature abuse is the act of allowing foods to stay in the temperature danger zone and is especially dangerous when it comes to TCS foods. Along with cross-contamination, time-temperature abuse is a common source of foodborne illness, making it a major health code violation. Foods may become time-temperature abused in three ways: If they are not held or stored at food-safe temperatures. If they are not cooked or reheated to the temperature required to eliminate possible pathogens. If hot food is not cooled properly before being placed in cold storage. How Long Can Food Stay in the Temperature Danger Zone? ServSafe states that the maximum length of time ready-to-eat foods can stay in the temperature danger zone is 4 hours. After the 4-hour limit, food is considered spoiled and must be thrown away. Within the 4-hour time limit, foods can be consumed, reheated, or chilled to bring them back to safe temperatures. By checking temperatures every 2 hours, you give yourself a larger window to perform any necessary corrective actions. How to Keep Food Out of the Danger Zone The easiest way to keep foods out of the temperature danger zone is to monitor and record food temperatures regularly. Proper documentation is key, offering a clear timeline and record of when temperatures were measured and how long they've been out. This is especially important while prepping, cooking, and holding food on your buffet line or salad bar. As part of your HACCP training, train your staff members on key temperature logging procedures to keep your menu items out of the danger zone. Follow these important tips to ensure you’re making the best use of your kitchen thermometers to keep food safe for consumption: Always use the right type of thermometer for the job. Never rely on the temperature display of your equipment alone. Place a thermometer inside your refrigerator or freezer as an additional safety measure. Keep written records of all temperature checks, including the temperature, time, and name of the operator. Clean and calibrate thermometers often. Use our downloadable Food Holding Temperature Log. Download our Food Holding Temperature Log PDF Safe Holding Temperatures For Food Once your food is cooked to the proper internal temperature or chilled to 40 degrees Fahrenheit or below, it’s important to maintain these safe temperatures before serving. There are several instances in which foodservice professionals need to hold food for extended periods. These instances could include holding food in salad bars and buffet lines or transporting food to off-site locations and catering events. Keep in mind that holding techniques vary for cold and hot foods. Cold Holding Temperature The cold food holding temperature for TCS foods must be 40 degrees Fahrenheit or below. Here are some tips to properly hold cold foods so they don't fall into the danger zone: Ensure your cold-holding equipment, like cold food tables and cold crocks, keeps foods at 40 degrees Fahrenheit and below. Any cold food held without refrigeration is safe for up to 6 hours, starting from the time it was removed from refrigeration at 40 degrees Fahrenheit and below, as long as the product does not exceed an internal temperature of 70 degrees. Check the temperature of cold foods every 2 hours and discard any cold food that reaches a temperature of 70 degrees Fahrenheit or higher. Hot Holding Temperature The appropriate holding temperature for hot food is 135 degrees Fahrenheit or above. Here are some tips to keep hot foods out of the danger zone: Never use hot holding equipment to reheat food. Foods should be heated to safe temperatures before holding. Hot holding equipment, like steam tables and holding cabinets, is designed to maintain current temps, not bring food up to temp. When possible, keep food covered to help maintain temperatures and keep contaminants out. Stir frequently to distribute heat throughout the food. Use the appropriate thermometer to monitor food temperatures. Discard hot food that has been sitting below 135 degrees Fahrenheit for more than 4 hours. Never mix freshly prepared food with foods already being held for service to prevent cross-contamination. Temperature Danger Zone FAQ The danger zone is a key concept when it comes to maintaining food safety, and there is much to be learned about it. We've answered some of the most common questions about the danger zone to help you maintain a safe kitchen and reduce the risk of contamination or foodborne illness. How Often Should I Check the Temperature of Hot or Cold Holding Food? It is recommended that you check the temperature of your hot or cold holding food every four hours. However, checking every 2 hours instead allows enough time to take corrective action if food has fallen into the danger zone. By staying on top of your food’s internal temperatures, you can prevent the spread of dangerous bacteria and eliminate food waste by simply re-heating or re-chilling the affected foods before bacteria have time to spread. What Foods Are Most at Risk in the Danger Zone? TCS foods are most at risk in the danger zone, as they present an ideal environment for germs to grow and spread. Preventing TCS foods from entering the danger zone and becoming time-temperature abused is a critical food safety practice. These are the high-risk TCS foods that should be closely monitored at all times: Milk and dairy products Meat and poultry Fish, shellfish, and crustaceans Shell eggs Baked potatoes Cooked rice, beans, and vegetables Tofu, soy protein, or other plant-based meat alternatives Sprouts and sprout seeds Cut tomatoes, melons, and leafy greens Untreated garlic and oil mixtures How Do I Safely Thaw Food? One of the most common ways food is time/temperature abused is by thawing it incorrectly. Leaving it out on the counter or running it under hot water might seem like the right thing to do, but it puts food at risk of entering the danger zone. One of the most common examples of time temperature abuse in a kitchen is defrosting food incorrectly. Use the following methods to defrost food safely: Move the frozen food to the refrigerator 10-24 hours before cooking. Place the frozen food under cold running water in a clean prep sink. Use the defrost setting on a microwave. Cook from frozen, regularly checking internal temperatures. What are Safe Cooking Temperatures? Before serving foods, they must reach a safe internal temperatures for at least 15 seconds. The exact internal temperature to aim for varies depending on which food you’re cooking. 165 degrees Fahrenheit: Poultry, stuffing, any dish that contains a cooked TCS food 155 degrees Fahrenheit: Ground meat, flavor-injected meats, eggs from the shell 145 degrees Fahrenheit: Seafood, steaks and chops, game meat, roast meats 135 degrees Fahrenheit: Fruits, vegetables, grains, legumes It's every food service operator's top priority to keep the food they're serving safe for consumption. Following these important tips and getting your staff food handling certified will ensure they have the knowledge to keep food out of the danger zone, take corrective action, and protect customers from foodborne illnesses. <!-- Start Author Bio Block --> Written by Jason Kurtz Over his 5+ years with WebstaurantStore, Jason has spent countless hours learning, researching, and writing about the foodservice industry. With expertise in technical topics, he takes pride in helping customers and readers understand everything from troubleshooting their equipment to the fundamentals of starting a business. Learn more about this author and WebstaurantStore's Content Writing Team here! <!-- End Author Bio Block -->