How to Make Grilled Miso Chicken Thighs
Last updated on May 23, 2024Michale LeRoyChicken thighs are often overlooked in favor of other popular cuts of chicken like grilled chicken breast or chicken wings. But using chicken thighs for recipes offers a range of benefits. They're known for their rich flavor and tenderness, making them ideal for marinating and absorbing bold seasonings like miso paste. Chicken thighs also have a higher fat content compared to other cuts, which helps keep the meat moist and creates delicious results on the grill. Try our grilled honey miso chicken thighs recipe for a cost-effective dish that combines sweet and savory flavors.
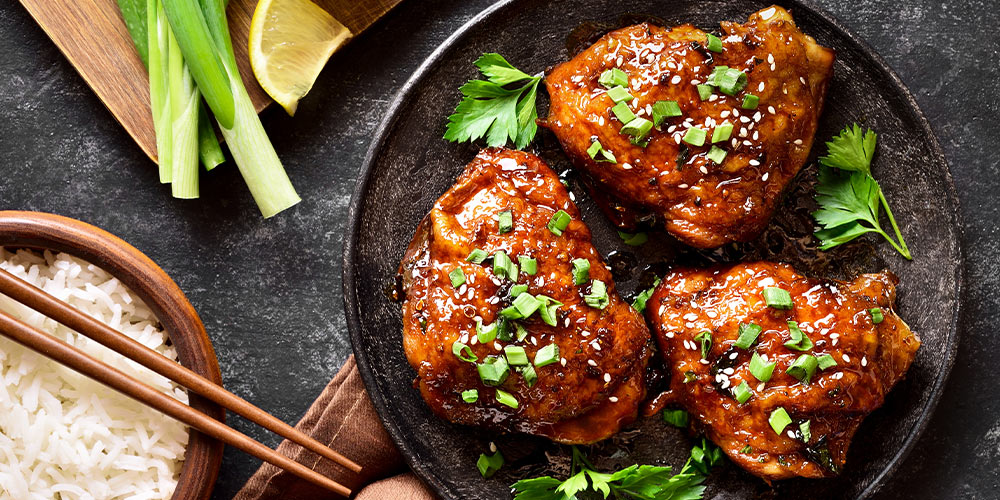
Honey Miso Chicken Thigh Recipe
Once marinated, chicken thighs can be grilled, baked, or pan-seared to perfection. The high-fat content in the thighs helps them stay juicy and tender, while the miso paste caramelizes and forms a flavorful crust on the outside. Top these tasty chicken thighs with a garnish of chopped green onions and your dish is complete.
Yield: 4 servings
Prep Time: 130 minutes
Cook Time: 15 minutes
Total Time: 145 minutes
Ingredients

- 8 bone-in, skin-on chicken thighs
- 1/4 cup miso paste
- 2 tablespoons soy sauce
- 2 cloves garlic, minced
- 3 tablespoons honey
- 1 tablespoon sesame oil
- Chopped green onions for garnish
Directions
- In mixing bowl, whisk together miso paste, soy sauce, minced garlic, honey, and sesame oil to create marinade.
- Place chicken thighs in shallow dish and cover with marinade. Refrigerate 2 hours or overnight for maximum flavor.
- Preheat outdoor grill to medium-high heat and lightly oil grates to prevent sticking.
- Remove chicken thighs from marinade and place on grill, skin side down. Discard remaining marinade.
- Grill thighs for about 6-7 minutes per side, or until internal temp in thickest part reaches 165 degrees Fahrenheit. Skin should be crispy and slightly charred.
- Once cooked, remove thighs from grill and let them rest for a few minutes before serving.
- Garnish with freshly chopped green onions and serve.
What Type of Miso Should I Use?
You can use any type of miso that you prefer. White miso will have a mild flavor and the darker red miso will be stronger.
Can I Cook This in the Oven?
Yes, you can cook these chicken thighs in the oven. Preheat the oven to 400 degrees Fahrenheit and place the thighs on a baking sheet lined with parchment paper. Cook for 30-35 minutes, or until the internal temperature reaches 165 degrees Fahrenheit and the skin is crispy and golden brown.
Compared to other cuts of chicken, such as chicken breasts, thighs tend to be more affordable, making them a budget-friendly choice for restaurants and food service establishments. This means that you can offer high-quality chicken dishes to your customers without breaking the bank. The dark meat of the chicken thighs lends well to a range of cooking methods, so you don't have to worry about the meat drying out.
Related Resources
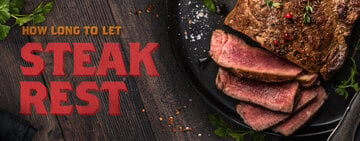
Resting Meat: Why You Should and for How Long
If you’re grilling the best cuts of steak, you want to make sure these premium cuts shine. Letting meat rest is an essential part of the cooking process to serve quality meat. This is true for chicken, lamb, pork, game meats, and even some fish. We explain exactly why and how long meat needs to rest so your menu has customers coming back for more. How to Rest a Steak Check out our video to learn how to rest a steak the proper way: <iframe itemprop="embedURL" width="560" height="315" src="https://www.youtube.com/embed/RJohoiGPSRw?rel=0" frameborder="0" allowfullscreen></iframe> How Long to Let Meat Rest As a general rule, rest thinner cuts of meat for a minimum of 5-7 minutes. Thick cuts should rest for 10-20 minutes before you cut into them. Meat Resting Times and Temperature The goal with steak is for the center to be between 120-130 degrees Fahrenheit and the exterior between 125-140 degrees Fahrenheit. You can use a probe thermometer to check the internal temperature, but any further cutting into the meat will cause the juices to expel from the fibers. Use the following timing recommendations to learn how long to rest steak so that the flavorful juices have time to distribute through your meat: Rest meat for 5 minutes per inch of thickness. Rest meat for 10 minutes per pound. Rest meat for 1 minute for every 100 grams. Rest thin meat for half the time it took to cook. Rest thick meat for the whole time it took to cook. How to Rest Steak Follow the steps below to properly rest a steak, roast, or any type of meat: Remove the meat from the oven or off the burner. Transfer the meat to a cutting board, warm plate, or serving platter. Trap heat by tenting the pan with aluminum foil. Remove the foil after the appropriate rest time. Plate and serve. Why Do You Let Meat Rest? Internal juices constrict during the cooking process, and resting meat allows its juices to reabsorb and redistribute. Cutting it too soon will cause its juice to pool out and yield a dry cut of meat. We break down what happens to muscle fibers when they're heated so you can understand this phenomenon: What Happens to Meat When You Cook It? This is what happens to the muscle fibers in meat while it cooks: When the steak is heated, the muscle fibers constrict. This constriction pushes the juices in those fibers away from the heat source and towards the center of the meat. Since all of the moisture is concentrated in the center of the meat, it will pour out of the meat as soon as it is cut, making it look unappealing and bloody while taking the moisture and flavor with it. The steak ends up dry and flavorless. What Happens When You Let Meat Rest? This is why it is so important to rest meat before serving: As the meat rests, the constricted muscle fibers begin to relax. The pressure on the juices is slowly released and they redistribute towards the edges of the meat. By letting the meat rest, you achieve an evenly moist and flavorful steak. What Is Carryover Cooking? Carryover cooking means your food is still cooking after it's removed from the heating element. Why does carryover cooking occur? During the resting period, the outer layers of your meat cool while the temperature at the center continues to rise. The latent heat traveling through the meat induces carryover cooking. The meat achieves its final resting temperature when its outer and inner temperatures meet. How Much Does Meat Temperature Rise When Resting? The density of your meat determines how much its temperature rises when resting. While you'll set your unit to your desired grilling temperature, variables like hot zones can induce more carryover, and small cuts of meat, such as steaks, are less prone to carryover cooking. With that in mind, we provide guidelines for carryover cooking large and small cuts of meat below: Small Meat Cuts Temperature Rise - Smaller meats like hamburgers, chicken breasts, and steak will continue to rise between 3-6 degrees Fahrenheit when resting. Large Meat Cuts Temperature Rise - Larger roasts such as pork tenderloin and turkey can rise between 10-15 degrees Fahrenheit when resting. When to Remove Steak from Grill Factor carryover cooking into your total cooking time and remove your steak from the grill when it’s between 3-5 degrees Fahrenheit under its ideal doneness temperature. For example, if you're preparing an asado and want to serve a thick picanha steak medium-rare (130 degrees Fahrenheit), remove it when it reaches 126 degrees Fahrenheit. Resting Meat FAQs As chefs start resting their meat, they may have some additional questions about how to achieve the best results. To help you engineer the perfect steak, we answer the most frequently asked questions about resting meat below. How Long Can Cooked Meat Sit Out? Resting meat should never run the risk of time-temperature abuse. Cooked meat can only sit out for less than two hours before it enters unsafe temperatures. According to the USDA, food items between 40-140 degrees Fahrenheit are in the Temperature Danger Zone, and at risk of growing bacteria. To prevent food poisoning, don't leave food out for extended periods. Should You Wrap Steak in Foil? Tenting steak in aluminum foil after grilling keeps the meat warm during the resting period. When it's 3-5 degrees under its ideal doneness temperature, remove your steak from the grill and loosely wrap aluminum foil around it. Give your prime-grade beef, ribs, or chicken the time they need to rest before serving. Your guests and customers will be impressed by the flavorful results!

Chicken Grilling Guide
While achieving the perfect burger doneness is the goal of many grill masters, not every patron is interested in red meat. Grilling chicken enhances the umami flavor of the poultry, offering a healthful and typically less expensive alternative to cuts of grilled beef. We break down how to grill each chicken cut so you can add delish grilled breasts, thighs, and wings to your summer catering menu. Shop All Outdoor Commercial Grills Skip to the chicken cut you want to grill: Grilling Chicken Breast Grilling Boneless Chicken Thighs Grilling Bone-In Chicken Thighs Grilling Chicken Legs Grilling Chicken Wings Grilling Chicken Quarters Grilling a Whole Chicken Chicken Grilling Tips Safe Chicken Grilling Temperature When grilling chicken, it is crucial that it reaches a safe internal temperature to prevent foodborne illnesses. The recommended safe cooking temperature for chicken is 165 degrees Fahrenheit. This temperature is necessary to kill any harmful bacteria, such as salmonella, that may be present in the chicken. How to Check Temperature of Chicken The most accurate way to check the internal temperature of chicken is by using a grill thermometer. Insert the thermometer into the thickest part of the chicken, avoiding any bones, to get an accurate reading. Once the chicken reaches 165 degrees Fahrenheit, it is safe to consume. It is important to maintain this temperature throughout the cooking process to ensure the chicken is thoroughly cooked and safe to eat. How Long to Grill Chicken Breast The total grill time for chicken breast is between 12 and 16 minutes. Lean chicken breast meat is prone to drying out on the grill. To prevent this, cook each side for two to three minutes over direct heat. Then, transfer to indirect heat and turn until the internal temperature reaches 165 degrees Fahrenheit. A meat thermometer is a reliable way to monitor the internal temperature and prevent overcooking. Chicken breast has a mild taste and readily absorbs the flavor of marinades. From an American BBQ sauce to an Asian sauce like gochujang, saturating the chicken breast in a marinade for a few hours before grilling will enhance the flavor of the meat. When ready to grill, preheat and maintain a medium-high grill temperature between 425 and 450 degrees Fahrenheit. The exact grilling time may vary slightly depending on the thickness of the chicken breast. Chicken Breast Grilling Temperature: 425 to 450 degrees Fahrenheit Total Chicken Breast Grilling Time: 12 to 16 minutes Chicken Breast Grilling Tips: Start by grilling over direct heat to sear. Then move to indirect heat until the internal temperature reaches 165 degrees Fahrenheit. How Long to Grill Boneless Chicken Thighs The recommended grilling time for boneless chicken thighs is 7 to 8 minutes per side. This cooking time allows the chicken to develop a nicely charred exterior while retaining its juiciness on the inside. Boneless chicken thighs are a popular choice for grilling as they are tender and cook relatively quickly. Their rich, juicy flavor stands up against bold, savory sauces like our honey miso chicken thigh recipe. To ensure the chicken thighs cook evenly and quickly without drying out, cook them over medium-high heat, typically around 375 to 400 degrees Fahrenheit. Cooking chicken thighs over direct heat allows them to cook through efficiently while developing a delicious sear on the outside. Use a meat thermometer to ensure its internal temperature is safe to consume. Boneless Chicken Thighs Grilling Temperature: 375 to 400 degrees Fahrenheit Total Boneless Chicken Thighs Grilling Time: 15 to 20 minutes Boneless Chicken Thighs Grilling Tips: Cook over direct heat until it reaches 165 degrees Fahrenheit. How Long to Grill Bone-In Chicken Thighs Grill bone-in chicken thighs for 6 to 8 minutes on each side. To begin, preheat one zone of your grill to 400 degrees Fahrenheit for direct heat and another to 300 degrees Fahrenheit for indirect heat. When the grill is ready, place the chicken thighs skin side down over direct heat. Sear the chicken for approximately three minutes, or until the skin turns a beautiful golden brown. After searing one side, flip the chicken thighs and sear the other side for an additional three minutes. Once both sides are seared, transfer the chicken thighs to the indirect heat portion of the grill. Rotate and flip the thighs occasionally to ensure even cooking. Continue grilling the bone-in chicken thighs over indirect heat until the internal temperature reaches 165 degrees Fahrenheit. This ensures the chicken is cooked thoroughly and safe to eat. Bone-In Chicken Thighs Grilling Temperature: 400 degrees Fahrenheit direct heat zone and 300 degrees Fahrenheit indirect heat zone Total Bone-In Chicken Thighs Grilling Time: 20 to 25 minutes Bone-In Chicken Thighs Grilling Tips: Use direct heat for searing and indirect heat for reaching a safe internal temperature after it's seared. How Long to Grill Chicken Legs The total grill time for chicken legs averages between 20 to 30 minutes, depending on their size. Begin by preheating the grill between 375 and 400 degrees Fahrenheit and placing the chicken legs on the grill with the bone side down. This positioning helps the meat cook evenly and retains its moisture throughout the grilling process. Flip the chicken legs every 5 minutes. Continue this process until the internal temperature of the chicken reaches 165 degrees Fahrenheit. For those looking to achieve crispier skin on their grilled chicken legs, consider starting over direct heat to sear the skin. This initial high heat will help to lock in the juices and create a flavorful crust. After searing, move the chicken legs to indirect heat to finish cooking them, cooking the chicken gently and evenly without burning the skin. Chicken Legs Grilling Temperature: 375 to 400 degrees Fahrenheit Total Chicken Legs Grilling Time: 30 to 35 minutes Chicken Legs Grilling Tips: For crispy skin, start over direct heat and move to indirect heat. How Long to Grill Chicken Wings Chicken wings typically take 15 to 20 minutes to finish, depending on the wingspan and the specific grill temperature. Turn the wings every three minutes. This helps prevent burning and cooks the wings evenly on all sides. Use a meat thermometer to check the internal temperature. Before grilling chicken wings, preheat your grill to around 350 degrees Fahrenheit. This temperature provides a good balance between cooking the wings thoroughly and achieving a nice char on the outside. Cook the wings over direct heat to develop a crispy exterior until they reach an internal temperature of 165 degrees Fahrenheit. Chicken Wings Grilling Temperature: 350 degrees Fahrenheit Total Chicken Wings Grilling Time: 15 to 20 minutes Chicken Wings Grilling Tips: Use direct heat to develop a crispy exterior. How Long to Grill Chicken Quarters Grilling chicken quarters takes 45 to 55 minutes. Preheating the grill to 375 degrees Fahrenheit allows the chicken quarters to cook evenly, creating crispy skin without drying the meat. Start by placing the chicken quarters over direct heat with the skin side down. With two high-quality kitchen timers handy, set the first timer for 10 minutes. Using your second timer, turn the chicken every two minutes to sear the skin and lock in the juices. After the 10-minute searing period is complete, move the chicken quarters to the indirect heat section of the grill. Keep the skin side down. The indirect heat cooking allows the chicken to cook slowly and evenly, ensuring the meat is tender and juicy. Continue cooking the chicken quarters until the internal temperature reaches 165 degrees Fahrenheit. A meat thermometer is the most accurate way to determine when the chicken is fully cooked and safe to consume. Chicken Quarters Grilling Temperature: 375 degrees Fahrenheit Total Chicken Quarters Grilling Time: 45 to 55 minutes Chicken Quarters Grilling Tips: Use direct heat to create a crispy skin and indirect heat to yield juicy meat. Start with the skin side down. How Long to Grill a Whole Chicken The total grill time for a whole chicken typically ranges from 45 minutes to 1 hour. The thickest part of the chicken must reach an internal temperature of 165 degrees Fahrenheit to ensure it is safe to eat. Maintaining a grill temperature between 350 and 400 degrees Fahrenheit allows the chicken to cook evenly and develop a delicious, charred exterior. Before grilling a whole chicken, spatchcock it by removing the backbone so it lays flat on the grill. This method not only helps the chicken cook more evenly but also reduces the overall grilling time. Using indirect heat prevents the white meat portions from drying out while the dark meat portions finish cooking. Brine the chicken before grilling it to enhance its flavor and juiciness. Whole Chicken Grilling Temperature: 350 to 400 degrees Fahrenheit Total Whole Chicken Grilling Time: 45 minutes to 1 hour (until the thickest part of the chicken reaches 165 degrees Fahrenheit) Whole Chicken Grilling Tips: Spatchcock the chicken so you can lay it flat on the grill, brine it to enhance its flavor, and use indirect heat so white meat portions don’t dry out while the dark meat portions finish cooking. Back to Top Chicken Grilling Tips To ensure your grilled chicken is both delicious and safe to eat, follow these tips. Prepare the Meat: Before grilling chicken, trim excess fat, marinate and/or season the chicken to enhance flavor and tenderness, and ensure the chicken is at room temperature before grilling. Temperature Control: Preheat the grill to medium-high heat (375 to 450 degrees Fahrenheit) before placing the chicken on the grates. This helps sear the chicken and lock in juices. Review the sections above for the exact grill temperature range for each chicken cut. Avoid Flare-Ups: Chicken skin contains fat that can cause flare-ups on the grill. To prevent this, trim excess skin and fat from the chicken before grilling. If you want to grill the chicken in its skin, start by searing the meat over direct heat and then finish cooking it over indirect heat to prevent flare-ups. Cook to Safe Internal Temperature: The safe internal temperature for chicken is 165 degrees Fahrenheit. This temperature destroys any harmful bacteria in the chicken, making it safe to consume. Use a Thermometer: For food safety, use a meat thermometer to determine when the chicken is fully cooked. Insert the thermometer into the thickest part of the chicken, avoiding contact with bones, to get an accurate reading. Rest the Meat: Once the chicken is grilled to perfection, rest it for a few minutes before serving. This helps the juices redistribute throughout the meat, yielding juicier and more flavorful grilled chicken meat. Chefs can customize grilled chicken with marinades, seasonings, and sauces to suit customers' preferences. With the right equipment, such as commercial-grade grills and accessories, you can efficiently prepare large quantities of grilled chicken to meet the demands of a busy summer season. Consider featuring grilled chicken as a star attraction on your Fourth of July menu for a crowd-pleasing and cost-effective menu special.
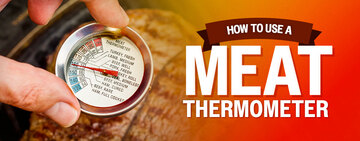
How to Use a Meat Thermometer
Precision is key when it comes to cooking meat, and that's why a meat thermometer comes in handy. Professional chefs rely heavily on the accuracy of meat thermometers to ensure food safety and quality. Whether you're running a restaurant, a catering business, or a food truck, knowing how to use a meat thermometer is essential. We'll walk you through the steps of using a meat thermometer so that your proteins are cooked perfectly every time. Meat Thermometer Video Watch the video below to learn the proper way to use a meat thermometer. <iframe width="560" height="315" src="https://www.youtube.com/embed/ibQmIznzF4s?si=sVdwxZJwVXKb_7Mu" title="YouTube video player" frameborder="0" allow="accelerometer; autoplay; clipboard-write; encrypted-media; gyroscope; picture-in-picture; web-share" referrerpolicy="strict-origin-when-cross-origin" allowfullscreen></iframe> What Is a Meat Thermometer? A meat thermometer is a type of thermometer designed to accurately measure the internal temperature of meat. This helps you determine whether your meat is cooked to the desired level of doneness, whether it's rare, medium, or well-done. But it's not just about personal preference; using a meat thermometer is critical for food safety as well. When cooking meat, it's crucial to reach the right internal temperature to kill any harmful bacteria that may be present. Different types of meat have different safe minimum internal temperatures, and using a meat thermometer takes the guesswork out of knowing when your meat is cooked through. Types of Meat Thermometers There are several types of meat thermometers available on the market, each with its own unique features and benefits. Oven-Safe or Leave-In Thermometers: These thermometers are designed to be left in the meat throughout the cooking process, even when grilling or smoking. This way you know immediately when your steak or roast has come to temperature so you don't overcook it. Probe Thermometers: Probe thermometers consist of a long metal probe attached to a digital display unit. The probe is inserted into the meat, and the display unit shows the temperature reading. These thermometers are versatile and can be used for various cooking methods, including grilling, baking, and frying. They are available in both analog and digital readouts, offering flexibility and convenience. Wireless Thermometers: If you want to monitor the temperature of your meat from a distance, wireless thermometers are the way to go. These thermometers consist of a probe that is inserted into the meat and a transmitter that sends the temperature readings wirelessly to a receiver unit. The receiver unit can be carried around, allowing you to keep an eye on the cooking progress without being tied to the grill or oven. Wireless thermometers are perfect for outdoor cooking or when multitasking in the kitchen. How to Use a Meat Thermometer the Right Way Follow these steps to use a probe thermometer to check the internal temperature of meat: Calibrate your thermometer: Calibrating a meat thermometer is crucial to ensure accurate temperature readings, especially when it comes to food safety. One simple and effective method to calibrate your meat thermometer is by using ice water. Start by filling a glass with ice cubes and then add cold water until the glass is full. Stir the mixture gently to ensure even temperature distribution. Insert the thermometer probe into the ice water, making sure it doesn't touch the sides or bottom of the glass. Wait for the thermometer reading to stabilize, which should be at or very close to 32 degrees Fahrenheit (0 degrees Celsius). If the reading is off, consult your thermometer's manual for calibration instructions or consider purchasing a new thermometer. Clean and sanitize: Before and after each use, thoroughly clean and sanitize your thermometer to prevent cross-contamination. Use warm, soapy water to clean the probe, and then sanitize it with a food-safe sanitizer. Insert the thermometer correctly: When using a probe thermometer, insert the probe into the thickest part of the meat, avoiding any bones or fatty areas. Ensure that the probe is inserted deep enough to reach the center of the meat without touching any bones or the cooking surface. For burgers or thin cuts of meat, don't insert the probe from the top. Instead, insert the thermometer into the side so that it reaches the center. Wait for the reading: Allow the thermometer to stabilize and give an accurate reading. This may take a few seconds for instant-read thermometers or a few minutes for probe thermometers. Avoid removing the thermometer too quickly, as this can result in an inaccurate reading. Meat Thermometer FAQ We answer common questions about meat thermometers below: Can You Leave a Meat Thermometer in While Cooking? Yes, you can leave a meat thermometer in while cooking if it's rated as an oven-safe or leave-in thermometer. These thermometers are designed to handle the high heat of the oven or cooking surface. What's the Right Way to Insert a Meat Thermometer? The goal is to insert the meat thermometer into the thickest part of the meat. For roasts, this means inserting the probe into the center of the thickest part. This will give you the most accurate reading of the meat's internal temperature. When it comes to a whole chicken or turkey, the best place to insert the meat thermometer is into the breast. The breast is typically the thickest part of the bird, and inserting the probe here will give you an accurate reading of the meat's temperature. Thinner cuts of meat like steaks, chops, and burgers require a different method. Instead of inserting the probe vertically, you'll want to insert it horizontally into the center of the meat. This will ensure that the thermometer is measuring the temperature at the thickest part of the cut. How to Read a Meat Thermometer Dial The dial on an analog meat thermometer is typically marked with different temperatures and levels of doneness. As the internal temperature of the meat rises, the needle on the dial will move accordingly. Make sure to read the temperature once the needle has stopped moving to get an accurate reading. Remember, different types of meat have different recommended internal temperatures for safe consumption, so consult a food safety guide or recipe to determine the appropriate temperature for your specific dish. By following these simple steps and using a meat thermometer correctly, you can ensure that your commercial kitchen produces safe and delicious food every time. So, whether you're grilling steaks, roasting a turkey, or smoking a brisket, don't forget to rely on the accuracy of a meat thermometer.