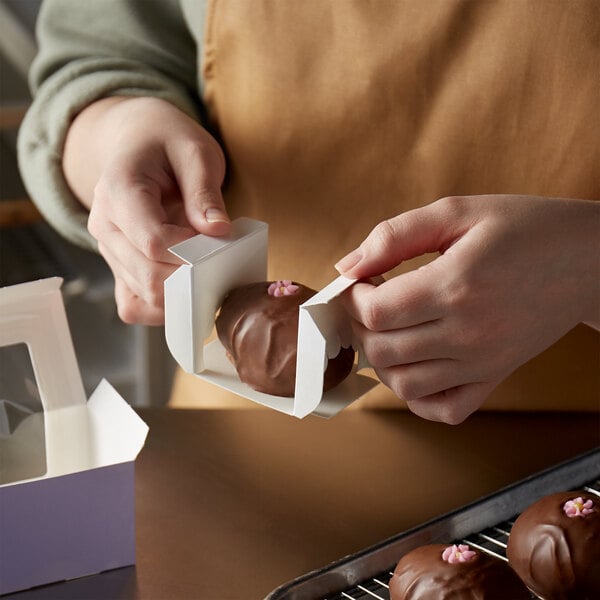
How to Make Peanut Butter Eggs
Prepare your candy shop or bakery for springtime by making these delicious homemade peanut butter eggs. Only six ingredients are needed to make these no-bake confections and the steps are easy to follow. Featuring a thick, rich chocolate coating that gives way to a creamy peanut butter center, our peanut butter egg recipe is the perfect way to celebrate the Easter season.
Shop All Candy Making SuppliesHomemade Peanut Butter Eggs
Watch our video tutorial for homemade peanut butter eggs or read our recipe below:
Paraffin Wax in Chocolate
Food-grade paraffin wax is made of vegetable oils, palm oil derivatives, and synthetic resins that are considered safe to consume. Incorporating edible paraffin wax into melted chocolate adds shine and delivers a satisfying snap when you bite into the chocolate. It also helps the chocolate remain solid at room temperature.
What Special Equipment Do I Need?
To get started with this easy peanut butter egg recipe, you'll need the following items:
- Two Large Mixing Bowls - One large mixing bowl is needed to stir all of the ingredients together to make the peanut butter egg filling. You will also need a large mixing bowl to mix the chocolate chips and edible paraffin wax.
- Sheet Pan - The peanut butter eggs will be cooled on a sheet pan.
- Double Broiler - A double boiler allows you to gently melt the chocolate with indirect heat.
- Peanut Butter Egg Mold - Use an egg chocolate mold to ensure each batch of candies is consistently shaped.
- Silicone Baking Mat - Once the peanut butter eggs are dipped in chocolate, you will place them on the sheet pan lined with a silicone baking mat to ensure an easy release once the confections have hardened.
- Fork - You will need a fork to dip the peanut butter eggs into the chocolate coating.
- Easter Egg Window Boxes - The Easter egg window boxes feature an eye-catching pattern and clear window to help market your eggs.
- Easter Egg Box Inserts - Easter egg box inserts hold the peanut butter eggs securely in the boxes while on display or in transport.

Peanut Butter Egg Recipe
Our no-bake peanut butter marshmallow egg recipe has a short, simple ingredient list and is easy to make. We use an old-time candy-making secret to make our peanut butter eggs: food-grade paraffin wax. Use the following ingredients and steps to make crowd-favorite, old-fashioned peanut butter eggs.
Yield: 12 to 24 peanut butter eggs
Peanut Butter Egg Ingredients:
- 1 1/2 cups butter
- 1 1/2 lb. confectioner's sugar
- 1 lb. semi-sweet chocolate chips
- 1 cup creamy peanut butter
- 7 oz. jar marshmallow creme
- 3/4 stick food-grade paraffin wax
Directions:
Depending on the size of your molds, this recipe makes 12 to 24 homemade peanut butter eggs. Our recipe converter helps adjust the peanut butter egg recipe ingredients to meet your quantity needs.
- Melt three sticks butter and let it cool a little (overly hot butter won’t allow filling to hold a dense consistency).
- Add melted butter, marshmallow creme, creamy peanut butter, and 1/2 lb. confectioner’s sugar to large mixing bowl.
- Mix ingredients until they reach a lumpy and runny consistency. Then, stir in remaining 1 lb. confectioner’s sugar until smooth and even.
- Scoop peanut butter egg filling into peanut butter egg molds.
- Place molds on sheet pan. Refrigerate until they are firm (about 1 to 2 hours).
- Add chocolate chips to large mixing bowl. Shave food-grade paraffin wax into bowl.
- Melt chocolate and wax in double boiler. Stir until it’s smooth enough to use as a dip.
- Remove sheet pan from the fridge and extract peanut butter filling from egg molds. Line empty sheet with a silicone baking mat.
- Place peanut butter egg on fork. Gently lower it into melted chocolate.
- Use fork to flip peanut butter egg. Then scoop coated egg out of chocolate and place it on lined sheet. Repeat for each egg.
- Refrigerate loaded sheet pan until chocolate coating hardens (about 10 to 20 minutes).
- Remove sheet pan from refrigerator. Place chocolate peanut butter eggs in Easter egg box inserts and load them into Easter egg window boxes.

Peanut butter eggs are a low-cost, high-profit Easter treat. But don't just save this recipe for springtime! Use different chocolate molds to create other themed and seasonal candies for patrons. Display these eye-catching treats in your candy shop or store's bakery case to create a nostalgic atmosphere and generate impulse buys.
Related Resources

Ruby Chocolate Recipe
It's not every day that a new type of chocolate is invented! Ruby chocolate isn't just white chocolate with pink food coloring, it's a brand-new type of chocolate with a natural pink hue from ruby cocoa beans. If you're as excited as we are, check out our easy ruby chocolate truffle recipe. Can't wait to get your hands on some ruby chocolate? Click below. Shop for Ruby Chocolate Jump to Recipe Watch Our Video Ruby Chocolate Truffles Make a show-stopping confection and impress your guests by introducing them to ruby chocolate. Our ruby chocolate truffles are dipped in white chocolate and decorated three ways - topped with chopped cranberries, sprinkled with sparkly pink luster dust, and drizzled with melted red chocolate. Choose your favorite or try all three styles. How to Make Ruby Chocolate Truffles Watch our video tutorial for ruby chocolate truffles or read our recipe below: <iframe itemprop="embedURL" width="560" height="315" src="https://www.youtube.com/embed/4QSgKitfBuk" frameborder="0" allowfullscreen=""></iframe> What Special Equipment Do I Need? To get started with this ruby chocolate recipe, you'll need the following items: Double Boiler - Pair a double boiler with an induction cooking unit for the most precise control while heating the white and red chocolate chips. If you don't have a double boiler on hand, place a bowl over a saucepan of simmering water. Just make sure the water does not touch the bottom of the bowl because the chocolate will heat too quickly and burn. Small Saucepan - You will heat the heavy cream in a small saucepan. Medium Glass Bowl - The ruby chocolate will be gently melted by combining it with hot heavy cream in a medium-sized glass mixing bowl. Sheet Pans lined with parchment paper - Catch any melted chocolate drips with a sheet pan. Cooling Rack - Your ruby chocolate truffles will cool quickly on a baker's cooling rack. Rounded Scoop - Use a #70 round scoop (.5 ounce) for consistently sized truffles. Dipping Tools - Dipping tools make it easy to dip your truffles into melted chocolate. Luster Dust - Luster dust is an edible, shimmery powder that adds sparkle to your desserts. Try any shade you like, but we recommend pink. Tips from the Test Kitchen Shown here: Combining heavy cream with ruby chocolate. Ruby chocolate has its own unique makeup, so you'll find that it doesn't behave the same way that other types of chocolate do. Here are some tips from our test kitchen to help you achieve the best results with ruby chocolate: Color change - When you add additional ingredients to ruby chocolate (like milk or cream), the vibrant pink color will become muted. This is completely normal. If you want to brighten the chocolate, simply add a couple of drops of an oil-based food coloring. Do not use gel or liquid food coloring. Melting the chocolate - Ruby chocolate melts differently than other chocolates and may "break" or separate when heated. Our method of adding the hot cream to the chocolate is a gentle way to melt the chocolate and works better than heating the ruby chocolate directly. If the chocolate does start to separate on you, whisk it quickly to reincorporate the ingredients. Chocolate won't melt - If the ruby chocolate hasn't melted for you per our directions, you can use a microwave. But be warned! It's very easy to overheat chocolate in a microwave. You don't want to ruin your precious ruby chocolate, so only place the chocolate mixture in the microwave for 15-second increments. Let it sit for a minute and stir before trying again. Ruby Chocolate Truffles Recipe Add these colorful ruby chocolate truffles to your display case or use them in a festive dessert charcuterie board. They might look fancy, but they're surprisingly easy to make. Check out our test kitchen tips above before you get started with this recipe: Recipe by: Ronne Day, WebstaurantStore Food Stylist Yield: 20 to 24 truffles Total Time: 120 minutes Shown here: Drizzling melted red chocolate with a fork. Ruby Truffle Ingredients 1 pound Callebaut Ruby Couverture Callets, finely chopped 4 ounces heavy cream 1 1/2 pound Regal white melting chips 1/4 cup dried cranberries, finely chopped Pink luster dust 1/2 pound Regal red melting chips 1 - 2 Tablespoons of vegetable oil Directions Note: Wear gloves throughout this process. Place chopped ruby chocolate callets in medium glass bowl and set aside. In small saucepan over medium heat, warm heavy cream until steaming but not boiling. Pour cream over ruby chocolate and allow to rest for 1 minute. Do not skip this resting period. The chocolate will continue to melt as it sits. Gently stir ruby chocolate and cream mixture until chocolate is melted. Place mixture in refrigerator for 8 hours or overnight until firm. Dip .5 ounce scoop into ruby chocolate mixture and release truffles into your hands. Roll between your palms to make evenly portioned balls. You should have 20 to 24 truffles. Place on a sheet pan lined with parchment. Refrigerate 4 hours or until completely solid. Before decorating truffles, line sheet tray with parchment paper and place baker's rack on top. Heat white chips in double boiler until just melted. Whisk in up to 5 teaspoons of vegetable oil to increase fluidity, if necessary. Using two forks or truffle dipping tool, dip truffles into melted white chocolate and transfer to baker's rack. While freshly coated in white chocolate, top 1/3 of truffles with chopped cranberries. Transfer all truffles to refrigerator for 1 hour. After coating has set, gently brush luster powder onto 1/3 of truffles. Allow to sit for 30 minutes. Decorate the remaining 1/3 truffles. Melt red melting chips using the same process as white melting chips. Whisk in vegetable oil, 1 teaspoon at a time, until chocolate has a fluid consistency. Using the tines of a fork or a whisk, drizzle a little melted red chocolate over remaining 1/3 truffles. Allow to sit for 30 minutes to set. Cover and refrigerate all decorated truffles until ready to serve. Truffles will be good for two weeks in the refrigerator.

How to Ship Chocolate
While shipping chocolates straight to your customers is a vital business strategy, it also comes with its challenges. If chocolate softens in your hand, how can you ship it to your customers without it melting? Whether you’re starting an e-commerce food business or optimizing your food shipping service, we explain everything you need to know to ship your chocolate. Shop All Mailing, Shipping, and Packing Supplies Use the following links to navigate through the blog: Package Chocolate for Shipping Shipping Chocolate without Melting Chocolate Shipping Methods Mailing Chocolate FAQs How to Pack Chocolate for Shipping You put time, love, and labor into creating delicious chocolate candies, so you should sell and share them outside your immediate area. Learn how to pack chocolate for shipping so it holds its form and flavor. Work with cold, clean hands. Chocolate has a softening point lower than the human body temperature, so run your hands under cold water before packaging your chocolate. Keep your chocolates in a wine cooler before shipping them. Shipping chocolate requires careful temperature planning because cold induces sugar bloom and warmth melts chocolate. To address these dual challenges, many chocolatiers store their chocolates in wine refrigerators to cool them down prior to shipping them. Wine refrigerators are not as cold as regular refrigerators and won’t cause sugar bloom. Add your chocolates to a chocolate box. Remember to take the same care and consideration for presentation as you would when packing your chocolates at your storefront. A positive unboxing experience goes a long way toward generating brand loyalty. The chocolate box also protects your candies. Build your shipping box. Use an insulated shipping box that is 2-3 times the size of your chocolate container. The additional space separates your chocolate from the heat and protects your truffles from getting smashed if the box dents in transit. Line the bottom of your shipping box with metalized bubble packaging. Metalized packing bubbles deflect the heat, insulate your chocolates, and provide cushioning. Decide whether you need cold packs. Based on the time of year, destination, and distance your chocolates are traveling, determine how many cold packs (if any) you need to prevent your chocolates from melting. If using cold packs, place one on the bottom of the shipping container. Wrap the cold packs in a resealable plastic food bag or another leak-proof container. This prevents condensation from hurting your chocolates or leaking into the shipping box. Insert the chocolate box into the shipping container. If applicable, surround it with cold packs. Fill remaining gaps with packing materials. Add a sheet of metalized insulation to the top of the package. It should cover the entire top of the package. Secure the shipping box. Tape all the seams to reduce warm air penetration. Add the shipping labels. Your chocolates are ready for shipment! Chocolate Packaging Supplies: You’ll need the following chocolate packaging supplies to pack your chocolate for shipping, Chocolate shipping boxes Cold packs for shipping chocolate Metalized Bubble-Wrap Chocolate Box Shipping Paper Tape Mailing and Shipping Labels How to Ship Chocolate without Melting The most challenging part of shipping chocolate is preventing it from melting. Chocolate softens at 72 degrees Fahrenheit, which puts it at risk of smudging, taking on fingerprints, and receiving structural damage. While chocolate's heat sensitivity makes shipping precarious, chocolatiers can thrive in the e-commerce market by following chocolate shipping best practices. Learn how to keep chocolate from melting in the mail below: Elect to delay shipment orders. Some chocolatiers elect to delay shipments if the temperature spikes. As long as you communicate, customers are less frustrated by prolonged arrival than by ruined product. Use overnight shipping. If you’re shipping chocolates in the summer, you may need to use overnight shipping to ensure they arrive intact. Choose insulating and cooling packing materials. Metalized bubble packaging insulates your chocolates and deflects the heat. Nestling your chocolate box in icepacks keeps them below their softening point. Don’t ship chocolate orders Thursday through Sunday. Shipments leading up to and on Saturday/Sunday remain in hot warehouses over the weekend. To avoid this, let your customers know you won't ship orders placed on these days until Monday. Send them an email confirmation once their order ships so they have confidence and clarity about your process. Provide an arrival alert. After working hard to ensure your chocolates don’t melt during transit, the last thing you want is for them to melt on your client’s front porch. Provide updates on your chocolate’s shipping progress so your customer can bring them inside as soon as they arrive. Should You Ship Chocolates in the Summer? Some chocolatiers forgo shipping chocolate in the summer months. You'll lose some business by foregoing summer shipments, and the proper packaging makes this profit reduction avoidable. However, depending on the size of your operation and where your main clientele lives, shipping chocolate in the summer may not be cost-effective. Ask yourself these three questions to determine whether your chocolate shop is up to filling summer shipment orders: Where are you shipping to? If most of your clients are from warm-weather areas, then shipping chocolates in the dead of summer is going to be expensive. Is it cost effective? The additional fees may scare off customers, making it nonsensical to stock chocolate shipping supplies over the summer for the number of orders received. How big is your operation? Shipping chocolates during the hottest months of the year requires a vigilant eye on weather patterns, careful packaging, and detailed shipping timelines. If you are the sole employee of your chocolate business or operate with a limited staff, you may not have the help you need to tackle summer chocolate shipments. If you don’t feel confident about shipping chocolate in the summer but you aren’t willing to give up national sales for several months each year, you could exclusively ship to cooler weather states from June through August. Alternately, you could include a pop-up link to other candies you do ship during the summer if a potential customer tries to add chocolate to their online cart during the hottest months. Back to Top Best Way to Ship Chocolate Now that you know how to package your sweets, you must determine the best way to ship your chocolate. Many chocolatiers offer both standard and expedited shipping based on the season and candy purchased. If your client lives in a destination over 70 degrees Fahrenheit, consider requiring them to ship Next Day Air via UPS. When shipping to cooler climates, USPS two-day mail is a reliable and economical alternative. Discover our top tips for the best way to ship chocolate: Know your chocolate box dimensions and average weight. Before choosing a shipping carrier, you need to know your packages’ average dimensions and weight so you can figure out the most affordable carrier for your products. Provide total transparency. If your customer’s shipment requires ice packs and other special packing materials, it’s reasonable to charge for them. Patrons appreciate transparency, so we recommend giving a breakdown of shipment costs at checkout and including the price of the ice packs. Potential customers are less likely to abandon their cart if they understand your pricing structure. Consider including shipping in the sales price. Offering "free shipping" discloses the total expense of ordering your chocolates from the start. This can help prevent abandoned carts once the customers see the shipping fees. Offer custom tracking. Post-purchase platforms allow you to create a customized tracking page. You can provide food storage instructions and beverage pairing ideas on your custom page. Shipping Chocolate FAQs Have more questions about shipping chocolate? We don’t blame you! Shipping chocolate is a complicated process. From providing insider tips to breaking down how to ship niche chocolate treats, read on to find answers to the most frequently asked chocolate shipping questions. Melting Point of Chocolate Understanding the melting point of different types of chocolate allows you to evaluate how many ice packs you need for each chocolate shipment order. As a rule, the darker the chocolate, the higher the melting point. For a thorough analysis, check out our breakdown of dark, milk, white, ruby, and ganache chocolate below. Melting Point of Dark Chocolate = High in cocoa solids, dark chocolate melts at 90-96 degrees Fahrenheit. Melting Point of White and Milk Chocolate = While white chocolate contains no cocoa solids, most milk chocolate contains few cocoa solids. The average melting temperature range for these chocolate types is between 86-90 degrees Fahrenheit. Melting Point of Ruby Chocolate = A newcomer to the chocolate world, ruby chocolate comes from ruby cocoa beans. Its perfect tempering point is 86 degrees Fahrenheit. Melting Point of Chocolate Ganache = Ganache, a chocolate mixture composed of boiled heavy cream, chocolate, and flavorings, melts at room temperature (aka in the mid-70s degrees Fahrenheit). Do All Chocolate Candies Have the Same Melting Point? While the average melting point for chocolate across all types is between 86- and 90-degrees Fahrenheit, not all chocolate candies have the same melting point. You’ll need to take the type of chocolate you're sending into consideration to keep it from melting in the mail. The darker the chocolate, the less prone it is to melting. Chocolate candy uses two extracted portions of the cocoa bean: cocoa solids and cocoa butter. Most white and dark chocolate contain comparable amounts of cocoa butter. However, white chocolate has no cocoa solids. Without the cocoa solids to absorb liquefying cocoa butter, white chocolate melts fast. Chocolatiers increase the candies' "darkness" by adding more cocoa solids. So, milk chocolate contains some cocoa solids and dark chocolate is saturated with cocoa solids. Can You Freeze Chocolates? Chocolatiers do not recommend freezing or refrigerating chocolate. Cooling chocolate and then exposing it to warm air causes condensation to form on its surface. The moisture dissolves some of the chocolate's sugar content. When the sugar recrystallizes, it creates a white, grainy layer known as “sugar bloom.” Sugar bloom distorts the taste and texture of your chocolate. So, while freezing is a great preservation strategy when shipping baked goods, avoid it at all costs when shipping chocolate. Pro Tip: Store chocolate in a wine cooler instead of freezing it. While traditional freezing and refrigeration are ill-advised, some chocolatiers store their chocolates in a wine cooler to prevent them from softening. Operating in a range between 45- and 67-degrees Fahrenheit, wine coolers are not as cold as refrigerators. By setting a wine cooler to its warmest operating temperature, you’re able to keep ganache-filled truffles intact without inducing a sugar bloom. Keeping your chocolates cool prior to shipping helps prevent them from melting in the mail. If you choose to store your chocolates in a wine cooler, place distinct flavors in airtight containers to preserve their taste. Cocoa butter absorbs odors and flavors, so storing blueberry truffles and chocolate turtles side my side will cause flavor perversion. How to Ship Chocolate Covered Strawberries Shipping temperature-sensitive and perishable chocolate-covered strawberries requires extreme care. Follow these steps to ship your chocolate covered strawberries and prevent spoiling: Chill the strawberries. Refrigerate the strawberries for two hours or until they’re hardened to prevent the chocolate from melting in transit. Once cold, package and ship. Chocolate-covered strawberries that are refrigerated for more than a day will not arrive at their shipping destination fresh. Wrap each chocolate-covered strawberry. Cellophane wrap will mold itself to the strawberry. Once wrapped in cellophane, place the strawberries in large baking cups. Place the strawberries in a sturdy container with a tight sealing lid. The container needs to be durable enough to protect the strawberries. Leave an inch of buffer space between the strawberries to prevent them from bumping into each other. Add your box of strawberries to an insulated box. This larger box will ward off heat, preserve your strawberries’ freshness, and keep the chocolate from melting. Lay packing peanuts or packing bubbles on the bottom of your shipping box. This creates a cushioning layer for your strawberries. Fill the empty spaces in your shipping container with packing materials. Once you've secured the strawberry box on all sides, layer packing materials on top and seal the shipping container with packing tape. Choose the fastest delivery service. To keep the chocolate-covered strawberries from spoiling, select overnight, express, or one-day delivery. How to Ship Chocolate Covered Pretzels Because pretzels are prone to breakage and chocolate is prone to melting, you must take exceptional care when shipping chocolate-covered pretzels. We break down how to ship chocolate covered pretzels below: Package the pretzels. If you're using pretzel rods, individually heat seal each pretzel before adding them to a sealable food-grade bag (don’t overstuff the bag). For regular pretzels, heat seal your servings together. We suggest using bags because they absorb the impact if the carrier drops the shipping container. If you place the pretzels in a rigid container, they are more likely to shatter because they will crash against the hard material. Label and seal the food-grade bag. This is your opportunity to add branding to your chocolate-covered pretzels and create an attractive unboxing experience. It’s also the time to include FDA-required allergy and calorie information. Add the bag to a bubble mailer. Bubble mailers help protect your chocolate-covered pretzels during transit. Assemble a mailing box. You can pick up large mailing boxes for free at the post office. Tape all the seams. You do not want any cold air to escape when you add the ice packs. Fill in the shipping box. Lay a cushioning bubble packaging layer on the bottom of the shipping box. Then, add your bubbled mailer(s) and surround them with packing bubbles. Insert ice packs. For smaller orders, use one six oz. ice pack and nestle it to the side of your bubbled mailer. For larger orders, add two six oz. ice packs, one to the side of the bubbled mailers and one in-between them. Seal the shipping box. Add another cushioning layer atop the contents before sealing your shipping box. Seal all the edges to contain the cold. How to Ship a Breakable Chocolate Heart Breakable chocolate hearts are hollow chocolate hearts filled with candy and sprinkles. They come equipped with mini mallets and make a cute, interactive dessert experience for Valentine’s Day or any time of the year. Given their fragile nature, you must take extra care to make sure your clients don’t receive a shattered heart. They want to do the heartbreaking themselves! Learn how to ship a breakable chocolate heart below: Pack your breakable chocolate heart in a heart-themed chocolate box. This is where your branding will shine. Wrap the chocolate box in packing bubbles. The bubble packaging provides the first layer of protection. Assemble your shipping container. Tape all seals so balmy air doesn’t leak into your box. Lay air pillows on the bottom of your shipping container. This buffers against rough handling. Add the chocolate box to the shipping container. Include any notes, details, or promotional flyers at this stage. Drape packing bubbles over the chocolate box before adding the ice packs. The bubble packaging protects your chocolates from condensation. Add three ice packs. Place one on top of the chocolate box and the remaining two on its sides. Leave no space. Fill all remaining areas with packing materials. Tape the shipping box closed. Seal all the seams to preserve a cool internal temperature. How to Create an Unboxing Experience A chocolatier’s priority is to have their shipments arrive intact, but a memorable unboxing experience goes a long way to boost brand loyalty. It provides free advertising when customers post their unboxing experience on social media. Here are some tips for creating a chocolate unboxing experience your customers will want to share: Ship your chocolate in branded boxes. Knowing the box is from your chocolate shop as soon as it arrives builds anticipation. Use attractive and sustainable packing materials. Customize your internal materials to create a cohesive aesthetic. If you use sustainable packaging, include an insert that shares this information with your customers. Environmental responsibility can earn respect and boost brand loyalty. Think like a merchandiser. Consider the color scheme of the cushioning materials and how they complement your items. Use dividers to manage your products' placement. Browse the social media hashtags #unboxing and #flatlay for inspiration. Provide free samples. Free samples introduce your clients to your other product lines and encourage repeat business. For example, if your customer ordered a shipment of your chocolate truffles, consider adding a sample of your caramels or toffee. Personalize the package. From handwritten notes to customizable gift packaging, personal touches encourage repeat business. Add Inserts. Insert coupons, new flavor/product promotions, or branded stickers. Mark the package as perishable. This is for the customer, not the carrier! If someone sends your chocolates as a gift, you want the recipient to know they should open the box upon arrival. Back to Top With the rise of ghost kitchens, you don’t need a storefront to sell gourmet chocolate treats. However, you will need a solid shipping strategy to make sure your goodies arrive intact. Whether your chocolate shop is ramping up its shipping strategy or you want to create a virtual chocolate brand, save this resource to ship your chocolates right.

Candy Making Tips from a Real Chocolatier
Chocolate is a decadent dessert that has been around for centuries! While it may be readily available today at grocery stores and even gas stations, there’s a big difference between prepackaged products and artisanal chocolate candies. There are people who devote their entire careers to the study of chocolate, and they are the top chocolatiers in the world. Interview with Josh Gingerich Our friend Josh Gingerich spent some time learning the art of chocolate making from one of the best chocolatiers in the country. He was kind enough to share a little bit about his experience with us. Q: How did you first get involved in candy making? A: Spontaneously. I started in the pastry industry—I wanted to be a baker and work with bread. I enrolled in the pastry arts program at YTI (York Technical Institute) and got an internship right out of school where I met a friend who introduced me to a well-known chocolatier in the area. I wasn’t seeking to become a chocolatier, it was more a matter of the opportunity presenting itself and I decided to take a chance. Q: What kinds of candy do you make? A: Mostly chocolate, but I also have some experience working with caramel and pate de fruit, which are fruit jellies that are cut into squares and tossed in sugar. Q: Tell us about your experience working with candy. A: I was hired as an assistant chocolatier at an artisanal French-influenced chocolate shop. I had only tried tempering chocolate once or twice in school, so I had to learn quickly. The shop where I worked had tempering machines that I used when preparing candies to sell, but the owner encouraged me to temper chocolate by hand in my spare time so that I could get a better sense of the process and learn to identify exactly what was happening to the chocolate as it reached different temperatures. Q: What does it mean to temper chocolate? A: Basically, chocolate is a crystalline substance. It has two types of crystals that become interlocked at two different temperatures, but there is a window where those temperatures overlap and that’s where chocolate tempers. Well-tempered chocolate has a specific, satin sheen. Q: How do you temper chocolate? A: To temper chocolate at home, you need to use a double boiler. Having chocolate directly on the heat will burn at the bottom while the top is still solid, so you’ll end up with a mess. You also need to be really careful not to get any liquid in the chocolate because that can ruin the process too. Q: What’s a challenge that you faced while learning to make candy? A: Any kind of candy making requires a specific skill. It’s a medium that you have to practice with and eventually you can tell the different stages just by looking at it and by smelling it. I’ll still use a candy thermometer when working with caramel, but I’ve become familiar enough with chocolate to recognize when I need to add more cocoa butter or take it off the heat. Q: Why would you add cocoa butter? A: Cocoa butter is just the fat from the cocoa bean. Processing plants take the raw beans and separate the solids from the fats (or cocoa powder from cocoa butter). The art of chocolate making is introducing these two ingredients back together in an artful way. In ganache, you can add cocoa butter at any point to make the chocolate more stiff, since cocoa butter is solid at room temperature. It helps keep it stable and it’s also tasteless, so it won’t ruin the flavor of your candy, which is especially important when you’re working with exotic fruits or other flavors in the chocolate. Pure white chocolate is basically just cocoa butter and sugar, without any cocoa powder, to give you an idea of the role it plays in the mix. Q: Do chocolatiers ever process the raw cocoa beans themselves? A: It’s possible to process cocoa beans and I’ve seen it done, but the results are not consistent. Processing plants have the proper equipment to get really consistent, high-quality ingredients from cocoa beans and the chocolatier then chooses from a catalog of products offered by the manufacturer. I worked mainly with single-origin chocolates and found that each region has a distinct flavor profile, just like specialty coffee beans. Another similarity to coffee is there are different grades of chocolate and the top-tier products are harvested from old growth plants. But, unlike coffee, it’s not just a matter of roasting and grinding the whole bean to achieve a final product. There’s more that goes into the process of chocolate making, so most chocolatiers will entrust that first step to a processing plant. Q: What’s the difference between artisanal chocolate and commercial chocolate? A: The main difference is that many commercial chocolate makers will replace some of the cocoa butter with other fats. Cocoa butter is very expensive, but if you’re trying to make ganache or any kind of pastry, trying to work with commercial chocolate becomes extremely difficult because the fats don’t melt at the same rate and don’t solidify properly. I mostly worked with couverture chocolate, which uses 100% cocoa butter and is considered an extremely good quality chocolate. Removing cocoa butter affects the snap and sheen of the chocolate, so if you come across a chocolate that has a dull finish and bends easily, chances are, it has some other oils in it besides pure cocoa butter. Q: What makes a good chocolate recipe? A:There needs to be a balance of acid and liquid content. Some ganache is strictly cream based, but you can also make ganache with a mixture of hot cream and tea, fruit, or even just pure caramel. Once you have a basic understanding of the chemistry, you can get creative and adjust recipes you might find online or in books to transform them into your own creations. It’s also important to consider the visual effect of your chocolate candy. Cocoa butter takes well to coloring, so if you spray a thin layer of colored cocoa butter onto your candy mold, you can achieve a bunch of different effects by mixing different colors and swirling them, or sometimes, we’d do a splatter effect—different things to make the presentation more impressive. But classic brown with just a lavender blossom or some kind of small seed on the corner is a very typical French look that’s beautiful in its own way. Q: What kinds of businesses did you sell your chocolates to? A: We had an online store where we did most of our wholesale business. Our customers included a lot of high-end hotels and small artisanal pastry shops all over the country. We’d package about 50 pieces of one type of chocolate per box and often, customers would purchase as many as 12 different types that would each be packaged in separate boxes, all insulated with ice packs and shipped with quick 2-day shipping. Then, once the boxes reached their destination, the hotel staff could divide them into different assortments for their guests. We didn’t do too much retail business, but occasionally, people would wander in and keep us in mind for events they were hosting or other small-scale sales. Q: Do you have any stories that demonstrate the importance of candy making or the impact of the product on the customer? A: Chocolate is a universal language. Nearly every nation in the world enjoys chocolate of some kind and different cultures put their own spin on it. Whether it’s French, Mexican, or Ghanaian, people put their own spin on the ingredients and make recipes to represent their culture. The look on someone’s face when they taste a really good piece of chocolate communicates the appreciation that they have for that type of chocolate and that style. And that’s satisfying to see.