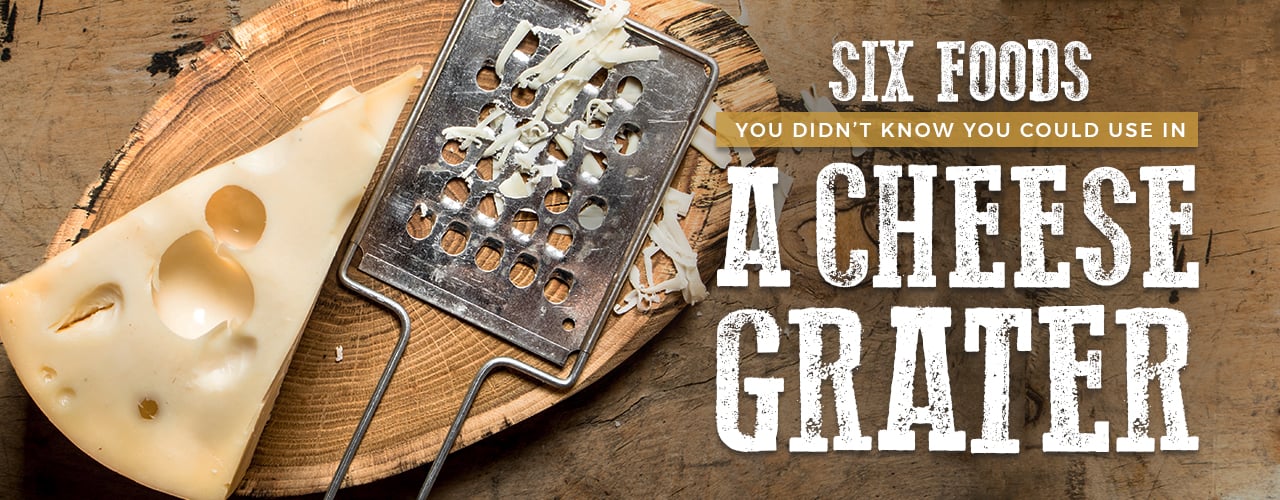
6 Foods You Didn't Know You Could Use in a Cheese Grater
Last updated on Nov 6, 2017Jessica WieserCheese graters aren’t just for cheese. While there are plenty of fancy pieces of equipment designed to chop, dice, and slice, sometimes all you need is a simple hand tool like a grater to complete your prep work. Check out these unexpected ways to use graters and keep scrolling to see our video with additional grater hacks.
Shop All Cheese Graters1. Slice Peppers
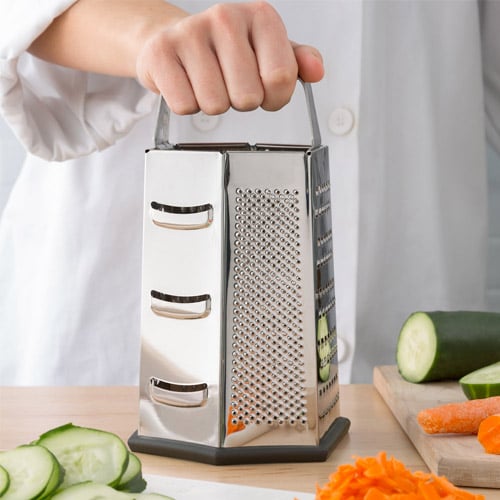
Peppers and onions are a popular flavor base for many dishes for a wide variety of cuisine styles. By using a grater, you can slice your peppers faster and more finely than you could with a knife. So whether you’re using bell peppers, jalapenos, or hot chiles in you food, remember that a slicer grater can be a handy tool to save time on prep work.
2. Shred Carrots
Shredded carrots are delicious on sandwiches, salads, and can even be used in soups and sauces. The shredding side of your handheld grater works great to shred your carrots into small, fine pieces that add a bit of color and texture to any dish.
3. Grate Spices
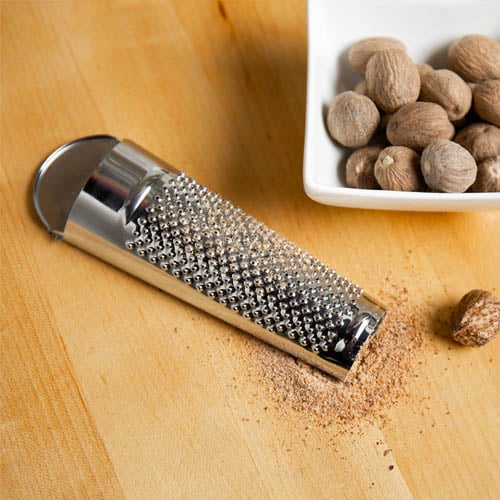
The flavors of some spices, like nutmeg and cinnamon, are greatly enhanced by being freshly grated. If you don’t own a spice grinder, a fine grater can deliver similar results of freshly ground spice.
4. Shred Cabbage
If you’re making coleslaw or sauerkraut, you’ll want to grate your cabbage. While you can achieve slender ribbons of cabbage by using a knife, it requires a lot more time and skill than you’d need using a box grater.
5. Flake Chocolate
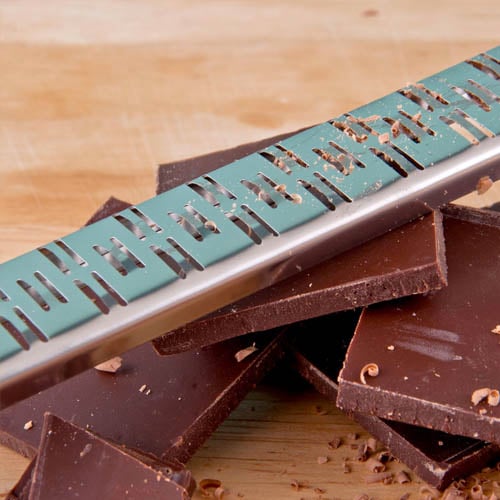
Grated chocolate is a beautiful (and delicious) finishing touch to cakes or other desserts. A ribbon grater is the proper tool for achieving those flaky and sweet bits of chocolate that bring your desserts to the next level.
6. Prep Potatoes
Want diner-style hash browns that melt in your mouth? By coarsely grating your potatoes, you can achieve hash browns that have a consistent texture for even cooking.
So next time you’re worried that you might not have the proper equipment to complete a certain prep task, remember that a cheese grater is actually a very versatile tool that can be used in many different ways. From chocolate shavings to pepper ribbons, make the most of your four-sided box grater to complete all your prep tasks.
Related Resources
The Best Cheese for Pizza
It’s safe to say that pizza is one of America’s favorite foods. In just the United States, there are over 70,000 pizzerias that generate more than $32 billion in revenue annually. As the owner of a pizzeria, it can be tough to create a pizza that stands out from your competition’s signature pies. Many factors contribute to making an amazing pizza, but the secret lies in choosing the perfect cheese. We have done the research to see which cheeses will give your pizza the best look and taste. Shop All Wholesale Cheeses Use these links to navigate through our choices for the best pizza cheeses: 1. Mozzarella Cheese 2. Provolone Cheese 3. Cheddar Cheese 4. Parmesan Cheese 5. Gouda 6. Goat Cheese 7. Gruyere 8. Ricotta How Do You Choose Cheese for Pizza? Before you can select the perfect pizza cheese for your menu, it is important to understand what makes a cheese suitable for pizza. The following are characteristics to look for that make a cheese optimal for baking on pizza: Browning Capability - can turn golden brown through the Maillard reaction without burning Melting Ability - can evenly cover the surface without leaving lumps or becoming too thin Stretchiness - shows visible strands when pizza slices are pulled apart Fat Content - the milkfat by weight of the solids in a cheese is what makes it denser, helping it stretch and melt Moisture Content - the percentage of liquid in a cheese impacts its browning ability The best cheese for pizza should turn a light golden brown without burning in the high heat of the pizza oven. It should also have a low melting point to spread evenly over the crust and avoid clumping. The cheese should have a mild stretchiness so that it produces strands when pulled apart but not be too difficult to break when chewed. Pizza cheese typically has a low moisture level (~50-52%) and a low-fat content (~35-40%), which creates the desired melting and stretchability. Best Cheeses for Pizza Although there are various types of cheese available, not all belong on a pizza. Mozzarella, cheddar, parmesan, and provolone are the four main pizza cheese types, but many other cheese varieties can be incorporated into your gourmet pies to add a unique taste. Try incorporating some of the following types of cheeses for pizzas to create a versatile menu: 1. Mozzarella Cheese Mozzarella is the most popular cheese option for a pizza. It is a defining ingredient in Neapolitan pizza, but it is an ideal cheese for any pizza style. Since it’s minimally processed, it offers a fresh taste with a light and creamy texture. Mozzarella cheese was traditionally only made with Bufala milk, but now can be found with cow's milk in the ingredients. Look for a DOP logo if you are planning to serve the traditional variation. Difference between High and Low Moisture Mozzarella When making pizza with mozzarella cheese, you can choose between high and low moisture. High-moisture mozzarella has a very short shelf life and has to be used within the first day of being made. Low-moisture mozzarella has a longer shelf life with a saltier, denser flavor than high-moisture mozzarella. This low moisture component also helps it melt faster when being baked. Low-moisture mozzarella made with whole milk is the best option for pizza whether it's being used as the only cheese or added into a cheese blend. High-Moisture Mozzarella Cheese Characteristics Flavor: Creamy and mild Browning Capability: Pale to light browning Melting Ability: Medium, tends to retain shape Stretchiness: Low, tends to puddle Fat Content: 4.8 grams per 1 oz. slice Moisture Content: Very high (52%-60%) Low-Moisture Mozzarella Cheese Characteristics Flavor: Creamy with a slight tang Browning Capability: Light to medium browning Melting Ability: High, melts evenly Stretchiness: High, with visible strands Fat Content: 6 grams per 1 oz. slice Moisture Content: High (45%-52%) Using Mozzarella on Pizza Use low-moisture mozzarella for Margherita pizzas and high-moisture mozzarella for Neapolitan and Greek pizzas. If used alone, make sure to slice it thinly and drain any excess moisture from the cheese. Because mozzarella is so versatile, it is the number one cheese to be added to a cheese blend. Mozzarella can be blended with provolone to make a traditional cheese or pepperoni pizza. Mozzarella Pairings for Pizza The following toppings pair well with the mild and creamy flavor of mozzarella cheese: Pepperoni Basil Vienna sausage Tomatoes Salami Olives Red peppers Arugula 2. Provolone Cheese Provolone is a semi-hard Italian cheese and is the second most popular cheese to blend with other cheeses. The flavor of provolone varies greatly depending on how long it ages. If you want to add a sweeter flavor and creamier texture to your pizza, use a provolone that’s been aged for a shorter amount of time. To add a sharper taste and dryer texture, choose a provolone that’s been aged for longer. Provolone Cheese Characteristics Flavor: Sweet and creamy when young, sharp and dry when aged Browning Capability: Dark browning Melting Ability: High, melts evenly Stretchiness: Low to medium, with minimal stranding depending on age Fat Content: 7 grams per 1 oz. slice Moisture Content: High (45%) Using Provolone on Pizza Because of provolone's popularity among the pizza-making crowd, you can use it on just about any flavor or kind of pizza. Try to make an Italian tomato pie, St. Louis pizza, Greek pizza, or a Pinsa Romana with this versatile cheese. It won't disappoint! Provolone Pairings for Pizza Try some of the following toppings when using provolone cheese on pizza: Chicken Basil Pesto Tomatoes Onion Broccoli Red peppers Sausage Spinach 3. Cheddar Cheese Cheddar cheese is widely loved because of its sharp taste. People don’t tend to associate cheddar cheese alone as a cheese to be used on pizza because it doesn't handle high heat well. It's usually an ingredient in a lot of pizza cheese blends. Cheddar is a good addition to any pie because its lower elasticity means it doesn't blister as easily as mozzarella. Also, if you choose a sharper cheddar cheese that has a deep orange tint, it will add color to your pizza. Cheddar Cheese Characteristics Flavor: Sharp, earthy, and pungent, sharpness is more intense in darker-colored cheddars Browning Capability: Medium browning Melting Ability: Low, fats can separate from solids in high heat Stretchiness: Low, with minimal stranding Fat Content: 9 grams per 1 oz. slice Moisture Content: Medium (34-45%) Using Cheddar on Pizza Although cheddar isn't a great option alone on pizza, it lends itself well to cheese blends to add color to your mix. Feel free to get creative with cheddar cheese and the types of pizza you want to create. Because of the versatility that cheddar cheese offers, you can add toppings like savory meat or sweet pineapple to create a unique menu. Cheddar cheese is also commonly used on specialty pies like chicken bacon ranch, cheeseburger, and buffalo chicken pizzas. Cheddar Pairings for Pizza If you're using cheddar on pizza, pair it with some of these toppings: Pepperoni Ham Bacon Pineapple Chicken Caramelized onion Capers Broccoli 4. Parmesan Cheese Parmesan cheese, in addition to other aged Italian hard cheeses, can be shaved or shredded on top of freshly baked pizzas. It should never be blended into your cheese mixes and due to the delicate flavor and dryness of this cheese, it should never be baked in the oven. When cheeses like parmesan are exposed to heat, their umami taste is ruined. Instead, use parmesan as a garnish on your pizzas to enhance the flavor of the whole pie. Parmesan Cheese Characteristics Flavor: Nutty, slightly sweet Browning Capability: Very dark browning, tends to burn Melting Ability: Very low, will crisp instead of melt Stretchiness: Very low, snaps instead of stretches Fat Content: 1.4 grams per 1 Tbsp. Moisture Content: Low (13-34%) Using Parmesan on Pizza If you are a cheese lover, parmesan cheese, like Parmigiano-Reggiano, is probably one of your favorite go-to cheeses to sprinkle on top of your pizza. Putting parmesan cheese on any pizza will do, but we recommend it specifically for Sicilian, Margherita, or Hawaiian pizzas. This cheese will accentuate the taste of other fresh and flavorful toppings. Parmesan Pairings for Pizza Combine the savory flavor of parmesan with the following toppings on pizza: Mozzarella cheese Provolone cheese Bacon Broccoli Prosciutto Arugula Back to Top 5. Gouda Gouda is a semi-hard Dutch cheese known for its rich, unique flavor and smooth texture. Older gouda will have less moisture and a tangier flavor than young gouda. Because of its versatile flavor profile, gouda is a delicious addition to pizzas featuring pulled pork or barbecue chicken. Plus, it’s available in straight or smoked, so you can pick the option that will best bring out the other flavors on your pizza. Gouda Cheese Characteristics Flavor: Buttery and smokey Browning Capability: Medium to dark browning Melting Ability: Low to medium, doesn't soften easily, younger gouda will melt more easily Stretchiness: Low, pools rather than pulling into strands Fat Content: 8 grams per 1 oz. slice Moisture Content: Medium to high (35%-55%) Using Gouda on Pizza Because of gouda's buttery flavor, it tends to work well for flatbread and thin-crust pizzas that balance sweet with savory flavors. Gouda is most popularly paired with barbecued meats because of the natural smokiness of the cheese. Gouda Pairings for Pizza Here are the pizza toppings that pair well with gouda cheese: Pulled pork Barbecue chicken Spinach Mushrooms Red onions Garlic Olives Sausage Bacon 6. Goat Cheese Goat cheese is made from goat's milk. It is soft and creamy when young and can be mixed with other flavors like berries or herbs. As it ages, it dries into a hard cheese that can be preserved in a rind. Goat cheese is known for its earthy and tart flavor, which can bring a unique twist to your pizza. Goat Cheese Characteristics Flavor: Tart and earthy Browning Capability: Light to medium browning Melting Ability: Low to medium, becomes creamy but can separate if overheated Stretchiness: Low, tends to pool Fat Content: 8 Grams per 1 oz. slice Moisture Content: High to very high (53%-59.8%) Using Goat Cheese on Pizza Although goat cheese doesn’t melt like mozzarella and provolone do, it softens up very nicely when cooked in the oven. Goat cheese makes a great addition to flatbread pizzas, focaccia pizzas, and Mediterranean pizzas. Try dropping small dollops of goat cheese across your pie’s surface. This will give customers a burst of savory taste as they take each bite. Goat Cheese Pairings for Pizza Try goat cheese on your pizza with some of the toppings below: Caramelized onions Figs Peppers Arugula Basil Mushrooms 7. Gruyere Gruyere cheese is a type of Swiss cheese made from whole cow's milk. It is a hard cheese but melts very nicely and has a mild savory flavor. When eating gruyere, you experience a range of flavors, starting with sweet and ending with nutty and earthy. Gruyere Cheese Characteristics Flavor: Nutty, sweet, and earthy Browning Capability: Medium browning Melting Ability: High and even Stretchiness: High, becomes gooey with visible strands Fat Content: 9 grams per 1 oz. slice Moisture Content: Medium (39%) Using Gruyere on Pizza Gruyere is a popular cheese to use on traditional pizza slices. The sweet and nutty flavor pairs well with red or white pizza sauces. Because gruyere cheese melts evenly and doesn’t blister easily, it is a great cheese for any pizza. Gruyere Pairings for Pizza Enjoy some of these pizza toppings with gruyere cheese: Potatoes Peppers Prosciutto Sausage Caramelized onions Spinach Red onions Pesto 8. Ricotta Ricotta cheese is made from the whey that's leftover from cow's milk, goat's milk, or buffalo's milk. This soft Italian cheese has a mild and slightly sweet flavor with a rich and creamy texture. It lends itself well to many Italian dishes, including pizza, pasta, and even cannolis. Ricotta Cheese Characteristics Flavor: Fresh, milky, and slightly sweet Browning Capability: Pale to light browning Melting Ability: Very low, retains shape in high temperatures Stretchiness: Low, becomes creamy instead of stretching Fat Content: 16 grams in 1/2 cup Moisture Content: Very high (55%-80%) Using Ricotta on Pizza Because of ricotta's creamy consistency, it is used as a base cheese for white-sauce pizzas, like Pizza Bianca and grilled flatbread pizzas. Ricotta cheese can be blended with mozzarella, fontina, gruyere, or gorgonzola cheese to make a creamy base. Its fresh flavor pairs well with seafood and vegetables. Ricotta Pairings for Pizza Ricotta pairs nicely with these pizza toppings: Chicken Shrimp Basil Tomatoes Charred spring onion Broccoli Kale Artichokes Spinach Roasted garlic Back to Top Now that you know the characteristics of each cheese type and the most compatible pizza toppings, you can begin experimenting by adding in some specialty cheeses. Whether you're making a pizza as a staple on your menu or just as a specialty item offered at your restaurant once a week, it's important to find a cheese that works for your pizza! Enjoy making wonderful pizza for all of your customers.
What Is Charcuterie?
Why does everyone love charcuterie boards? Besides the artful presentation that photographs so well on social media, charcuterie brings together all your favorite finger foods in one place. What used to be called a fancy "meat and cheese board" is now a star of tapas menus. Charcuterie boards are no longer a passing foodservice trend and have become a culinary staple for gatherings, catered events, and restaurant menus. If you're still wondering how you should say this French term, it's pronounced shahr-KOO-tuh-ree. Learn a little bit more about the tradition of charcuterie or get started with making your own board. Click below to learn more about charcuterie boards: How to Make a Charcuterie Board Charcuterie Cheeses Charcuterie Meats Charcuterie Fruits Charcuterie Crackers Charcuterie FAQ Charcuterie Definition When describing charcuterie, there's a traditional definition and a modern definition to consider. The traditional art of charcuterie was developed in 15th century France and involves preparing cured meats and meat products. A French chef who performs charcuterie-style cooking is called a charcutier (shar-KOO-tee-ay). Our modern definition of charcuterie has evolved to include more types of foods and styles of boards. The basic cheese board that you see at every holiday gathering has morphed into a culinary marvel by including more finger foods like cut fruits, olives, nuts, and dips. You can also find many charcuterie trends like dessert boards, breakfast boards, and even vegan boards. It turns out that you don't even need the board to make charcuterie! Place your ingredients in a jar (jarcuterie) or a paper cone, and now you have a portable, single-serve charcuterie option. How to Make a Charcuterie Board Watch our video to learn how to make your own charcuterie board: <iframe itemprop="embedURL" width="560" height="315" src="https://www.youtube.com/embed/Ky0tN5ta8x4?si=7xr_dtX2Lkv1zWp6?rel=0" frameborder="0" allowfullscreen></iframe> How to Make a Charcuterie Board for Beginners If you're just getting started with charcuterie, we've created a simple guide to inspire you. The common elements of a cheeseboard are meats and cheeses, but there are no rules when it comes to charcuterie. Play around with your favorite ingredients and themes. Before serving your board, take a picture of it for future reference. It will come in handy the next time you want to build a charcuterie board. Choose Your Board There are so many shapes and styles of charcuterie boards that it can be a little overwhelming. Check out our tips for choosing the right board: Shape - Rectangular boards are easy to work with and their shape makes a great canvas for laying out ingredients. Round boards are the next most popular shape, but they're a little more challenging when it comes to your portions. Once you've mastered a rectangular or round board, try experimenting with different shapes. Size - For a standard-size board that feeds 4 to 6 guests, go with something around 8" x 12" or 9" x 13". A larger board with a length over 18" or 20" is suitable for a crowd. Material - Melamine breadboards are a convenient option because they are more lightweight than slate or wood boards, but they provide the same rustic look. Large boards with many ingredients tend to become very heavy. Break-resistant melamine is also safe for your patio or outdoor dining space. Note: The charcuterie board recipe shown below was created by Ronne Day, the WebstaurantStore food stylist. To recreate this charcuterie board, use a 12" by 24" slate board. 1. Charcuterie Cheeses Everyone knows cheese is the main event! Begin by adding your cheeses and spacing them out evenly across the board. Shown here: Stilton, Manchego, Mimolette, herbed goat cheese, Saint-Andre cheese, Parmigiano Reggiano For smaller boards, stick with two types of cheese you know your guests will enjoy. If you want to go larger, increase the number to 4 or 6 kinds of cheese. When adding a unique or offbeat cheese, use it sparingly because it's probably more expensive and won't be as popular with all your guests. We recommend adding cheeses from these categories: Soft cheese - Start with 8 ounces of soft cheese, like brie, chevre, or camembert. Semi-firm cheese or hard cheese - Add 8 ounces of medium-firm and/or aged cheese like cheddar, gouda, or manchego. Unique cheese - For your third cheese, add 4 to 6 ounces of something unexpected, like blue cheese or Mimolette (an aged cow's milk cheese from France). Please note: For ease of serving, pre-slice all the cheeses before putting them on the board. If you are serving a very soft cheese, such as chevre, you can set it on a small dish or a piece of parchment with a cheese knife, which helps to maintain the appeal of your board. 2. Charcuterie Board Meats The next step is to add charcuterie meats to your board. You can start to fill in some of the space between the cheeses. Shown here: Soppressata, hard salami, speck, prosciutto Think you’d like your board to be quick and classic? Go for popular meat options like salami and prosciutto. Expanding your horizons? Try some less typical selections like guanciale, coppa, or lardo. Try using charcuterie meats from these categories: Dry-Cured Salami - Add 4 to 6 ounces of thinly sliced peppered salami, soppressata, or cinghiale. Cured Ham - Add 2 to 4 ounces of thinly sliced cured ham like prosciutto or Italian speck. These meats usually come pre-sliced, but if you order from a charcuterie counter you can have it sliced to your desired thickness. Pate or Mousse - For a traditional charcuterie board, add 6 to 8 ounces of country pate or mousse. Pate has a firm texture and can be placed directly on the board. Mousse has a smooth texture and should be served in a dish or ramekin to keep the board clean. Please note: If you choose a fatty meat, keep the board clean by placing a small piece of parchment beneath the slices. 3. Charcuterie Fruits Fruit adds color to your board and provides a flavor contrast to your meats and cheeses. Continue to fill in the spaces of your board with a variety of vibrant fruits. Shown here: Figs, plum, green and red grapes, strawberries, kumquats, pear, mini kiwis, dried apricots For a small board, a cluster of grapes and some sliced apple or pear should be sufficient. If you want to build a large board like ours, choose a fruit from each category below: Grapes - Grapes are one of the best charcuterie fruits for easy grazing. If they're in season, try Champagne grapes because they look especially elegant on a charcuterie board. Cut the grape bunches into small clusters and arrange them on top of one another. Apples and Pears - You can't go wrong with these cheeseboard-friendly fruits. After slicing but before serving, soak the apples or pears in lemon juice. Gently pat them dry before placing them on the board. The lemon juice prevents discoloration and adds a little extra citrus zing, which helps cut the richness of the cheese. Berries - Stick to halved strawberries, whole blackberries, or large blueberries. Raspberries tend to be very soft and small blueberries can roll off the board. If you have your heart set on raspberries or small blueberries, place them in a small dish. Fresh Figs - If they're in season, halve or quarter a few fresh figs for your board. They're not only beautiful, but they also pair well with cheese and charcuterie meats. Dried fruit - Dried apricots, cherries, and dates are popular choices if you choose to add dried fruit to your board. You can also try some of the more unusual dried fruits like kiwis or mango. 4. Charcuterie Crackers Crackers and bread options are an important part of your charcuterie board! Guests can layer their favorite foods on top of a cracker for a combination of delicious flavors and textures. Start filling in some of the remaining space with your cracker options. Shown here: gluten-free crisps, jalapeno cheese crisps, raisin pecan crackers, pineapple basil crackers, grilled baguette (in basket) For a small, basic board, choose a sliced baguette and water crackers. If you're entertaining a larger crowd, pick one or more options from each category below: Baguette - It’s never a bad idea to have some thinly sliced baguette in a basket next to your board. Some guests like to build a little crostino (Italian appetizer) with the choices you’ve provided. Warm the baguette whole and slice it before serving. Or drizzle the slices with olive oil and quickly grill them for a summertime crowd-pleaser. Crackers - Pick one mild cracker that doesn't overpower the other flavors on the board, like a water cracker. Then choose one adventurous option, like a rye or seeded cracker. If you opt for three types of crackers, choose a variety of flavors and textures. Grissini - Grissini are a type of thin breadstick with a crisp texture. Their pencil-like shape adds more visual interest to your charcuterie board. Cookies - If you have the room, add a crumbly shortbread cookie or chocolate-dipped biscotti for a sweet option that pairs well with your other elements. Sweet and savory is a popular flavor combination! 5. Charcuterie Board Extras Now it's time to complete your board with extra elements that add visual interest and unique flavors. Fill in the last open spaces with your favorite finger foods, dips, and spreads. Shown here: radishes, rainbow carrot sticks, mixed olives, fresh thyme and rosemary, golden cherry tomatoes on the vine, raspberry preserves, white anchovies, honeycomb, Marcona almonds, candied pecans There are many interesting and creative ways to round out your cheeseboard. Here are a few of our favorites: Jams or Preserves - Fruit preserves provide a sweet contrast to meats and cheeses. Fresh Herbs - Add sprigs of rosemary or thyme to your board. Edible Flowers - Try placing blooms of edible flowers throughout your board. Nuts and Seeds - Arrangement depends on the type of nut. Large nuts, like whole pecans, can be placed directly on the board. Addia small dish for nuts like peanuts. Olives - Olives are a popular choice for charcuterie boards thanks to their briny flavor. Serve pitted olives for convenience. Smoked Shellfish - For an adventurous option, add a small ramekin of smoked clams, oysters, or mussels. Anchovies - Try adding white anchovies, which are a mild, slightly sweet version of the tiny fish. Tapenade - This spread, which is a savory combo of olives, capers, and anchovies, can be served right out of the jar or added to a ramekin. Back to Top 4 Styles of Charcuterie Boards There are a few different approaches you can take while developing a concept for your charcuterie board. You can go with a regional approach and include items that all hail from the same country or town (i.e. you could make an entire board based on the flavors of Alsace, France, or Bologna, Italy). Or you can take a more freestyle approach and think about how your favorite flavors and textures would translate onto one board. Here are a few examples of the latter option, to spark your creativity. 1. Pickles and Spreads Pickled foods provide a tangy contrast to sweet, smokey meats and cheese. There are many types of pickles and pickled vegetables to choose from, like pickled cauliflower, sweet gherkins, or pickled red onion. 2. Cheese and Fruit Pairing the right cheese and fruit provides a flavorful contrast of taste and textures. Some classic fruit and cheese combinations are grapes with cheddar, pears with gouda, or cherries with brie. 3. Fresh Veggie and Citrus Think crunchy fennel and blood orange slices. The bright, fresh flavors of produce balance out heavier, fattier meats like salami. 4. Toasted Bread and Meat Slices of toasted bread provide a delicious vehicle for topping with meats, cheeses, and dips. Classic charcuterie items like prosciutto and fig jam pair perfectly with a toasted baguette. Charcuterie FAQ We answer some common charcuterie questions below: Do I Need Cheese on My Charcuterie Board? Technically, you can make a charcuterie board with your favorite ingredients, and if that doesn't include cheese, leave it out! Your dairy-free and lactose-intolerant guests will appreciate it. But, if you have no dietary restrictions to consider, including cheese will add a range of pleasing textures and flavors to your board. See our tips for choosing the right cheese above. What Size Charcuterie Board Do I Need for 20 Guests? For grazing, a crowd of 20 guests will usually be satisfied with a large charcuterie board that measures over 20" in length. What Is the Correct Pronunciation of Charcuterie? Here in the US, charcuterie is pronounced shar-KOO-tuh-ree. The French pronunciation is shar-koo-TREE. What Does Charcuterie Mean in French? In the French language, charcuterie means "pork-butcher-shop". What Is a Cheese Board? A cheese board is an appetizer platter that features cut meats and cheeses. Before charcuterie took the culinary world by storm, we had the humble cheese board! When it comes to making a charcuterie board, there's no right or wrong way. Instead, focus on creating flavor combinations and providing your guests with a memorable dining experience. Knowledge of the types of ingredients used on a standard charcuterie board can help you break the rules effectively. Soon you'll grow more comfortable with the craft of developing a delicious, cohesive board for your restaurant, bar, or cocktail party.
Food Presentation Tips
If you own a food service business, you know that food presentation is crucial to marketing your restaurant on Instagram. Studies from Oxford show that a quality food presentation increases customers' perceived value of your meals, allowing you to raise your menu prices. Chefs tactfully arrange ingredients to curate flavor and textural complexity, and their creative plating techniques stimulate appetites before the first bite. Read on to discover plating techniques, an instructional plating video, and the tools you need to create your own signature food presentation style. Shop All Plating Tools Click any of the sections below to explore the topic that interests you: Plating Video Plating Techniques Plating Ideas Plating Tools Food Plating and Presentation Video An understanding of food plating techniques will help your staff improve your meal presentation and enhance the dining experience for your guests. For a visual guide, check out our video on how to plate food like a chef. <iframe scrolling="no" src="/v/?num=4852&width=600&height=500&embed=1" frameborder="0" height="500" width="600"></iframe> How to Plate Food like a Chef While there are no fixed food presentation rules, there are several important concepts to keep in mind as you arrange your meals. Remember your plate is your canvas. Arrange food items using the rule of thirds. Entice the eyes with visual stimulants. Use the sauce as paint for your plate. Garnish to enhance both appearance and flavor. Plating Techniques Conceptualize plating as an art form: you are the artist; the plate is your canvas, and the food is your medium. Master the following plating techniques to perfect your craft. 1. Plate Presentation Techniques Selecting the right plate for your meal is the first step in the food presentation process. Consider the following to choose the ideal plate for your food presentation: Plate Size - Your plate should be big enough to make your food stand out and petite enough to prevent your portions from appearing small. Light vs Dark Plates - Use light and dark plates to make your meal stand out. White plates are popular because they offer a neutral background for brightly colored foods. Dark plates lend beautifully to light-colored dishes, such as a whitefish or creamy polenta. Plate Color - A plate’s color can stimulate or reduce appetites. Red increases the appetite, so serving appetizers on red plates keeps customers interested in ordering large entrees and desserts. Professional platers consider blue dinnerware unappetizing because there are few naturally occurring blue foods. Restaurant Style - If you operate a fine dining establishment, classic China dinnerware pairs well with traditional plating styles. A trendy gastropub should invest in unique plates with unconventional shapes that facilitate maximum plating creativity. 2. Food Arrangement Techniques How you arrange your food determines your meal’s aesthetic tone, structural integrity, and flavor dispersion. Here are a few of the most important food arrangement techniques: The Rule of Thirds - When applied to cooking, the rule of thirds prescribes placing the focal point of your dish on either the left or right side of the plate, rather than the center. Use white space by thinking of the rim as your frame and highlight your plate’s focal point(s). View Your Plate as a Clock - As you place your ingredients, picture the face of a clock. From the diner’s point of view, your protein should be between 3 and 9, your starch/carbohydrate from 9 to 12, and your vegetable from 12 to 3. Don’t Overcrowd Your Plate - Keep your design simple by focusing on one ingredient (usually the protein). Having a focal point helps you arrange your accompanying items to complement your standout item. Moist Ingredients First - Plate moist ingredients first and prevent them from running by topping them with other foods. For example, you can angle sliced meat against mashed vegetables. Create Flavor Bites - Flavor bites are forkfuls of food that combine all the ingredients in your dish into one bite. Flavor bites are essential to quality plating as they please both the eyes and the taste buds. Mix Textures - Contrasting a smooth vegetable puree with crunchy onion straws or topping a steak with crumbled blue cheese yields appealing texture combinations that are classic in high-end cuisine. 3. Visual Plating Techniques Maximizing the visual elements of your meal is a key plating technique. While your arrangement develops around your protein, manipulating the colors and sizes of the other elements on your plate enhances your focal point and creates a gourmet presentation. Serve Odd Quantities - If you’re serving small foods like shrimp, scallops, or bite-sized appetizers, always give guests odd quantities. Color Diversity - Colorful dishes build the expectation of a flavorfully complex meal before your patrons take their first bite. Add green vegetables or brightly colored fruits that contrast with your focal point. Monochromatic Meals - Plating color-coded items together visually builds the expectation that the dish only offers one flavor. When the palate receives multiple textures and flavors instead, it surprises the tastebuds, causing them to engage with the dish. Add Height to Your Plate - Stimulate your guests' eyes by building height. While compactly stacking ingredients isn’t as popular as it was 5-10 years ago, building layers of food for guests to explore offers an exciting experience. Create Visual Balance - Balance your plate’s landscape by leaning long, flat items against taller elements (ex: leaning asparagus spears at a 45-degree angle across a stack of lamb lollipops). 4. Sauce Plating Techniques With your principal ingredients plated, you’re ready to top your dish with delicious sauces that enhance your food presentation. Think of your squeeze bottle or spoon as a paintbrush, and your sauce as a medium. Once you're done adding your sauce, make sure you wipe down the edge of your plate with a towel, so no drippings distract from your presentation. We explain some of the simplest, most fail-proof sauce plating techniques below. Smeared Sauce Plating Technique - Fill a squeeze bottle with your sauce. Squeeze a thick layer of sauce and form a large, filled-in circle on your plate. Take a spoon or plating wedge and dip it into the middle of the sauce where it’s thickest. Quickly pull the sauce across your plate. Accent Dots Plating Technique - Fill a squeeze bottle with your desired sauce. Analyze your plate from the perspective of the rule of thirds, then add accent dots. Use multiple sauces to create additional color contrast. Smeared Accent Dots Plating Technique - Alternate between two sauce accent dots in a curved line along the side of your plate. Then, take a small plating wedge and place it at the center of the first accent dot in your row. Drag the plating wedge through the accent dots, creating a multicolored, single-sided edge. Swirled Sauce Plating Technique- Fill a squeeze bottle with your desired sauce. Place your plate atop a cake turntable. Point your squeeze bottle face down at the center of the plate. Spin your stand while simultaneously squeezing your bottle. Adjust your wrist to vary your swirled design. You can use multiple sauces to create more visual contrast. 5. Garnishing Techniques In the past, chefs casually threw a piece of kale and an orange slice onto every plate. However, these garnishes added nothing exciting to the dish, and few guests ate them. Modern garnishes pair thoughtfully with the meal to create flavor bites. Follow these garnishing techniques and guidelines to master the last step of food presentation. Edible Garnishes - As you finish plating, remember that garnishes should always be edible and enhance the dish. To determine whether a garnish belongs, ask yourself whether you would want to consume it in the same bite as the meal it accompanies. Intentional Placement - Never heap garnishes in one corner of the plate. Instead, disperse them thoughtfully to add color or texture. For example, place crispy carrot shoestrings atop a delicate filet of fish nested in a curry sauce and decorate the plate with pomegranate seeds. Less Is More - Never clutter your plate for the sake of a garnish. If your plate is full, opt for a drizzle of flavor-infused vinegar or oil to enhance the taste and appearance of your dish without overcrowding your plate. Garnishes to Avoid - Avoid using unappetizing garnishes like raw herbs, large chunks of citrus, and anything with a strong odor. Also, avoid garnishes that take a long time to apply. Back to Top Food Plating Methods There are three popular plating methods: classic, free form, and landscape. Master each method to create meals worth photographing. We provide ideas on how to plate food using each method below. We’ve selected a white square plate as our canvas. Filet mignon, potato puree, carrots, demi-glace, pea puree, lima bean and pea blend, thyme, and fried leeks are our materials. Classic Plating 1.Pipe the potato puree onto the plate using a pastry bag. 2.Place the carrots next to the puree using precision tongs. 3.Garnish the carrots with thyme using precision tongs. 4.Plate the steak using precision tongs. 5.Garnish the steak with fried leeks using precision tongs. 6.Drizzle the demi-glace around the plate using a spouted saucier. 7.Wipe the edges of the plate with a clean towel. 8.Finished classic plate. Free Form Plating 1.Pipe dots of potato puree onto the plate using a pastry bag. 2.Slice the steak into three pieces using a chef's knife. 3.Plate the pieces of steak using precision tongs. 4.Place the lima bean and pea blend around the plate using a spoon. 5.Plate the carrots using precision tongs. 6.Place dots of pea puree around the plate using a large squeeze bottle. 7.Place dots of the demi-glace around the plate using a small squeeze bottle. 8.Garnish the plate with fried leeks using precision tongs. 9.Wipe the edges of the plate with a clean towel. 10.Finished free-form plate. Landscape Plating 1.Place dots of pea puree around the plate using a large squeeze bottle. 2.Paint the pea puree onto the plate using a brush. 3.Pipe the potato puree onto the plate using a pastry bag. 4.Plate the carrots using precision tongs. 5.Lean the steak against the puree and carrots using precision tongs. 6.Place the lima bean and pea blend around the plate using a spoon. 7.Drizzle the demi-glace around the plate using a spouted saucier. 8.Garnish the steak with fried leeks using precision tongs. 9.Wipe the edges of the plate with a clean towel. 10.Finished landscape plate. Back to Top Plating Tools Having professional tools is essential for commercial plating. We’ve rounded up the foundational items you need to create restaurant-quality food presentations. Decorating brushes aid in detailed line work and broad sauce strokes. You can also use decorating brushes to create a puree or coulis base for meats or vegetables. Garnishing kits come with everything you need to garnish your signature dishes, including plating wedges, tongs, squeeze bottles, and brushes. Molds keep plates clean and increase visual appeal by cutting ingredients to specific shapes and sizes. Ring molds help you develop height and structure when stacking ingredients. Precision tongs help you place garnishes or small, delicate items. Many tongs feature micro-serrations for improved grip and stability. Plating wedges come pre-cut with flat, round, or pointed edges and are perfect for smearing soft ingredients and creating sauce designs. Shavers allow you to top your dishes with shaved or grated chocolate, hard cheese, or soft vegetables. Plating Spoons in varying sizes are essential to the art of food presentation. Saucier spoons help you drag sauce across your plate and slotted spoons quickly separate solids from liquids. Squeeze bottles help you apply sauce and aioli to your finished plate. Many come with adjustable precision control tips. Back to Top Whether you own a fine dining establishment, gastropub, or eclectic cafe, thoughtful plating will attract customers and earn their loyalty. Even before they sample your meal, your guests will eat with their eyes. To test this theory, Oxford researchers plated the same meal two ways, artfully and without attention, and diners reported that the artfully plated version tasted better. By integrating basic food presentation techniques, styles, and tools, you can enhance your plating process and increase your menu prices without deterring customers.
