
How to Use a Gas Can
If you use a gas-powered generator to run outdoor equipment or even as a backup power supply, you need a reliable gas can to store and transport fuel. Gas cans may seem simple, but they require special handling when it comes to cleaning, filling, and storing. We'll walk you through the best procedures for using your gas can safely.
How to Clean a Gas Can
Before you fire up your food truck generator, you'll need to retrieve fuel in a clean gas can. If you haven't used the gas can recently, it's a good practice to remove any residue, dirt, or contaminants that may have accumulated over time.
To clean a gas can, you will need a bucket, mild detergent or dish soap, a long-handled brush or sponge, and clean water. Make sure the gas can is empty and all fuel has been used or properly disposed of. Also, always work in a well-ventilated area away from any open flames or sources of ignition. Here are some steps to follow when cleaning a gas can:

1. Remove the spout and cap: Most gas cans have removable spouts and caps. Take them off and set them aside for cleaning separately.
2. Rinse the gas can: Start by rinsing the gas can thoroughly with clean water to remove any loose debris or dirt.
3. Prepare the cleaning solution: Fill the bucket with warm water and add a small amount of mild detergent or dish soap. Mix it well to create a soapy solution.
4. Scrub the interior: Dip the long-handled brush or sponge into the soapy solution and scrub the interior of the gas can thoroughly. Pay special attention to the areas where fuel may have come into contact, such as the bottom and sides. Use a back-and-forth motion to dislodge any residue or build-up.
5. Clean the spout and cap: While the gas can is soaking, clean the spout and cap using the same soapy solution. Scrub them with a brush or sponge to remove any dirt or fuel residue. Rinse them well with clean water.
6. Rinse the gas can: Once you have scrubbed the interior and the spout and cap, rinse the gas can again with clean water. This will help remove any remaining soap residue.
7. Dry the gas can: After rinsing, allow the gas can to air dry completely. Make sure there is no standing water left inside before storing or using it again.
8. Reassemble and store: Once the gas can is dry, reattach the spout and cap. Ensure they are securely tightened. Store the gas can in a cool, dry place away from direct sunlight or extreme temperatures.
How to Fill a Gas Can
If you fill up a gas can at the gas station, you may run into trouble with the automatic shut-off feature on the gas pump. This can occur if the gasoline splashes too much inside the can and the sensor on the pump is alerted that the can is full (even if it's not). You can avoid this frustration by taking your time and filling slowly.
Before filling, make sure you are using a gas can that is specifically designed for storing and transporting gasoline. Look for cans that are made of durable materials, such as high-density polyethylene (HDPE), and have a tight-sealing cap. Follow these steps to safely fill your gas can:

1. Position the Gas Can: Place the gas can on the ground, away from any sources of ignition, such as open flames or electrical equipment. Make sure the gas can is stable and won't tip over during the filling process. Never fill a gas can from the bed of a truck or from inside your vehicle.
2. Ground Yourself: Touch a metal part of your vehicle or any other grounded object to discharge any static electricity before touching the gas can or the gas pump.
3. Remove the Gas Can Cap: Open the gas can by unscrewing the cap or removing the spout, depending on the type of gas can you are using. Keep the cap or spout in a clean and safe place, away from the gasoline.
4. Insert the Nozzle: Insert the gas pump nozzle into the gas can's opening. Make sure it is securely inserted to prevent any leaks or spills.
5. Fill the Gas Can: Press the trigger on the gas pump nozzle to start the flow of gasoline into the can. Fill the gas can slowly and avoid overfilling. Leave some space at the top to allow for the expansion of the gasoline. Pay attention to any automatic shut-off mechanisms on the gas pump, which will stop the flow of gasoline when the can is full.
6. Close the Gas Can: Once the gas can is full, carefully remove the nozzle from the can. Close the gas can tightly by screwing the cap back on or reattaching the spout.
How to Store Gas Cans
Filled gas cans have the potential to become a fire hazard, so proper storage is imperative. Gasoline should be stored in containers that are specifically designed for storing flammable liquids. These containers should be made of a material that is resistant to corrosion and leakage, such as metal or high-density polyethylene (HDPE). It is also important to ensure that the container is properly labeled and stored away from any potential sources of ignition.
How Long Can Gas Be Stored?
On average, gasoline can be stored for about 3 to 6 months without any significant degradation. However, with the addition of fuel stabilizers, the shelf life of gasoline can be extended to up to 1 year. Fuel stabilizers are chemicals that help prevent the oxidation and breakdown of gasoline over time.
The degradation process can be accelerated by exposure to air, moisture, and heat. That's why it is crucial to store gasoline in a tightly sealed, approved container in a cool and dry place to minimize degradation. Regularly inspecting stored gasoline is also recommended. If gasoline appears discolored, has a foul odor, or contains sediment, it should not be used as it may have degraded and can cause damage to engines or equipment.
Where to Store Gas Cans?
Remember that gas is extremely flammable and expands with heat. When storing a can of gas, keep it somewhere cool, dry, and well-ventilated. Recommended storage locations include sheds, detached garages, and other outbuildings. Use a fire-proof safety cabinet to house your gas cans where they will be secure and out of harm's way.
Storing gas in a utility room, basement, or attached garage puts the entire business or house in danger if the fuel catches fire. These areas also often include a furnace and other electrical equipment that can serve as an ignition source.
Can Gas Cans Be Stored Outside?
Storing filled gas cans outdoors is generally not recommended unless housed in an outbuilding or shed. The location must be cool, dry, and shielded from direct sunlight.
Gas Can Colors
Gas cans come in a variety of colors, and each color has a specific meaning and purpose. These colors are used to help users easily identify the type of fuel that the can contains, as well as to ensure proper handling and safety.
In addition to these standard colors, some gas cans may also feature additional markings or labels to provide further information about the type and grade of fuel contained inside. These markings can include words such as "unleaded," "ethanol-free," or "high octane," among others.
It is important to note that the use of color coding for gas cans is not standardized across all manufacturers or regions. Therefore, it is always recommended to carefully read and follow the instructions and labels provided by the can manufacturer to ensure proper handling and use of the fuel.
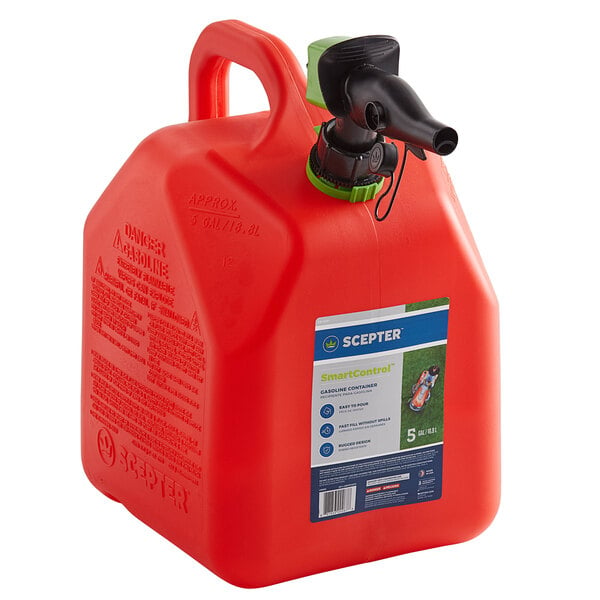
Red Gas Can
Use a red gas can for gasoline. It is perhaps the most commonly seen color, but should not be used as a "universal" color for any fuel type.
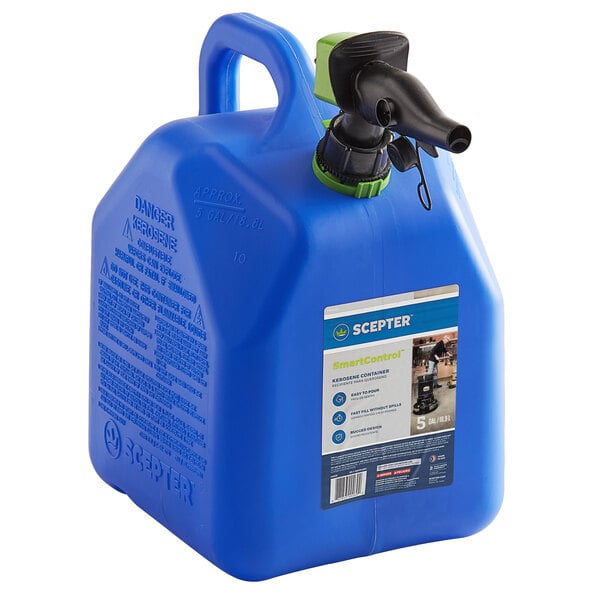
Blue Gas Can
Use a blue gas can for kerosene. Though flammable, kerosene is less flammable and volatile than either gasoline or diesel fuel.
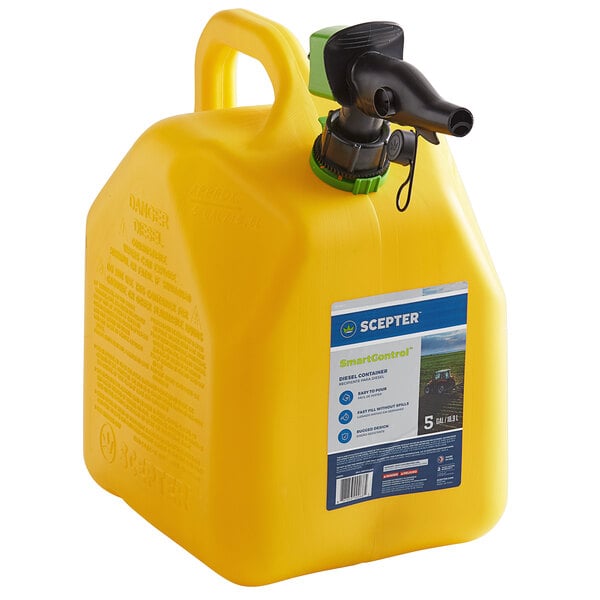
Yellow Gas Can
Use a yellow gas can for diesel fuel. It should never be used to store any other liquid fuel.
Related Resources

How to Create a Profitable Patio Space
Whether you live in warmth all year long or you're looking to take advantage of the summer sunshine, consider transforming your unused or wintry outdoor space into a profitable patio destination. Outdoor dining areas range from simple sidewalk space to lavish poolside bars. To make the most of the beautiful weather, revamp your current patio to provide guests with outdoor dining options. Take into account the following restaurant patio ideas and considerations to transform your space into a profitable addition for your bar or cafe. Shop All Restaurant Patio Furniture Use these links to learn more about individual aspects of creating a profitable patio space: Check Restaurant Patio Laws and Regulations Designing a Patio Layout Prepare for In

Delivery Driver Tips and Tricks
Food delivery has recently seen an increase in popularity, causing many restaurants to adapt their menus to be delivery friendly . Because of this, it's important to make sure every delivery experience is positive and fulfilling. Whether you're an experienced delivery driver or about to start your first day on the job, we've compiled a list of tips to help improve your delivery driver skills and make every driver safe, smart, and profitable. 1. Invest in Delivery Driver Gear Investing in the right equipment can give you an edge as a delivery driver. Some employers might provide you with basic equipment, but others might not. See if it's possible to acquire the following items before you make your next delivery. Insulated delivery bags: An i
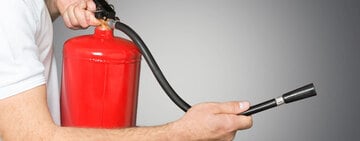
Types of Fire Extinguishers
Having a fire extinguisher is crucial to the safety of your restaurant, employees, and customers. It is important that you understand the different types of fire extinguishers as well as the associated components and terminology so you can choose the fire extinguisher that's right for your operation. Be sure to check out our fire extinguisher reviews as well!
- Topics 1357
- Industrial 55
- Troubleshooting Guides 21
- Restaurant Management 128
- Bar Management 56
- Catering Tips 36
- Bakery Management 42
- Food Trucks & Concessions 49
- Advertising & Marketing 37
- Eco-Friendly Tips 11
- Facility Layout & Design 42
- Coffee Shop Tips 28
- Installation & Maintenance 51
- Janitorial & Pest Control 30
- Safety & Sanitation 88
- Startup Tips 104
- Menu Design 10
- Kitchen & Cooking Tips 84
- Hospitality Management 24
- Pizza & Sandwich Shop Tips 36
- Smallwares 37
- Food Prep 89
- Tabletop Items 17
- Disposables 22
- Calculators & Tools 6
- Consumables 52
- Warewashing & Laundry 19
- Cooking Equipment 91
- Food Storage & Refrigeration 51
- Beverage Equipment 35
- Office Supplies 6
- Resource Type
- In-Depth Articles273
- Buying Guides298
- How-Tos95
- Product Reviews78
Join Our Mailing List
Receive coupon codes and more right to your inbox.