A Guide to Chocolate Candy Making
Chocolate candy making is a delicious and rewarding craft that allows you to create sweet treats for any occasion. Whether you're a seasoned confectioner or a beginner looking to try your hand at chocolate candy making, there are a few tips that can help you achieve the most consistent results. We'll cover some of the best practices for working with chocolate and help you identify the types of chocolate that make the most tempting and delectable candies.
Why Start a Chocolate Candy Making Business?
The allure of chocolate is undeniable, and the demand for high-quality, artisanal chocolates continues to rise. For individuals looking to turn their passion for chocolate into a profitable side job or business venture, starting a chocolate candy making business can be a rewarding and lucrative endeavor. The profit margins for handmade chocolates are often higher than mass-produced chocolates, making it an attractive business opportunity. By sourcing quality ingredients and creating unique chocolate confections, you can command premium prices for your products. Keep reading to learn the basics of chocolate candy making and how to produce the best quality products.
Chocolate Candy Making Supplies
Before you get started, you'll need some essential candy making supplies. These tools will help you master the techniques needed to create professional results with chocolate:
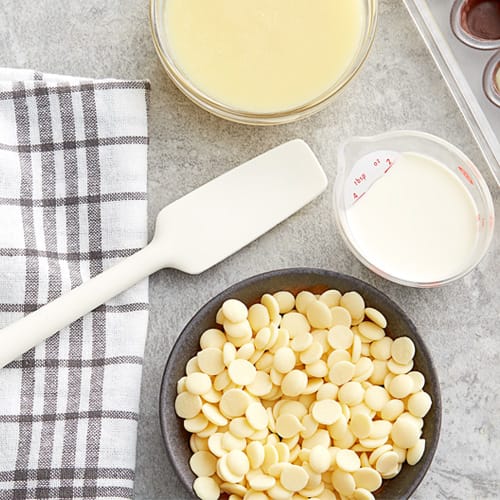
- Double Boiler: A double boiler is a crucial tool for melting chocolate gently and evenly. It consists of two pots - one that holds simmering water and another that fits on top to hold the chocolate. This indirect heat prevents the chocolate from burning or seizing, resulting in a smooth and glossy finish.
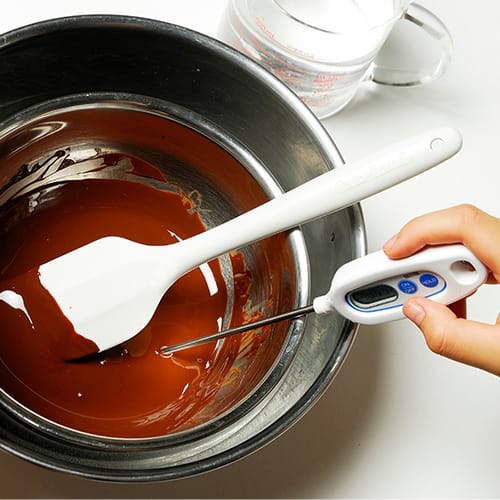
- Chocolate Thermometer: Precision is key when working with chocolate, and temperature control is crucial for tempering and molding. A chocolate thermometer allows you to monitor the temperature accurately, ensuring that your chocolate is at the perfect consistency for dipping, molding, or tempering.
- Chocolate Molds: Chocolate molds come in a range of shapes and sizes, allowing you to create an array of beautifully designed candies. From classic shapes like hearts and stars to intricate designs for special occasions, keeping a variety of molds on hand can elevate your chocolate creations.
- Offset Spatula: An offset spatula is a versatile tool that helps you spread, smooth, and decorate chocolate with precision. Its angled blade allows you to work efficiently when you're coating truffles, spreading ganache, or creating intricate designs on your candies.
- Piping Bags and Tips: Piping bags and tips are essential for adding decorative touches to your chocolate candies. Whether you're drizzling chocolate, piping fillings, or creating intricate designs, having a set of piping bags and tips can take your creations to the next level.
- Cooling Racks: Properly cooling chocolate candies is crucial for achieving a smooth and shiny finish. Cooling racks allow air to circulate around the candies, helping them set and harden evenly. They also prevent condensation from forming, which can affect the texture and appearance of your chocolates.
- Chocolate Scraper: A chocolate scraper is a handy tool for smoothing out the surface of your chocolate candies and removing any imperfections. Its flat edge helps create a clean and polished finish, perfect for professional-looking confections.
Chocolate Candy Making Techniques
If you've ever wondered how chocolatiers produce the perfect batch of candies, we'll let you in on a secret. Getting professional results comes down to mastering a few key techniques. Learn these methods, and with practice, you'll start to see the improvement in your chocolate candies:
- Tempering Chocolate: Tempering chocolate is a crucial technique that involves heating and cooling chocolate to specific temperatures to ensure a glossy finish, a satisfying snap, and a stable crystalline structure. This process is vital for achieving that professional-looking sheen on your chocolate candies.
- Molding: Using molds is a popular technique in chocolate candy making that allows you to create beautifully shaped candies with intricate designs. Mastering the art of molding will give your chocolates a polished and professional appearance.
- Enrobing: Enrobing is the process of fully coating a center or filling with a layer of chocolate. This technique is commonly used in creating truffles, bonbons, and other filled chocolates, resulting in a luxurious and decadent treat with a smooth and uniform coating.
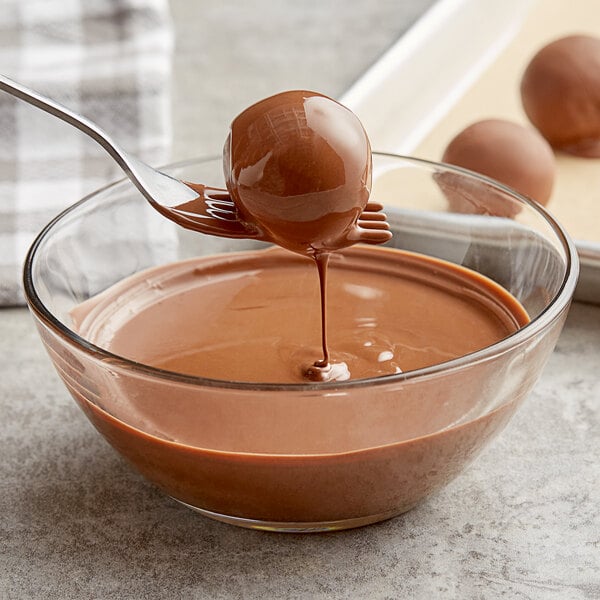
- Hand-Dipping: Hand-dipping involves coating centers or fillings by hand in melted chocolate. This technique allows for more creative freedom and customization, as you can experiment with different coatings, toppings, and drizzles to add visual appeal and flavor complexity to your chocolate candies.
- Decorating: Decorating is the finishing touch that can take your chocolate candies from ordinary to extraordinary. Whether you sprinkle on edible glitter, dust with cocoa powder, or add decorative accents like edible flowers or gold leaf, decorating your chocolates adds a touch of elegance and whimsy.
By mastering these essential techniques in chocolate candy making, you'll be well on your way to creating stunning and delicious confections that will impress your customers.
Best Chocolate for Candy Making
Did you know that choosing the right type of chocolate is key to achieving the perfect flavor and texture with your candies? For beginners, using high-quality chocolate chips or melting wafers is a great option because they are easy to work with and readily available in most stores. If you're looking to elevate your candy making game, couverture chocolate with a high cocoa butter content is ideal for a smooth and glossy finish.
- Couverture Chocolate: Couverture chocolate is a high-quality chocolate that contains a higher percentage of cocoa butter compared to regular chocolate. This makes it a top choice for both melting and tempering. Couverture chocolate is commonly used by professional chocolatiers because its smooth texture and glossy finish make it ideal for creating professional-looking chocolates.
- Chocolate Wafers: Chocolate wafers are convenient and easy to melt, making them a popular choice for home candy makers. These wafers are specifically formulated for melting and are available in a variety of flavors, such as dark, milk, and white chocolate. They melt smoothly and can be easily tempered for a glossy finish.
- Chocolate Callets: Chocolate callets are small, uniform chocolate drops that are specifically designed for melting and tempering. They are made from high-quality chocolate that is finely crafted to ensure a smooth and consistent finish. These little drops of chocolate goodness are perfect for creating a variety of confections, from truffles to chocolate bars to dipped fruits.
- Chocolate Bars: High-quality chocolate bars can also be used for melting to create delicious candies. Look for bars with a high cocoa content and avoid chocolates with added ingredients like nuts or caramel, as they can affect the melting process. Chop the chocolate bars into small pieces for even melting.
- Chocolate Chips: While chocolate chips are a convenient option for baking, they can also be used for melting to make chocolate candies. Avoid using chocolate chips for tempering because they won't produce a smooth, glossy product.
By selecting the right type of chocolate for melting, you can elevate your chocolate candy making game and create delectable treats that will impress your customers or guests. Just make sure that you understand the melting points of the products you use so that you can achieve the smoothest texture and consistency.
Back to Top
How to Use Chocolate Molds
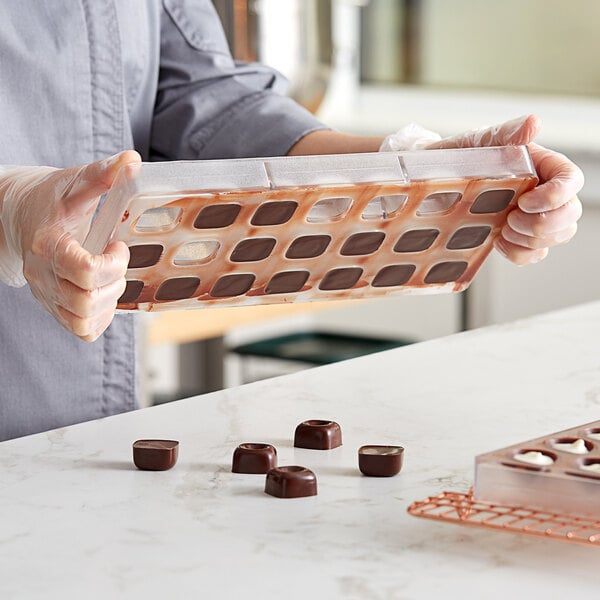
Making chocolate candies with molds is a popular and efficient way to create uniform and professional-looking treats. Here are some tips and steps to guide you through the process:
- Select the Right Mold: Choose high-quality silicone or polycarbonate molds specifically designed for chocolate making. Ensure that the mold is clean and completely dry before use.
- Temper the Chocolate: Properly tempering your chocolate is crucial for achieving a glossy finish and a smooth texture. Follow the tempering process by melting the chocolate, cooling it slightly, and then gently reheating it to the correct temperature.
- Fill the Mold: Pour the tempered chocolate into the mold, ensuring that each cavity is filled to the top. Tap the mold gently on the countertop to remove any air bubbles and to level the chocolate.
- Empty Excess Chocolate: Turn the mold upside down over a clean sheet of parchment paper or a baking tray to allow excess chocolate to drip out. Use an offset spatula to scrape off any excess chocolate from the top of the mold.
- Set the Chocolate: Place the mold in the refrigerator for the chocolate to set. The time required for the chocolate to harden will depend on the size and thickness of the candies.
- Releasing the Candies: Once the chocolate has completely set, gently flex the mold to release the candies. If the chocolates do not release easily, they may need more time to set in the refrigerator.
- Storing the Candies: Store the chocolate candies in a cool, dry place away from direct sunlight and strong odors. Properly stored chocolates can last for several weeks.
By following these steps and tips, you can create beautifully molded chocolate candies that are sure to impress your customers or guests. Enjoy the process of chocolate making and experiment with different flavors and designs to add a personal touch to your creations.
How to Color Chocolate
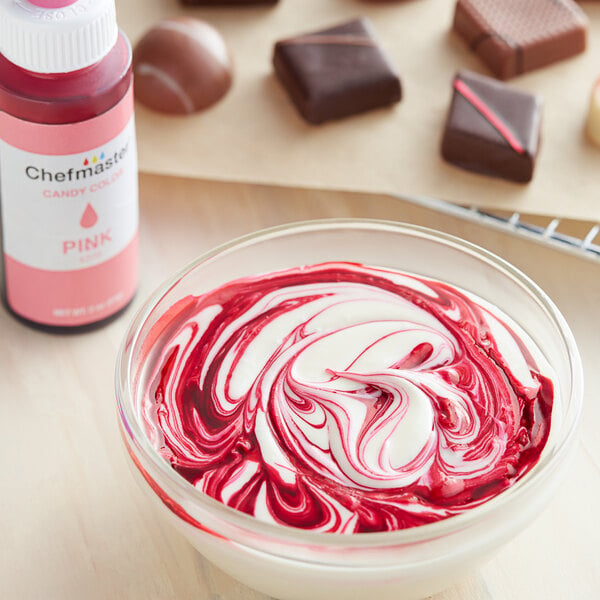
Adding a pop of color to your chocolate candies can take your creations to the next level, especially during holidays like Easter or Valentine's Day. Coloring chocolate is a fun and creative way to customize your treats for any occasion. Here are some tips to help you master the art of coloring chocolate:
- Use Oil-Based Food Coloring When coloring chocolate, it's important to use oil-based food coloring instead of water-based coloring. Water-based coloring can cause the chocolate to seize and become unusable. Oil-based coloring blends seamlessly with the chocolate, giving you vibrant and consistent results.
- Start with White Chocolate: If you're looking to achieve a specific color, start with white chocolate as your base. White chocolate is easier to color and allows you to achieve a wide range of hues. Simply melt the white chocolate, add the oil-based food coloring, and mix until you reach your desired shade.
- Gradually Add Color: When coloring chocolate, it's best to add the food coloring a little at a time. This allows you to control the intensity of the color and avoid adding too much, which can affect the texture and taste of the chocolate. Remember, you can always add more color, but you can't take it away.
- Test the Color: Before proceeding with your chocolate candy making, it's a good idea to test the color on a small batch of chocolate. This way, you can adjust the shade if needed before coloring the entire batch.
By following these simple tips, you can easily color chocolate like a pro and create stunning and delicious candies that are sure to impress. Let your creativity shine and have fun experimenting with different colors and designs to elevate your chocolate creations.
How to Package and Store Chocolate Candies
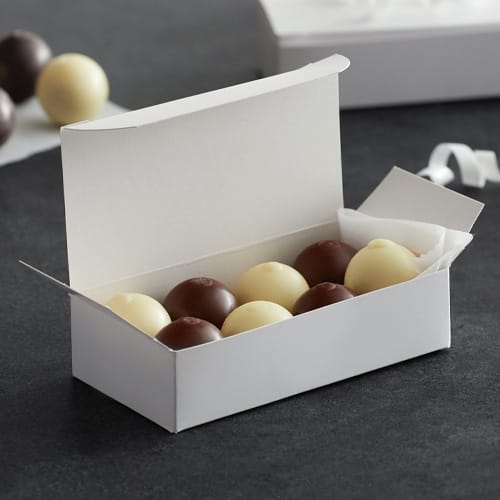
When it comes to making delicious chocolate candies, packaging and storing them properly is essential to maintain their quality and flavor. Whether you're a professional confectioner or just getting started with candy making, here are some tips to help you package and store your chocolate creations like a pro:
- Choose the Right Packaging: Opt for packaging that not only looks appealing but also protects your chocolate candies from moisture, light, and air. Consider using food-safe cellophane bags, clear plastic boxes, or decorative tins to showcase your treats.
- Wrap Individually: To prevent your chocolate candies from sticking together or absorbing unwanted flavors, wrap each piece individually in wax paper or parchment paper before placing them in the packaging. This also makes it easier for your customers or guests to grab a single piece without them all sticking together.
- Add a Personal Touch: Consider adding a personalized touch to your packaging by including custom labels, ribbons, or stickers with your logo or a special message. This not only enhances the presentation of your chocolate candies but also creates a memorable experience for the recipient.
- Store in a Cool, Dry Place: Chocolate is sensitive to temperature and humidity, so it's important to store your candies in a cool, dry place away from direct sunlight and heat sources. Ideally, keep them in a pantry or cupboard with a consistent temperature between 60-70°F.
- Avoid Refrigeration: While it may be tempting to refrigerate your chocolate candies to prolong their shelf life, this can actually cause them to develop a whitish film known as "bloom." Instead, store them at room temperature for the best taste and texture.
- Check Expiration Dates: If you're making chocolate candies for commercial purposes, be sure to label your packaging with an expiration date to ensure your customers enjoy them at their freshest. Chocolate doesn't go bad necessarily, but it can lose it lose its flavor or become discolored.
By following these simple packaging and storage tips, you can ensure that your chocolate candies remain fresh, flavorful, and visually appealing for your customers or guests to enjoy. Learn more about the best practices for shipping your confections in our chocolate shipping guide.
Chocolate Candy Making FAQ
If you're still looking for answers, check out the common questions about chocolate candy making below:
Why Is My Melted Chocolate Grainy?
Grainy chocolate can be a common issue that arises when the chocolate is overheated or comes into contact with even a small amount of moisture. When chocolate is heated too quickly or at too high of a temperature, the cocoa butter can separate from the cocoa solids, resulting in a grainy texture. To prevent this, it's important to melt your chocolate slowly and gently, stirring frequently to ensure even heating.
Is Melting Chocolate the Same as Tempering?
While both processes involve heating chocolate, melting and tempering serve different purposes. Melting chocolate simply involves heating it until it reaches a smooth and liquid consistency, making it easier to work with for dipping or coating. On the other hand, tempering chocolate is a more precise technique that involves heating, cooling, and re-heating chocolate to specific temperatures to achieve a glossy finish, snap, and stable crystalline structure.
What Are Candy Melts?
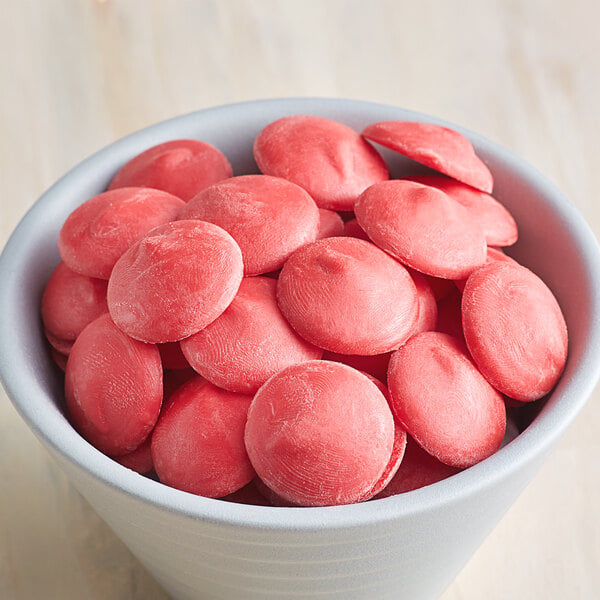
Candy melts, sometimes called coating wafers, are convenient and easy to use for melting and dipping. They're ideal for coating cake pops, pretzels, or molded candies. One key advantage of candy melts is that they don't need to be tempered. Candy melts are easy to work with, but they don't have the rich taste of chocolate because they don't contain cocoa butter.
Are Candy Melts the Same as Melting Wafers?
No, candy melts are not the same product as melting wafers. Chocolate melting wafers are made from high-quality chocolate and have a rich, indulgent flavor. These wafers are perfect for tempering, which is a process that involves heating and cooling chocolate to give it a smooth and glossy finish. If you need a quick, colorful coating, reach for candy melts. Choose chocolate wafers or other high-quality chocolates when you want to create truffles, bonbons, or other premium chocolate treats.
Back to Top
Now that you're familiar with the supplies, techniques, and types of chocolate used in candy making, you're ready to start your confectionary journey. Whether you're training to become a chocolatier or opening your own candy store, chocolate candy making can be a lucrative venture.