
How to Melt Chocolate
Last updated on 7/19/2023Whether you own a candy store, bakery, restaurant, or catering business, knowing how to properly melt chocolate is essential for creating delectable desserts, coating fruits, or decorating pastries. There are three common methods for melting chocolate: on the stove, with a chocolate melter, and in the microwave. We’ll walk you through each method to help you achieve professional and eye-catching results.
Shop All Melting ChocolateBest Chocolate for Melting
Choosing the right type of chocolate is crucial for achieving the perfect consistency and flavor when melting chocolate. The best chocolate for melting is a couverture type which features a high percentage of cocoa butter. Couverture chocolate contains at least 32 percent cocoa butter, higher than that of baking or eating chocolate, which allows the chocolate to melt smoothly and evenly. It is ideal when working with strawberries, cookies, cakes, or creating molded candies due to its smooth texture and rich taste. Top-quality semisweet and bittersweet chocolates are also excellent choices for melting, as they often meet the high percentage of cocoa butter required and have a balanced sweetness.
For convenience and ease of melting, chocolate chips are the ideal size. They are designed to melt quickly and evenly, making them a popular choice for bakers and chocolatiers. If you prefer using chocolate bars, it is recommended to chop them into smaller pieces before melting. This ensures that the chocolate melts at a consistent rate and prevents any clumps or chunks from forming.
Best Way to Melt Chocolate
There are a few methods you can use when melting chocolate. To achieve the most consistent and desirable result, the best practice is to use a double boiler or chocolate melter. You can use a microwave if you’re short on time, but this method requires more care to keep the chocolate from burning. Chocolate is very prone to scorching and seizing, so it is important to warm it gently regardless of the method you choose. We’ll walk you through the chocolate melting methods so you can pick which one works best for you.
Chocolate Melting Video
Follow these simple steps to learn how to melt chocolate correctly:
How to Melt Chocolate on the Stove
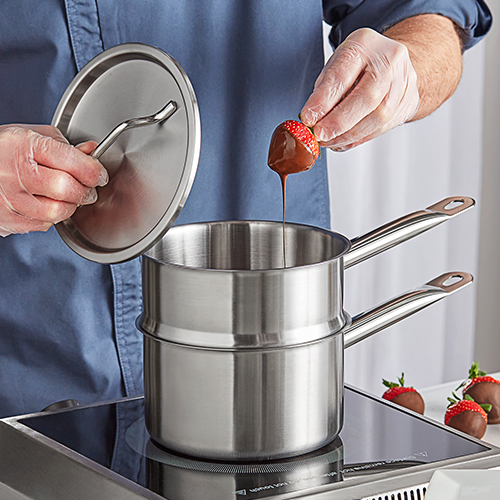
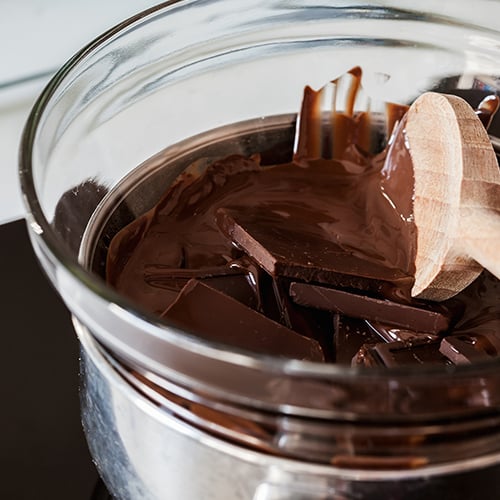
Melting chocolate on the stove is a popular method used by professional chefs and commercial bakers to achieve smooth and perfectly melted chocolate. This method requires a saucepan and bowl or double boiler, a specialized pan with two compartments, which provides gentle heat through steam. Follow these steps to learn how to melt chocolate in a double boiler:
- Add water: Fill the bottom compartment of the double boiler or a saucepan with water, making sure it is about 1/3 full, and place it over low heat.
- Place bowl over pan: Set the top compartment of a double boiler over the water-filled pan. If you don't have a double boiler, you can create one by placing a heat-proof bowl on top of a saucepan filled with water, making sure the water does not touch the bottom of the bowl.
- Add chocolate: Place chopped chocolate or chocolate chips in the top compartment or heat-proof bowl and set it over the simmering water. The steam generated from the water gently heats the chocolate, ensuring a gradual and controlled melting process.
- Stir occasionally: With a heat-proof spatula, stir the chocolate gently as it melts. Avoid using a wooden spoon, as any trapped moisture can cause the chocolate to seize (become grainy and thick).
- Monitor the temperature: To ensure you don't overheat the chocolate, use a candy thermometer to monitor the temperature. The ideal temperature for melting chocolate is between 104 and 113 degrees Fahrenheit depending on the type of chocolate. Remove the chocolate from the heat source when it reaches the desired temperature.
- Stir and cool: Once the chocolate has mostly melted, remove it from the heat and continue stirring until it is smooth and glossy. This process helps to melt the remaining chocolate and cool it gradually to prevent it from overheating and scorching.
How to Melt Chocolate With a Chocolate Melter
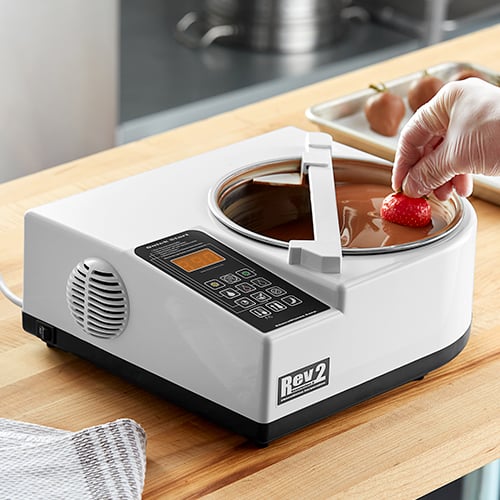
For large-scale chocolate melting, commercial kitchens often rely on chocolate melters. These specialized appliances are designed to melt chocolate quickly and efficiently. Chocolate melters typically feature a stainless steel basin or a removable insert that holds the chocolate. The basin is heated through electric or induction technology, maintaining a consistent temperature range ideal for melting, holding, and tempering chocolate. Some melters also come with adjustable thermostats and timers for precise control over the melting process. Refer to the user manual of your chocolate melter to achieve the best results. For most units, you can use the following steps:
- Prepare the chocolate melter: Make sure your chocolate melter is clean and dry. Any moisture or residue can affect the texture and quality of the melted chocolate.
- Set temperature controls: Plug in the chocolate melter and set it to the desired temperature. Allow the melter to preheat for a few minutes.
- Prep the chocolate: While the melter is preheating, prepare your chocolate for melting. Use a sharp knife to chop the chocolate into small, uniform pieces, or use chocolate chips.
- Melt the chocolate: Add the chopped chocolate to the melter's container or basin. Make sure not to overfill it, as chocolate expands when melted. If a lid is provided, close the lid to retain the heat and prevent any moisture from entering.
- Stir the chocolate: After a few minutes, open the melter and gently stir the chocolate using a heat-resistant spatula or spoon. Scrape the sides and bottom of the melter to prevent any chocolate from burning or sticking.
- Monitor the temperature: As the chocolate melts, monitor its temperature using a candy thermometer or a digital thermometer. Ideally, the temperature should be around 110 and 120 degrees Fahrenheit for dark chocolate, and between 104 and 115 degrees Fahrenheit for milk and white chocolate.
- Set to “keep warm”: Once the chocolate has melted to a smooth and fluid consistency, you can reduce the heat or switch the melter to its "keep warm" setting. This will maintain the chocolate's temperature and prevent it from solidifying.
How to Melt Chocolate in the Microwave
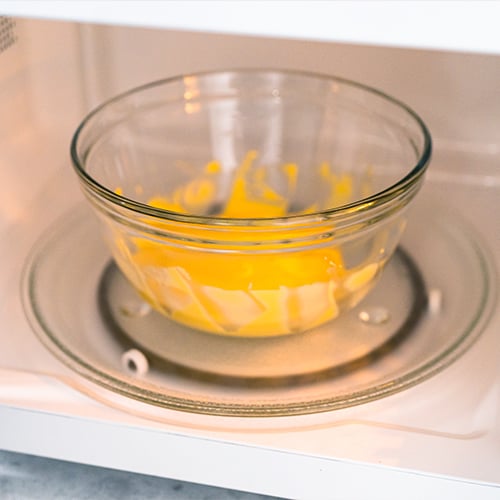
If you’re short on time, melting chocolate in the microwave can be a convenient option. This method requires careful attention as chocolate can easily overheat and become scorched or grainy. To prevent overheating, it's essential to stir the chocolate thoroughly after each heating interval until it is smooth and fully melted. We’ll guide you through the steps on how to melt chocolate in the microwave:
- Prep the chocolate: To ensure even melting, break the chocolate into smaller pieces. This will help the chocolate melt more quickly and evenly in the microwave.
- Microwave in short bursts: Place the chocolate pieces in a microwave-safe bowl and microwave for 30 seconds. After each interval, remove the bowl from the microwave and stir the chocolate with a dry spoon or spatula.
- Reduce the intervals: Repeat until the chocolate is almost completely melted. As the chocolate melts, reduce the microwave time to 15-second intervals to avoid overheating.
- Stir until smooth: Once the chocolate is almost melted, continue stirring until it becomes smooth and glossy. The residual heat will help melt any remaining chocolate pieces.
- Use immediately: Once the chocolate is melted, it is ready to be used in your desired commercial application. It will begin to harden as it cools, so you’ll want to use it immediately.
Melting Chocolate Tips
When it comes to melting chocolate for commercial applications, there are a few essential tips and techniques to keep in mind. By following these guidelines, you can ensure that your chocolate melts smoothly and is ready for use in your culinary creations.
- Avoid Contact With Water: One of the most important rules when melting chocolate is to avoid any contact with water. Even a small amount of water can cause the chocolate to seize, resulting in a grainy and lumpy texture. Make sure that your utensils, bowls, and work surface are completely dry before you begin melting the chocolate.
- Use Small Chunks or Chips: To facilitate even melting, it is recommended to chop your chocolate into small chunks or use chocolate chips. Smaller pieces of chocolate will melt more quickly and evenly, reducing the risk of overheating or burning. This is particularly important when using larger quantities of chocolate.
- Use Heat-Safe Utensils: When melting chocolate, it is crucial to use heat-safe utensils that can withstand high temperatures without melting or warping. Opt for tools such as heat-resistant spatulas or silicone spatulas that can handle the heat of the melting process. Avoid using wooden spoons, as they can retain moisture and affect the texture of the chocolate.
- Melt on Low Heat: To prevent scorching or burning the chocolate, it is best to use low heat during the melting process. Whether you choose to use a double boiler or a microwave, gentle heat ensures that the chocolate melts slowly and evenly. Avoid using high heat, as it can cause the chocolate to become grainy or develop a burnt taste.
Chocolate Melting vs Tempering
Two common techniques are often confused regarding preparing chocolate: melting and tempering. While both methods involve heating chocolate, they serve different purposes and yield different results. The difference between melting and tempering chocolate is that melting chocolate is the process of heating it until it reaches a liquid state while tempering chocolate involves heating and cooling chocolate to specific temperatures to stabilize its fat crystals.
Tempering chocolate is a more precise and controlled process. It helps give the chocolate a glossy appearance, a smooth texture, and a snap when broken. Tempering is commonly used when making chocolates, truffles, and other confections, as well as for coating fruits, nuts, or cookies. If a glossy sheen and snap are not required for your recipe, you can skip the tempering step when melting chocolate.
How to Temper Chocolate
 Tempering chocolate can help you achieve a smooth and glossy finish for your chocolate creations. We’ll guide you through the steps of tempering chocolate through the seeding method:
- Melt the chocolate: Start by chopping and melting 2/3 of your chocolate using a double boiler, chocolate melting machine, or microwave.
- Check the Temperature: Once the chocolate is melted, it's time to check its temperature. Different types of chocolate have different tempering ranges, so it's important to know the specific temperature range for the chocolate you're using. Aim for temperatures between 110 and 120 degrees Fahrenheit for dark chocolate, and between 104 and 115 degrees Fahrenheit for milk and white chocolate.
- Seed the Chocolate: Remove the chocolate from the heat and add the remaining 1/3 of the unmelted chocolate into the melted chocolate. This introduces stable crystals into the melted chocolate and encourages a smooth and glossy finish.
- Stir and Cool: Stir continuously until the temperature drops to the desired range, usually between 86 and 90 degrees Fahrenheit for dark chocolate, and 87 degrees Fahrenheit for milk and white chocolate.
- Tabling Method (Alternative): Instead of seeding the chocolate, some chocolatiers will use the tabling method and pour the melted chocolate onto a cold marble slab. The melted chocolate is scraped and turned until it cools to 78 degrees Fahrenheit. It is then returned to the bowl to be heated to 86 and 90 degrees Fahrenheit for dark chocolate, or 87 degrees Fahrenheit for milk and white chocolate.
- Test the Tempered Chocolate: To ensure that your chocolate is properly tempered, perform a simple test. Dip a spoon or a knife into the chocolate and set it aside for a few minutes. If the chocolate sets with a smooth and shiny appearance, it is properly tempered. If it appears dull or has streaks, it may need further tempering.
Chocolate Melting FAQs
We address some of the most common questions about melting chocolate below:
How to Melt Chocolate Chips
Melting chocolate chips is an essential skill for bakers, pastry chefs, and anyone looking to add a touch of decadence to their desserts. Chocolate chips are the perfect size for melting chocolate quickly and evenly. Use these methods to melt chocolate chips:
- Double Boiler Method: Use a double boiler or a heat-proof bowl and saucepan to simmer water. Add the desired amount of chocolate chips to the top bowl. Stir the chocolate continuously with a rubber spatula as it melts. The steam from the simmering water will gently heat the bowl, melting the chocolate without scorching it. Once the chocolate chips have completely melted and become smooth, you can remove the bowl from the heat source and use the melted chocolate as desired.
- Chocolate Melter: To melt chocolate chips using a chocolate melter, simply place the desired amount of chocolate chips into the machine's melting pot. Set the temperature according to the manufacturer's instructions and allow the machine to do its work. The chocolate melter will maintain a consistent temperature, preventing the chocolate from overheating or burning.
- Microwave Method: Place the desired amount of chocolate chips in a microwave-safe bowl. Microwave the chocolate in short bursts of 15 to 20 seconds on medium power, stirring the chocolate after each interval. This slow and steady approach helps to prevent overheating and ensures that the chocolate melts evenly.
Melting Chocolate Brands
Stock on reliable chocolate brands to achieve professional-looking results for your menu. Here are some of the best melting chocolate brands for your business:
- Cacao Barry Melting Chocolate
- Callebaut Melting Chocolate
- Ghirardelli Melting Chocolates
- Guittard Melting Chocolate
- Republica del Cacao Melting Chocolate
- Valrhona Melting Chocolate
- Wilton Chocolate Pro Melting Wafers
Understanding different methods for melting chocolate is crucial for achieving the desired consistency and quality in your commercial kitchen. Whether you choose to melt chocolate on the stove, with a chocolate melter, or in the microwave, each method offers its own advantages in terms of control, efficiency, and convenience. By selecting the appropriate method based on your specific needs and available equipment, you can ensure that your melted chocolate is perfectly smooth and ready for all your culinary creations like these ruby chocolate truffles.