Hobart Dishwasher Troubleshooting Tips
- Cleaning a Hobart Undercounter Dishwasher
- Cleaning a Hobart Door Type Dishwasher
- Cleaning a Hobart Conveyor Dishwasher
- How to Delime a Hobart Dishwasher
- How Often to Delime a Dishwasher
- How to Get the Most Out of a Hobart Dishwasher
- Troubleshooting Tips for Hobart Dishwashers
- Hobart Dishwasher Error Codes

How to Clean a Hobart Dishwasher
Reglardelss of whether you own or lease your dishwasher, cleaning any Hobart dishwasher is important to keep it in good condition. Daily cleaning is recommended for most commercial dish machines. These general cleaning instructions will get you started, though some models may have additional features that require extra steps.
When cleaning any dishwasher, you will need to remove and empty all scrap baskets, ensure wash and rinse arms are free from obstructions and rotate freely, and wipe down interior and exterior surfaces.
Remember, never use steel wool, scouring pads, or abrasive cleaners when cleaning your dishwasher. These will damage the machine.
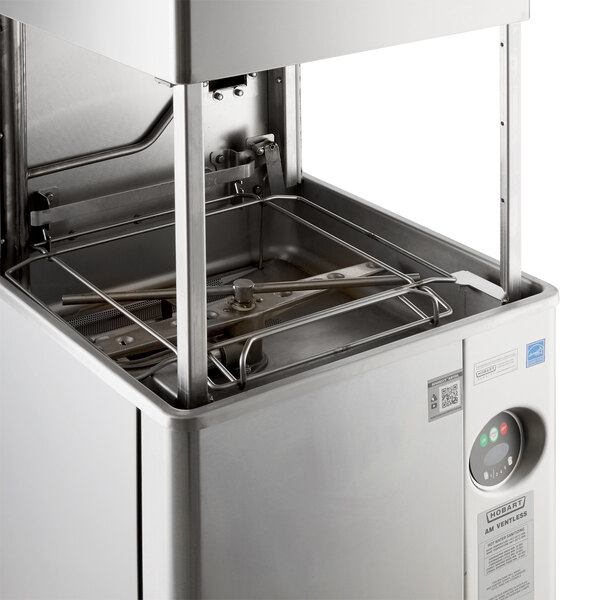
Cleaning a Hobart Undercounter Dishwasher
Drain the machine.
Remove and check the wash and rinse arms. Some models have squeeze buttons while others have hand screws for easy removal.
Remove all the strainers and clean them out to remove any food residues.
Clean the exterior and interior of the dishwasher with a damp cloth.
Reposition all components so that your machine is ready to use the next day.
Leave the door slightly open to allow it to air out during off hours.
Cleaning a Hobart Door Type Dishwasher
Spray down the inside of the dishwasher and scrub any hard-to-reach spots with a damp cloth.
Remove the interior components, including the rack track, strainer, and scrap baskets so you can clean them out thoroughly.
Check the wash and rinse arms for blockages and make sure they rotate freely.
Replace the interior components.
Drain the unit completely.
Clean the inside of the unit with a damp cloth.
Clean the exterior of the unit with a damp cloth.
Cleaning a Hobart Conveyor Dishwasher
Before beginning the process of cleaning your conveyor dishwasher, be sure to disconnect the power and follow lockout procedures for safety.
Turn the machine off.
Drain the unit completely.
Remove the curtains and clean them with a mild solution.
Remove the wash / rinse arms and ensure that they are free of any obstructions.
Remove the strainers and scrap baskets and clean them out.
Clean the standpipe and the screen around the pump intake.
Spray down the machine's interior.
Wipe down the exterior with a damp cloth.
Reassemble.
Leave the doors open to allow air flow through the machine.
You will need to delime your Hobart dishwasher frequently, as soon as you see signs of lime scale buildup. Deliming helps prolong the life of the machine, prevents malfunctions, and ensures proper performance.
How Often Should You Delime a Dish Machine?
You will need to delime your unit when you begin to see limescale buildup inside. The frequency of deliming depends upon the hardness of your water, as well as how much you use your dishwasher and some other factors. Some machines have automatic or semi-automatic deliming notifications that you can program with the results of a water hardness test to help you remember to delime at appropriate intervals.
Just remember that excessive deliming can cause as much damage to your machine as not deliming at all. The chemicals used in deliming are acidic and can harm the machine if they're used too often or not in accordance with proper procedures.
You will need to delime your Hobart dishwasher frequently, as soon as you see signs of lime scale buildup. Deliming helps prolong the life of the machine, prevents malfunctions, and ensures proper performance.
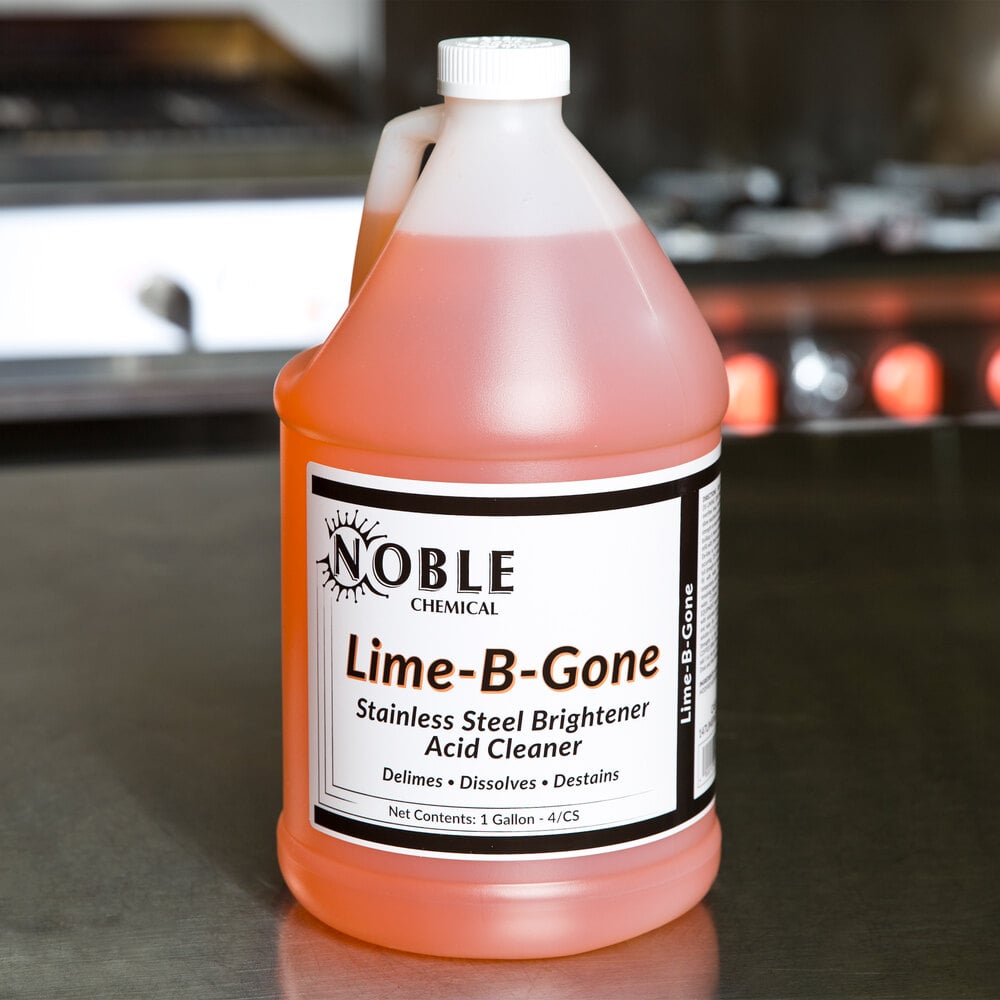
Dishwasher Deliming Procedures
There are three different types of deliming procedures. Be sure to check your unit's manual and operating instructions to determine which type you need to follow. Make sure to use the proper commercial deliming chemicals too!
Manual Deliming
The operator visually determines the need for deliming, then fills the tank to the appropriate level, adds chemicals, circulates the solution, drains the tank, and fills it with fresh water again for a rinse. After the rinse water drains, the unit is ready for normal use.
Semi-Automatic Deliming
The machine notifies the operator when deliming is required, then the operator adds chemicals and starts the cycle. The unit will run the cycle, drain, rinse, and be ready for service.
Automatic Deliming
The machine notifies the operator that deliming is required. All the operator needs to do is accept the delime cycle and the machine will automatically pump in chemicals. The machine will run the cycle, rinse, and put itself back in service when complete.
Back to Top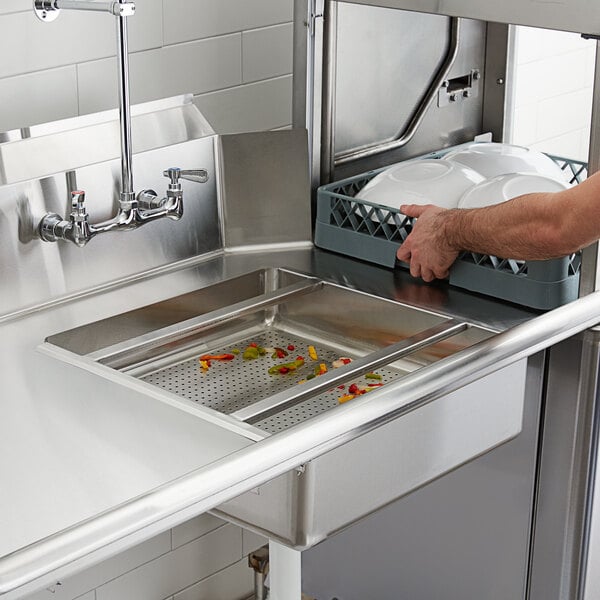
Follow a few simple tips to keep your machine in good condition and make sure your dishware always comes out clean.
Always Pre-Scrap Dishes
Removing the larger particles of food helps to protect the dishwasher and drains from clogs, and ensures no food remains on dishes after the wash cycle.
Load Racks Properly
Make sure to fill each rack so that the wash water can reach all sides of each dish, and follow all the instructions that came with your unit about how to properly load racks into the dishwasher. Check out our article about how to properly load a dishwasher for more guidance.
Only Use Commercial Chemicals
Make sure that you are using the proper chemicals for your type of machine - whether high or low temperature sanitizing - and only use commercial dishwashing detergents and sanitizers.
Delime Frequently
Limescale buildup can clog wash and rinse arms, and can cause other problems with your dishwasher. Make sure to follow the instructions for deliming your dishwasher.
While some issues require a call to the service agency, many common problems have simple fixes. If you are having a problem with your dishwasher, check out these troubleshooting tips for some things you can look in to before making that expensive phone call. Many of these tips apply to any dishwasher style, though some will be specific to door type or conveyor machines.
For common issues like spotting on glassware, slow filling, or chemicals dispensing poorly, you can investigate things yourself to see if it's a simple fix before you call in an expert service technician.
Machine Not Operating
Machine is turned off - turn it on.
Blown fuse or circuit breaker at the power supply - reset or replace it.
Power cord is unplugged or disconnected - reconnect it.
Door is jammed or not closed - inspect door seals and remove obstructions.
Conveyor has jammed - remove obstructions.
Timer has timed out - press START or insert a rack.
Energy Saver Mode is engaged - press STOP to resume operation.
Dishes Not Coming Clean
Strainers are clogged - clean your machine.
Water is dirty - drain and refill the tanks.
Wash or rinse arms are clogged - remove arms and clear obstructions.
Wash or rinse arms will not turn - check that they rotate freely and remove obstructions.
Chemical pump or dispensers are clogged - check lines to remove obstructions.
Dishes are too soiled before washing - remember to thoroughly pre-scrap ware.
Racks were loaded improperly - follow proper procedures for loading racks.
Low/no water - check water supply.
Water temperature too low - confirm that wash temperatures are reaching 120°F for low temperature machines or 150°F for high temperature machines.
Silverware, Glasses, and Dishes are Spotted
Improperly loaded racks - follow proper loading procedures.
Incorrect final rinse temperatures - ensure rinse water reaches 120°F for low temperature machines or 180°F for high temperature machines.
Low water pressure - check pump for obstructions.
Clogged wash / rinse arm nozzles - remove obstructions.
Improper water hardness - test water hardness and take corrective measures.
Incorrect chemical types for water hardness - contact chemical supplier.
Problem with rinse aid dispenser - check for obstructions or contact supplier.
Low water level - check water supply.
Unexpected Results on Dishes
Etching - may be caused by combination of high temperatures, soft water, soft glass, or high alkaline washing solutions.
Tarnishing - avoid washing silver or pewter in chemical sanitizing machines
Pitting - Stainless steel may pit with prolonged exposure to salt, fruit juice, or vinegar. Wash immediately.
Black or gray marks - avoid contact with aluminum.
Brown stains - potentially high iron content in water supply.
Chipping - improper loading of ware or ware is too delicate for machine washing. Load racks properly or hand wash.
Fading of china patterns - high temperatures and strong detergent, confirm ware is dishwasher safe.
Wooden ware is damaged - avoid washing wood in a dish machine.
Rust on cast iron - seasoning has been lost, avoid washing in a dish machine.
Plastic ware is misshapen - high temperatures, check ware's care instructions.
Final Rinse Temperature Too Low with Built-In Booster
Tank float not rising - prevents heat from turning on.
Temperature protector has been tripped - contact authorized service agency.
Circuit breaker has tripped - reset.
Incoming water temperature is too low - test and correct.
Temperature control adjustment required / booster heater failure - contact authorized service agency.
Inadequate Rinsing
Dirty strainer - remove and clean.
Clogged rinse nozzles - remove obstructions.
Continuous Rinsing
Rinse actuator not moving freely - check for free movement.
Foreign objects in rinse mechanisms - remove obstructions.
Rinse valve has failed or jammed open - clear obstructions or call for service.
Standpipe(s) not properly seated - check seals.
Wash Tank Not Heating
Low water supply - check water level.
Circuit breaker has tripped - reset.
Heat float is blocked - check for debris and freedom of movement.
Overtemp protector has tripped - call for service.
Standpipe(s) are not properly seated - check seals.
Not Filling / Filling Slowly
Door is open - close door.
Water supply valve is closed - open valve.
Fill floats are not moving freely - remove obstructions and check for free movement.
Dirty strainer - remove and clean.
Problem with solenoid - call for service.
Low incoming water pressure - test and correct.
Drain is open - close drain.
Standpipe(s) not properly seated - check seals.
Overfilling, Leaking from Door
Machine is not level - follow leveling instructions.
Solenoid valve is leaking - power unit off; if water continues to flow, call for service.
Vacuum Breaker Leaking
Foreign material or corrosion is preventing proper operation - clean valve and reassemble.
Chemicals Not Feeding
Low chemicals - check levels.
Air leaks in feeder hoses - check connections and fittings.
Tubes are kinked - check for smooth bends.
Food Soils Remain in Dishwasher
Machine not properly cleaned - clean dishwasher.
Solenoid Valve is Leaking
Foreign material preventing proper operation - call for service.
Rinse Arms Occasionally Dripping
This is normal for high temperature models. Water expands due to being heated in the booster tank, which causes some occasional dripping from the rinse arms.
Excessive Steaming
Vent stack damper not properly adjusted - check the adjustment.
Machine Not Draining
Drain is restricted - check for kinks, clogs, or improper drain rate.
Unknown issue - power off the machine, then wait several seconds and turn back on. Repeat if needed. If problem persists, call for service.
Machine Appears to Have Rust Inside
Aggressive cleaning - do not use steel wool to clean machine.
High iron content in water supply - test and correct water supply.
On occasion you may see an error code appear on your dishwasher's display. Typically the codes will be easy to understand and resolve, but if you are ever unsure here is a list of Hobart dishwasher codes that you can reference, along with what they mean and what you can do about them.
"Door(s) Open"
A door is open and is preventing operation. Check all inspection doors and main doors.
"Unload Dishes"
There is a rack resting on the table limit switch at the clean dish side. Remove the racks of clean dishes to resume operation.
"Clear Conveyor Jam"
Something is blocking the operation of the conveyor in your conveyor type machine. Clear any conveyor jams, remove the rack, press START, and rerun rack.
"Probe Err - [Tank Name]"
One of the sensors in the tank is not reading. Ensure that the float assembly is undamaged and there is sufficient water in the tank to cover the float.
"Fnl Rinse Temp Low"
Your unit's final rinse temperature didn't reach the required temperature, so your dishes may not be properly sanitized. Make sure to properly sanitize dishes before using them again. Here are some things to check:
Is booster tank circuit breaker tripped?
Is overtemp circuit tripped?
Final rinse booster tank reaches minimum temperature?
"Probe Error - FnlRns"
The sensors in your unit detected an issue with the water supply during the final rinse. Ensure that the supply valve to the booster heater is open.
"Check Water Level"
Your machine is sensing low water levels. Here are some things to check:
Drains are closed and free of debris?
Water supply valve is open?
Open inspection doors and check water level of tanks?
If tanks fail to fill within 20 minutes of closing inspection doors, call for service.
"Reset Required"
Your dish machine requires a reset. Place it in standby mode, then wait 60 seconds before turning it back on.
"Delime Recommended"
Based on the water hardness you programmed into your unit, it is time to delime your dish machine. Inspect the machine for signs of limescale buildup and perform delime procedures if required.
"Change Water Soon"
Based on the number of cycles that have run, your machine's water is becoming dirty. At your earliest convenience, drain and refill the tanks for best results.
"Water Change Req'd"
Your dish machine believes the water is dirty. Drain all tanks and allow the machine to refill.
"Energy Save Active, Press STOP to Exit"
Your dishwasher has gone into energy saving mode while it was inactive. Press STOP to resume normal operations and monitor wash / rinse temperatures closely at first as the water may have cooled while the unit was not in use.
Back to TopRelated Resources
Dishwasher Sizes
Whether you want to upgrade your kitchen appliances or are searching for a dishwasher for your new restaurant, choosing the right size is crucial. Finding a dishwasher that fits seamlessly into your kitchen's layout maximizes efficiency, ensures optimal cleaning of dishes and utensils, and prevents a backlog of dirty dishes. Whatever style of dishwasher you choose, knowing the dimensions you need will help eliminate obstacles in the kitchen. This guide outlines dishwasher dimensions, how to measure a dishwasher, and various dishwasher capacity options to help you make an informed decision about the ideal dishwasher for your establishment. Shop All Commercial Dishwashers
Types of Commercial Dishwashers
Ensuring the cleanliness of your dishes and glasses is crucial for the sustainability of your business. The way you wash your dishes and glassware can mean the difference between passing or failing your health inspection and is pivotal in shaping your establishment's reputation. Selecting the best commercial dishwasher is vital to upholding compliance with federal, state, and local regulations and supporting the continued growth of your business. Shop All Commercial Dishwashers
Types of Glass Racks
Glass racks keep glasses safe during the cleaning process , storage, and transport. They help ensure efficient movement of glassware from one location to the next, and they come in sizes and styles to fit every need. This guide will go over how to choose a glass rack based on the type and size so you can make a more informed purchase for your business. Shop All Commercial Glass Racks
- Topics 1346
- Industrial 55
- Troubleshooting Guides 21
- Restaurant Management 128
- Bar Management 55
- Catering Tips 35
- Bakery Management 42
- Food Trucks & Concessions 49
- Advertising & Marketing 37
- Eco-Friendly Tips 11
- Facility Layout & Design 41
- Coffee Shop Tips 28
- Installation & Maintenance 51
- Janitorial & Pest Control 30
- Safety & Sanitation 88
- Startup Tips 104
- Menu Design 10
- Kitchen & Cooking Tips 81
- Hospitality Management 23
- Pizza & Sandwich Shop Tips 36
- Smallwares 37
- Food Prep 88
- Tabletop Items 17
- Disposables 22
- Calculators & Tools 6
- Consumables 52
- Warewashing & Laundry 18
- Cooking Equipment 90
- Food Storage & Refrigeration 51
- Beverage Equipment 34
- Office Supplies 6
- Resource Type
- In-Depth Articles272
- Buying Guides296
- How-Tos93
- Product Reviews77
Join Our Mailing List
Receive coupon codes and more right to your inbox.